
Top Ways to Transfer Files with Remote Desktop on Windows 7
Here in this post, we list the ways to transfer files with Remote Desktop on Windows 7. If you happen to need it, you could get some inspiration from this guide.
By Ellie / Updated on December 13, 2024
Does RDP allow file transfer on Windows 7?
RDP (Remote Desktop), a Windows built-in feature, allows people to control a PC from another PC remotely, which makes it easier in aspects of work and study. And the features like file transfer provides super help to the users. At the same time, some users are confused about that whether they can transfer files with Remote Desktop on Windows 7.

To be honest, it’s not strange to have this kind of confusion because some Windows version such as Windows 10 Home edition doesn’t support RDP, let alone transfer files with it. Luckily, except for Windows 7 Home Premium, almost all versions of Windows 7 support RDP and we can make use of it to transfer files.
How to transfer files with Remote Desktop on Windows 7
Here in this part, we’ll talk about how to transfer files with Remote Desktop on Windows 7. Follow me to operate.
Before the operation: It’s necessary to enable Remote Desktop of the host PC. If the host PC is equipped with Windows 7, press Win + R and then enter into “sysdm.cpl”. Click on “OK” and then go to the Remote tab. Tick “Allow remote connection to this computer”. Click “Apply” > “OK”.
After the setup of Remote Desktop on the host PC, make sure both 2 PCs are on the same LAN, otherwise, you need to perform port forwarding to get file transfer with Remote Desktop. Apart from that, figure out the IP address and credentials of the remote PC so that the process will be smoother.
Step 1. On the client PC, search "remote desktop connection" and then open it.
Step 2. Click on "Options" and then go to the "Local Resources" tab. Tick "Clipboard" and then select "More". Tick "Drive" and then click on "OK".
Step 3. Go to the "General" tab, and enter the IP address and the computer name of the remote computer. Click on "Connect". After that, enter the password to establish a remote connection. (For all the popped Windows, click on OK to go ahead.)
Step 4. Now the remote connection is established successfully. To transfer files, there are 2 ways accessible to achieve the goal.
Way 1. Copy and paste directly
Let’s suppose the files you want to transfer to the remote desktop are located on the local desktop. Minimize the remote connection and then click the files. Press "Ctrl + C" to copy the files.
Go to the remote connection and then paste the files on the desktop of the remote PC by pressing "Ctrl + V".
If the files of Windows 7 are not on the desktop, go to the path of the files and then do the steps shown above.
Way 2. Use Move to function
On the remote PC, go to "Computer" or "This PC" and then you can see the Redirected drives and folders. Find the files and select them.
Click on the Home tab and then choose "Move to". Then click "Choose Location" and then the Windows 7 Remote Desktop file transfer is accomplished successfully.
AnyViewer: Transfer files without any limitations
You should now be able to transfer files with Remote Desktop on Windows 7. However, we must admit that the remote connection of RDP in Windows is too slow, and the host PC will be locked during the remote session, which has a negative impact on work or study efficiency. Under the circumstance, is there any way how to transfer files to remote desktop on Windows 7 quickly?
Here’s a great choice for you-- AnyViewer, a remote access software that could allow you to get remote desktop file transfer on Windows 7 easily. With it, you can achieve file transfer with a few clicks. And the remote connection won’t be limited to the same LAN, which means the remote connection can be achieved anywhere and anytime. And it supports multiple Windows versions, including Windows 7 Home Premium.
Don’t wait anymore, you can get a big surprise from it.
Option 1. File Transfer in remote access
If you need to transfer files in the course of remote access or remote control, then this option suits you best.
Step 1. Download and install and launch AnyViewer on both Windows 7 computers. Go to Log in, and then click Sign up.
Step 2. Fill in the signup information.
Step 3. Then you can see you successfully logged in to AnyViewer on Windows 7. Your device will automatically be assigned to the account you've logged in to.
Step 4. Log in to the same AnyViewer account on the two devices, then you can achieve a direct connection by clicking One-click control.
Step 5. When the remote connection on Windows 7 PCs is established successfully, you can see there are many options in the above line. And the Files can be used to transfer files to the remote server.
Step 6. The left pane is the client PC and the right pane is the host PC. On the left pane, choose the files you want to transfer and then click on the triangle blue button to transfer files to the remote server.
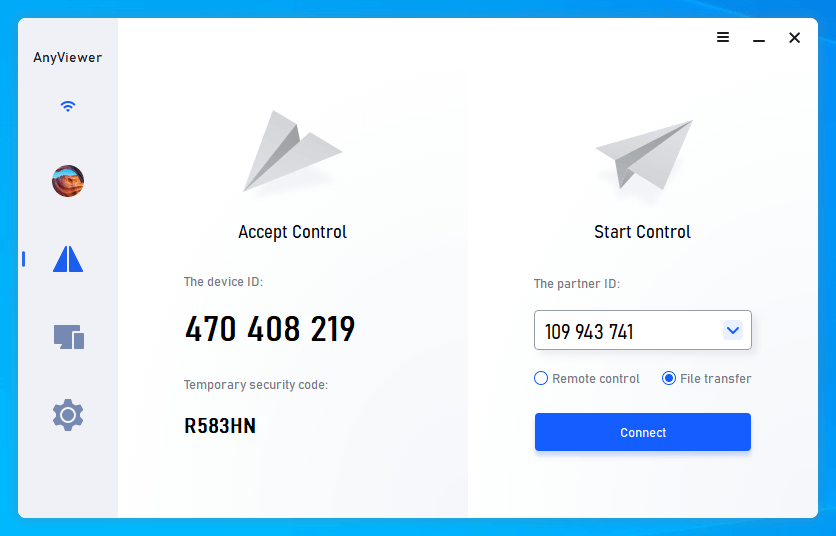
If you just want to transfer files to your friend only for a time, you can also get to Connect tab and then enter the partner ID of the remote PC. Choose Remote Control > Connect to establish a remote connection and get file transfer.
Option 2. Direct file transfer without controlling the remote computer
If you want to transfer files to the remote Windows 7 PC without accessing or controlling the remote computer, then this method can be the best choice for you.
Step 1. Log into the account as the above way and then go to the Connect tab. Enter the device ID of the remote server in the partner ID box. Choose File Transfer and then click on Connect.
Step 2. When the remote desktop allows the connection, then you’ll see 2 columns. File transfer can be achieved according to the steps mentioned above.
Whenever you want to pause or remove the file transfer, right-click on the transfer and choose Pause or Remove.
Note: If you want to transfer files larger than 100 MB, we highly recommend you upgrade to a higher version so that you could enjoy a unique experience like:
- Faster transmission speed. Transfer speed for a free account is 500 KB/s, and for a paid account is up to 10 MB/s.
- The larger size of a single file, such as 1 TB can be transferred.
- Enjoyment of Privacy Mode. With Privacy Mode, the screen of the remote PC would be blackened to safeguard your privacy.
- Much more devices would be assigned to the same account, making the remote connection more convenient.
- ...
Conclusion
Here in this post, we list the ways to transfer files with Remote Desktop on Windows 7. Hope you can make it smooth. However, if 2 PCs are not on the same LAN or RDP on Windows 7 is too slow for you, then you can try AnyViewer to help you achieve the goal.
