
How to: TeamViewer File Transfer from Remote to Local
This post is a detailed tutorial on how to use TeamViewer file transfer from remote to local. You can transfer files in a remote session or in file transfer mode.
By AnyViewer / Updated on December 13, 2024
Can I transfer files from TeamViewer?
I need to fix some work-related problems at home but I don’t have the files. So I’m attempting to transfer files from my work PC to my personal PC but I have no idea how to do it. I downloaded the TeamViewer program on the advice of a buddy. Can anybody give me some suggestions about file transfer from TeamViewer?”
- Question from Reddit
TeamViewer file transfer from remote to local [2ways]
TeamViewer is a remote access software with file transfer, before starting to learn how does TeamViewer file transfer work, make sure you have finished the preparation work below.
Part 1. Preparation work: Install and Sign up
To perform TeamViewer file transfer from remote to local, firstly you need to install and sign up for TeamViewer.
Step 1. On the TeamViewer Setup interface, choose the using purpose based on your own needs and then click Finish. In this post, we take the free version for personal use as an example.

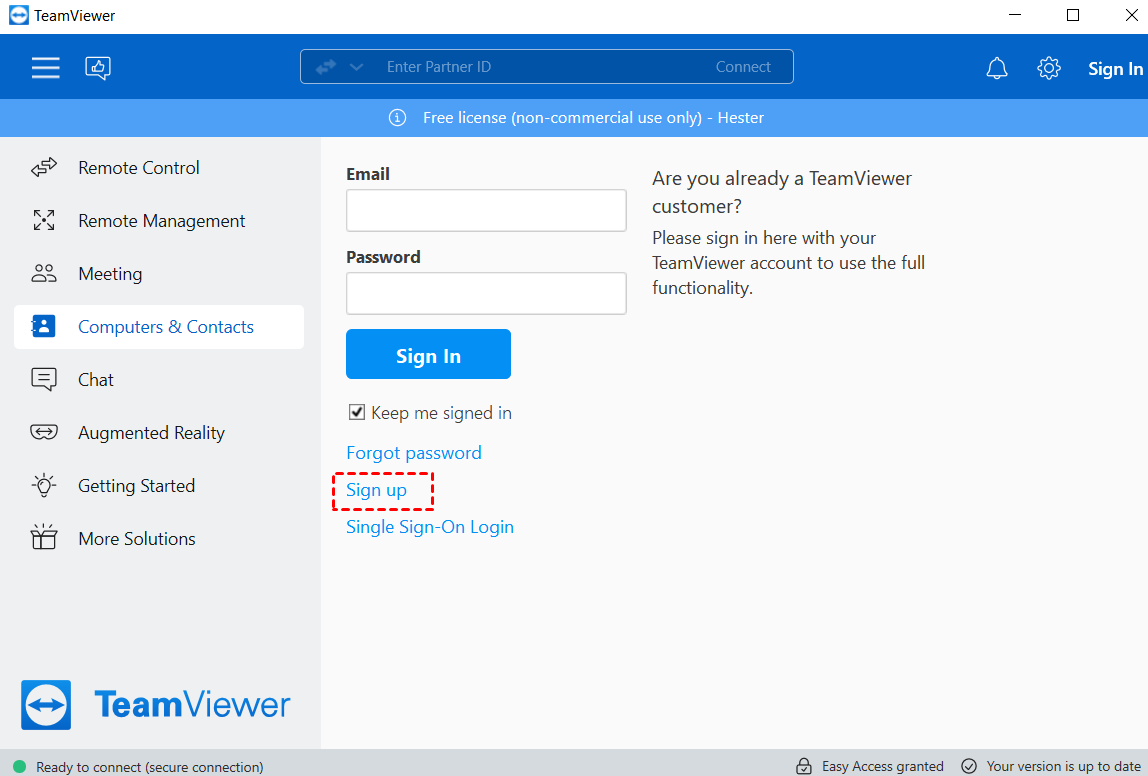
Step 2. Navigate to Computers & Contacts interface and select Sign up to create your own TeamViewer account.
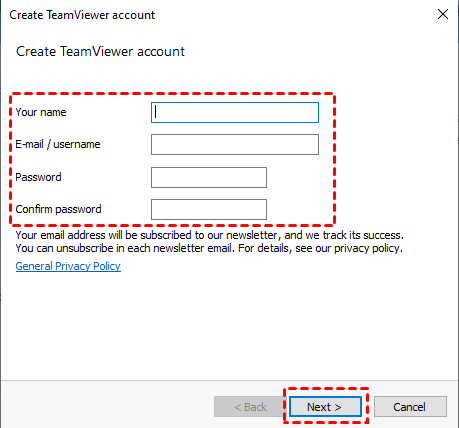
Step 3.Fill in the information and click Next.
Part 2. Transfer files via TeamViewer in 2 ways
In this part, we offer you two ways to transfer files using TeamViewer, choose the one that fits you most.
Way 1. Transfer files in remote session via TeamViewer
To transfer files from one computer to another remotely, you can achieve a remote connection in TeamViewer to do this job.
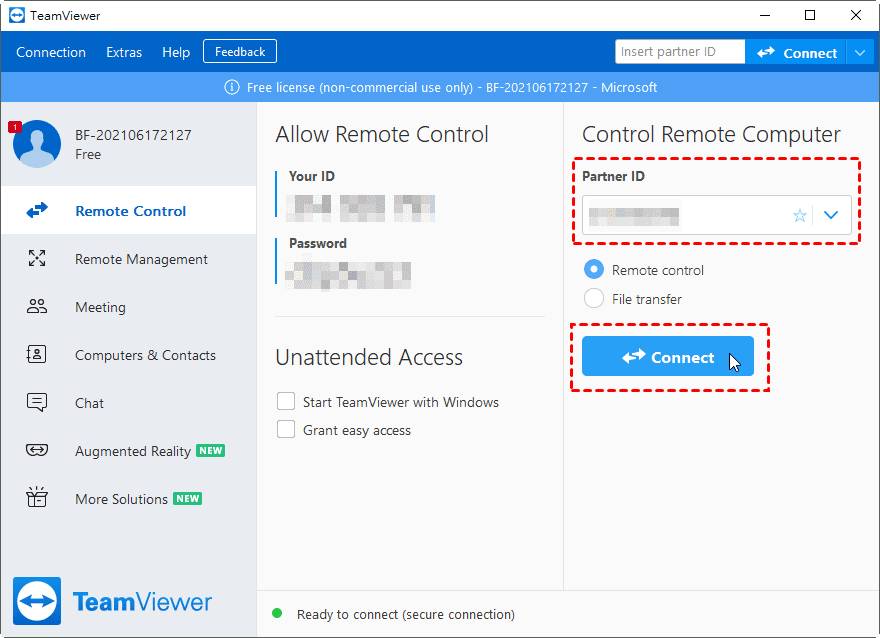
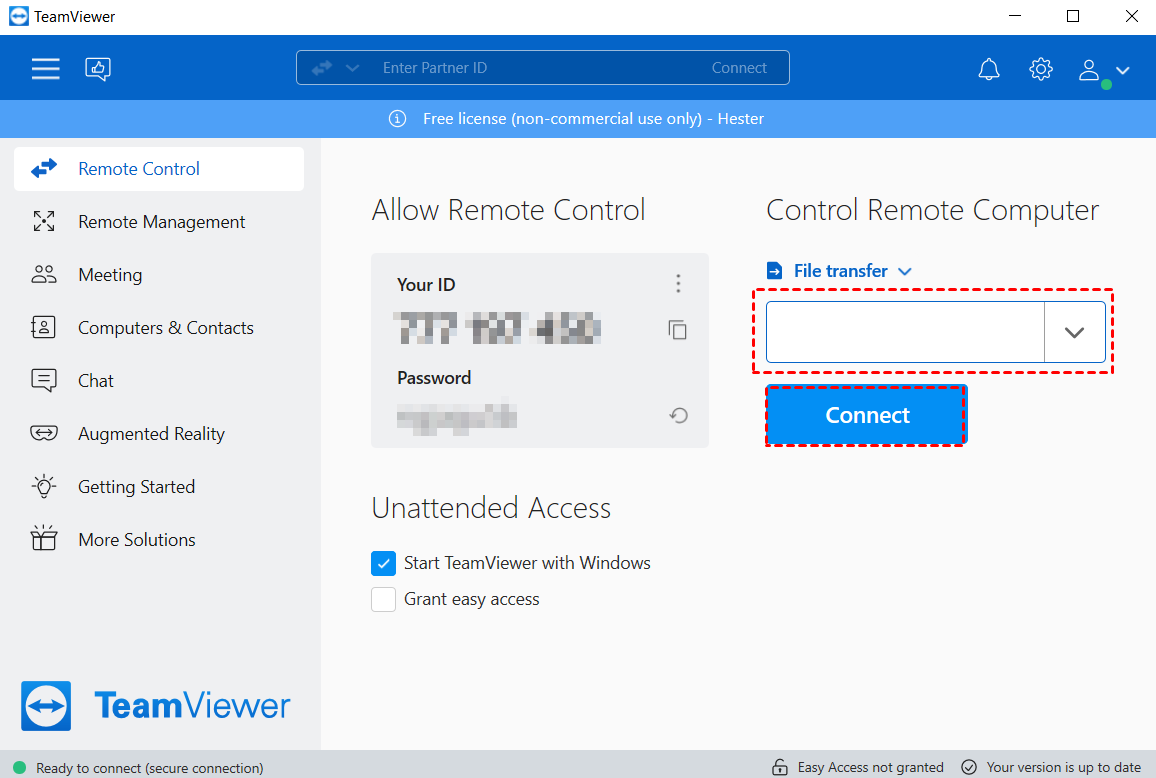
Step 1. On the client PC, go to Remote Control interface on the left pane, enter the ID of the host computer under Partner ID and then click Connect.
Step 2. In the pop-up window, type in the password of the host PC to establish remote control.
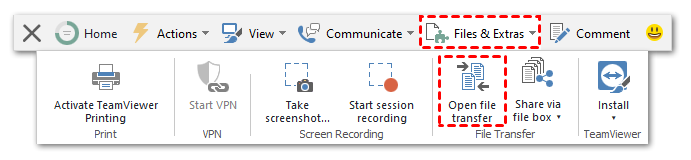
Step 3. When your PCs are connected successfully, click Files & Extras > Open file transfer to transfer files from PC to PC.
Way 2. Transfer files by file transfer mode with TeamViewer
TeamViewer offers a file transfer mode that allows you to perform TeamViewer file transfer from remote to local without taking control of other’s screen.
Step 1. On the client PC, go to Remote Control interface, click Remote Control tab and then select File transfer mode in the drop-down menu.

Step 2. Enter the ID of the PC you want to perform file transfer and then click Connect.
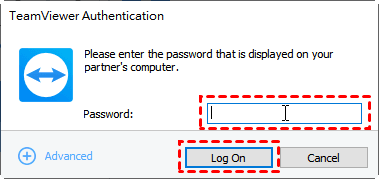
Step 3. Type in the password of the host PC in the pop-up window and click Log On.
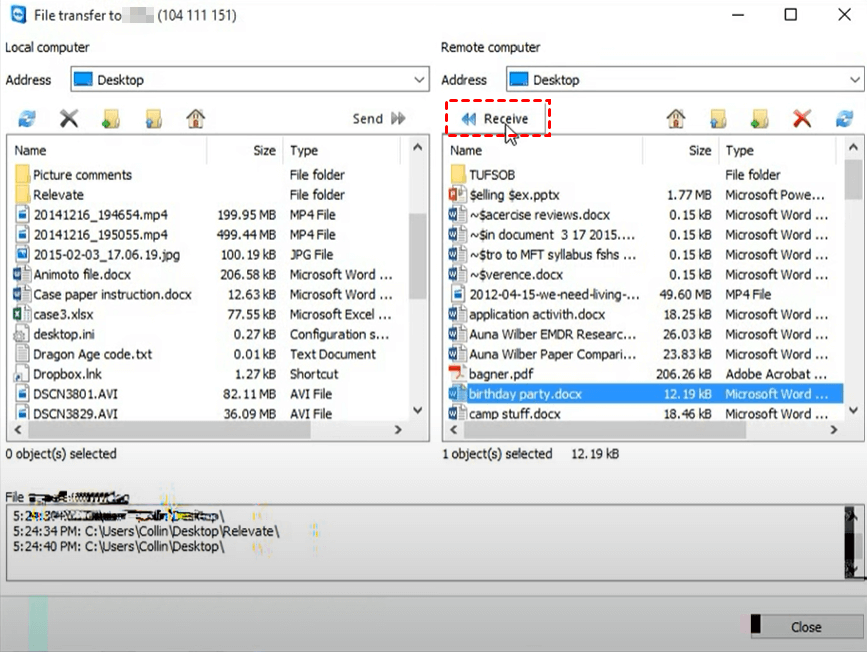
Step 4. On the left is the local computer and on the right presents the remote computer. For example, if you want to transfer files from remote to local, choose the address you want to store the files, select the target files on the remote computer and then click Receive, or vice versa.
Pros and cons of TeamViewer
It’s difficult to use software without understanding its pros and cons. Based on user feedback and reviews, here are the common pros and cons of Teamviewer you should know about.
- It’s easy to set up and use.
- It offers a free version for individual users.
- It offers a secure file transfer between the PCs.
- It allows access to sleeping/powered-off computers.
- It supports remote access to computers over the internet.
- TeamViewer file transfer size limit: A single file larger than 4 GB is not allowed to share.
- It has a slow transfer process, for example, many users complain that the transfer speed is as low as 120kb/s, particularly while sharing multiple files.
- The price of AnyViewer is not justified for the functionalities it offers.
- It is compatible with fewer data types.
- Its interface seems quite outdated.
- Its connection is unstable, and it’s impractical to transfer large files from remote to local with the unstable connection.
Free TeamViewer alternative with file transfer: AnyViewer
Due to the limitations listed above, you may seek another free file transfer tool without restrictions. In this case, AnyViewer is the best option for you to choose. AnyViewer is a free remote desktop software, which is highly appreciated for the following reasons:
- Easy-to-use. It has easy operations to set up and transfer files without limitations, you can transfer large files from remote desktop to local directly if you’ve logged into the same account.
- Fast. It has a fast file transfer speed and it provides you fast remote connection with high image quality.
- Compatible. It supports several Windows versions, for example, it’s available on Windows 11/10/8.1/8/7.
- Efficient. It ensures you a stable connection supported by a strong technical team.
- Multi-function.In addition to file transfer, you can also use AnyViewer to get unattended remote access to desktops, laptops, or servers without complicated settings, then you can share screen, play computer games, or manage another computer remotely whenever you want.
- User-friendly. It offers a chat box for text communication and it won’t lock the PC during connection.
- Secure. It is secured by Elliptic Curve Cryptography (ECC) encryption, preventing your data loss during the whole remote session.
Part 1. Sign up for AnyViewer
After download and installation, follow the next steps to sign up for AnyViewer.
Step 1. On the host PC, go to Log in interface and then click Sign up (log in directly if you have already signed up).

Step 2. Fill in the sign up information.

Step 3. When you successfully logged in to AnyViewer, your devices are automatically assigned to the account you’ve logged in to.

Part 2. File transfer via AnyViewer [2 ways]
After logging in to AnyViewer on the host PC, here are two ways for you to transfer files via AnyViewer.
Way 1. Transfer files with the same account
You are recommended to use this method which is more convenient and efficient when you need to transfer files from remote desktop to local frequently on your computers. Before operations, ensure your devices are logged in to the same account.
Step 1. On the client PC, go to Device interface to choose the target device you want to achieve file transfer, and then click File transfer.

Way 2. Transfer files with the partner ID
When you need to transfer files to someone you don’t trust enough, we suppose you to use this method to transfer files without logging into the same Anyviewer account on the other device to ensure security.
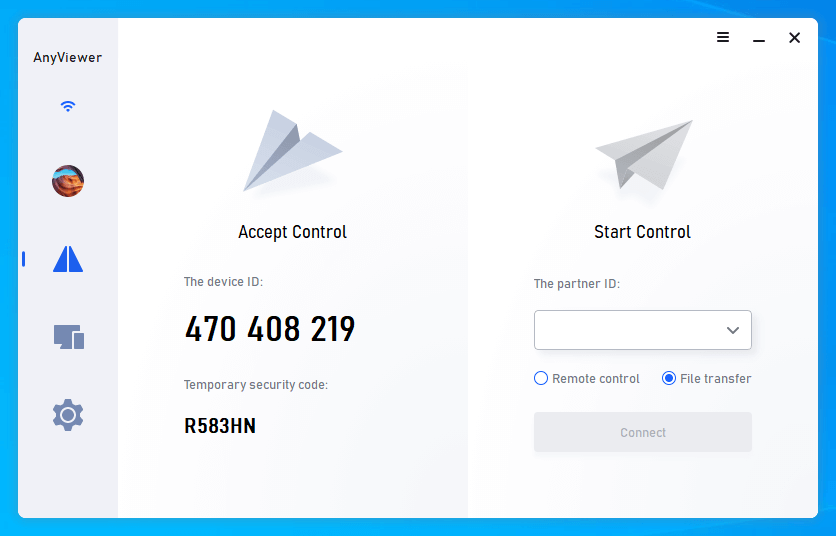
Step 1. On the client PC, type in the ID of the host PC and tick File transfer mode, and then click Connect.
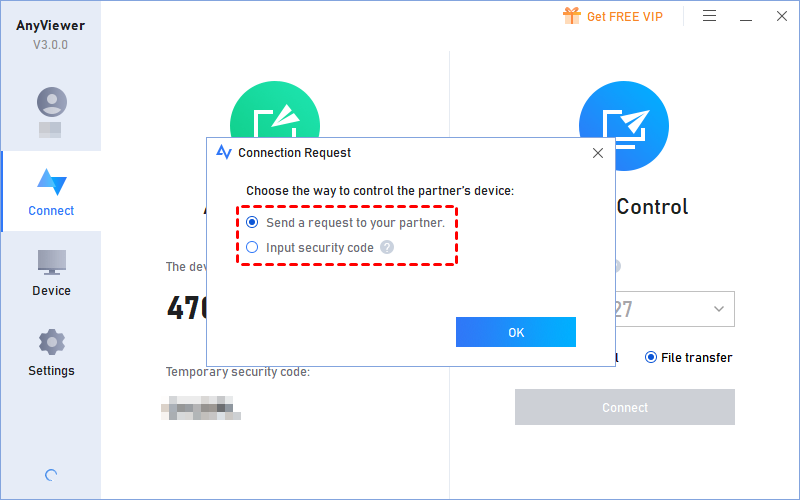
Step 2. A Connection Request appears to ask you whether to Send a request to your partner or Input security code. Choose the way according to your need and then you are allowed to transfer files between the devices.
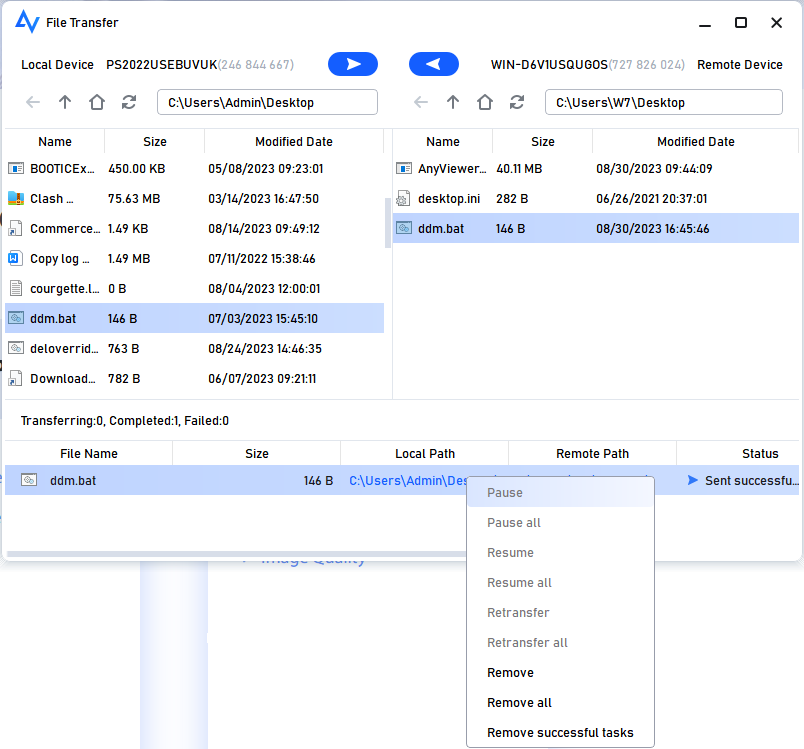
No matter which option you choose, a File Transfer dialog box will appear. The host PC is displayed there on the left of the box, while the client PC is displayed there on the right. To send the selected files to the client PC, click the right arrow after selecting the files you wish to send. To transfer files to the host PC, select the files and click the left arrow on the opposite side.

The transfer status is at the bottom of the box. Right-click to pause or remove the tasks.
- Notes:
- AnyViewer file transfer support for a single file smaller than 100 MB for the free account, and you can transfer no more than 100 files per time. Upgrade to a Professional or Enterprise plan to transfer larger files. Then you'll have the following rights:
- Transfer multiple files at once.
- Assign more devices to the same account to achieve direct file transfer.
- Connect to distant computers in privacy mode so that you can disable the remote device’s keyboard and mouse and completely black out its screen.
- Speedier file transfer speed. Transfer speed for a free account is 500 KB/s, and for a paid account is up to 10 MB/s.
Conclusion
You might already understand how to utilize TeamViewer file transfer from remote to local after reading this post. Even though TeamViewer offers a file transfer feature, it still has drawbacks. For instance, because of the unstable connection, sending huge files can be challenging and time-consuming. Therefore, you can try AnyViewer to experience free & quick file transfer.
