
How to Share Folder from Mac to Windows and Vice Versa
Sharing folders from Mac to Windows and vice versa is easy. This guide shows you four simple methods: AnyViewer for secure access, SMB for network sharing, cloud storage for syncing, and USB drives for quick transfers.
By Ellie / Updated on April 8, 2025
How do I share folder from Mac to Windows?
Sharing files between a Mac and a Windows PC is often necessary, whether you're working in a professional setting or at home. Since most people use both types of devices, enabling them to communicate smoothly is essential. If you need to transfer files between a Mac and a Windows PC, here's a simple guide to sharing folder from Mac to Windows and vice versa.
How to share folder from Mac to Windows and vice versa [4 ways]
Here's how to share folder from Mac to Windows and vice versa. Whether you're working across different operating systems or need to share files with others, these ways will help you transfer and access data seamlessly.
Way 1. Share folder between Mac and PC via AnyViewer
AnyViewer is a highly recommended remote access software that allows you to share files and folders easily between Mac and Windows devices. This tool provides a secure and fast way to transfer data without complicated network configurations.
Key Benefits of AnyViewer:
- Seamless File Transfers: Effortlessly transfer files between devices, regardless of whether they're on different networks.
- User-Friendly Interface: Transfer files between Windows and macOS with ease, no admin account or password is required.
- Quick and Secure: Enjoy fast file transfers, safeguarded with advanced encryption for maximum security.
- Multi-Functional: In addition to file transfers, AnyViewer allows you to access applications, adjust settings, and troubleshoot devices remotely.
Here's how to share folder from Mac to Windows and vice versa using AnyViewer:
Step 1. Download and install AnyViewer on both your Windows PC and Mac.
Step 2. Log into your AnyViewer account, or sign up for one if you don't already have an account.

Step 3. Open AnyViewer on your Mac and click on “Device” to view your connected devices. Locate your Windows PC under “My Devices,” select it, and click on “File Transfer” to open the transfer manager.
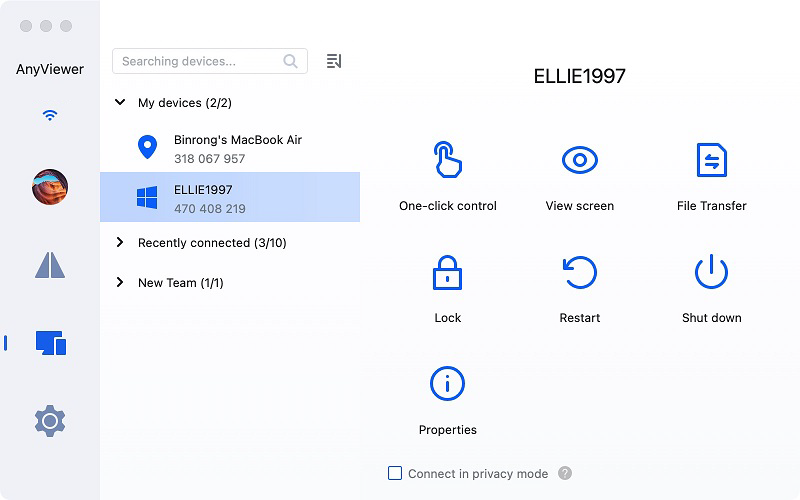
Alternative way: To access your files remotely during the remote session, choose “One-click control” to control your Windows PC from your Mac. Once connected, use the file transfer manager in the toolbar to move your files seamlessly.
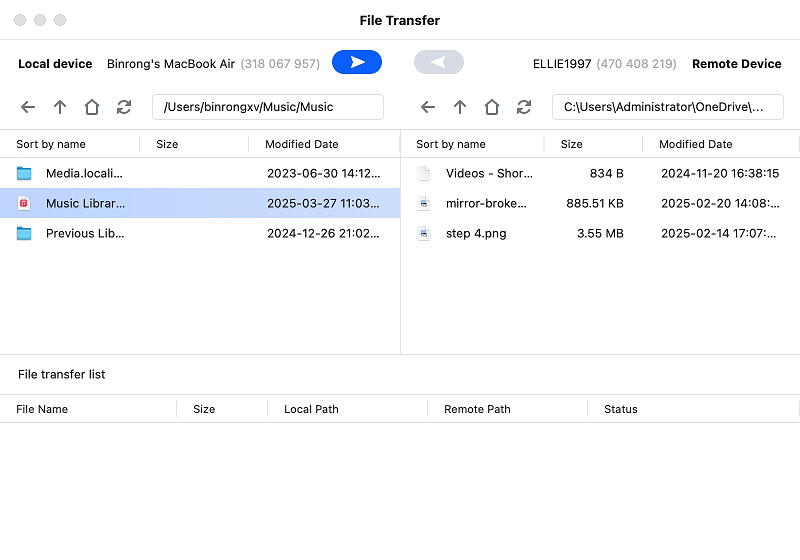
Step 4. In the file transfer manager, select the file you wish to transfer, click the arrow to start the transfer, and share the folder from Mac to Windows. You can also select a folder on your Windows PC and share it with your Mac.
Way 2. Share folder between Mac and Windows using SMB
SMB (Server Message Block) is a protocol that facilitates file sharing between Mac and Windows devices on a network. It is integrated into both operating systems and is easy to set up.
Mac sharing to Windows
Here's a step-by-step guide to access shared folder from Mac to Windows 10 and 11:
Part 1: Enable File Sharing on Your Mac
Step 1. Open the Apple menu and go to System Settings.
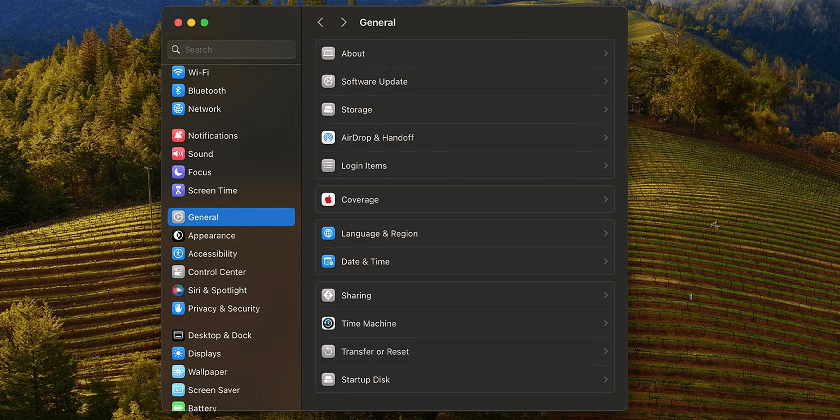
Step 2. Select "General" and then click "Sharing."
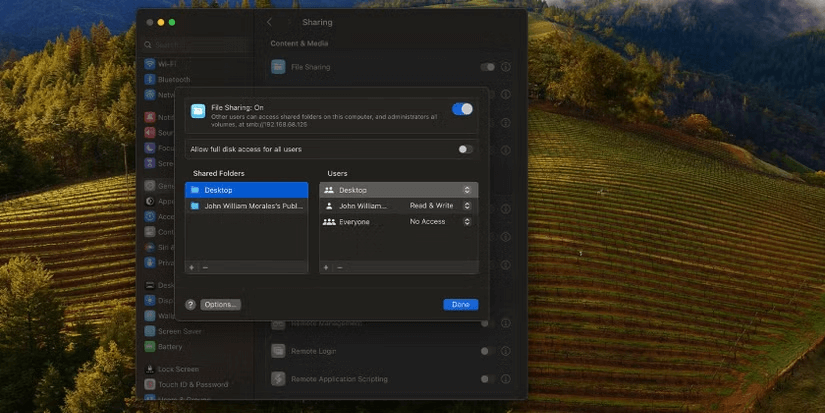
Step 3. Turn on "File Sharing" by clicking the Info button.
Step 4. Click "Options" and enable "Share files and folders using SMB."
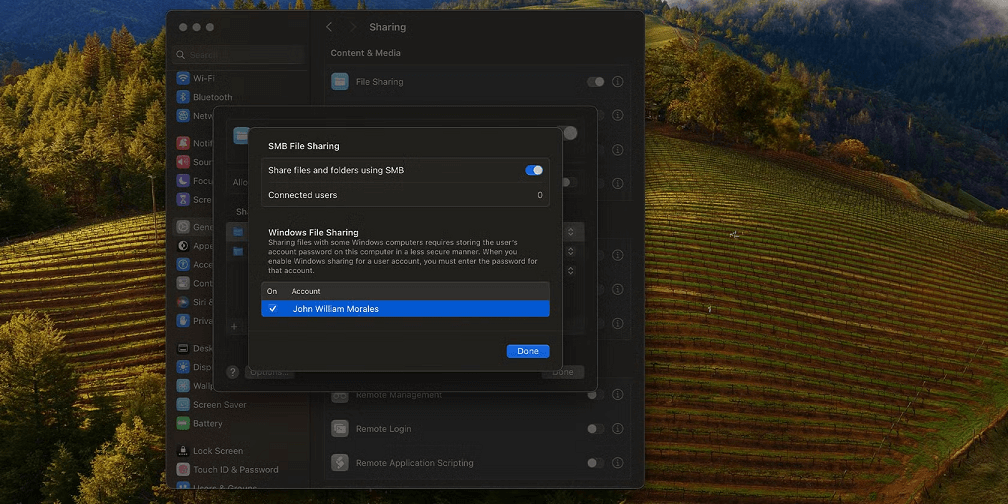
Step 5. Choose the user accounts with which to share files.
Step 6. Enter the password for each account and click OK.
Step 7. Click "Done" to save your settings.
Step 8. Note the IP address at the top of the window.
Part 2: Configure Network Settings
Step 1. Open File Explorer on your Windows PC.
Step 2. Click in the address bar and type your Mac's IP address (e.g., \\192.168.x.x), leaving out the SMB prefix.
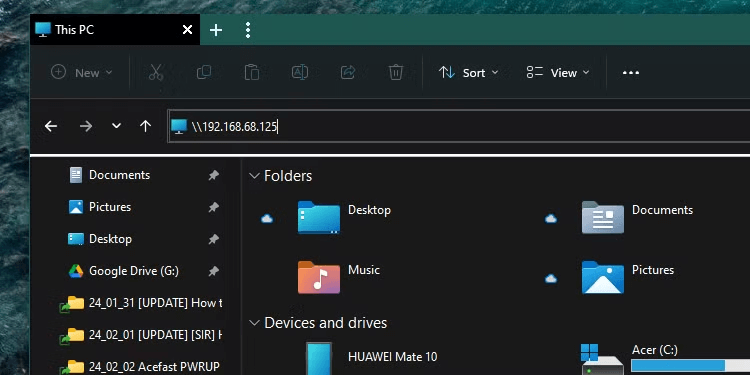
Step 3. When prompted, enter the username and password for the Mac user whose files you're accessing, ensuring they match exactly as on your Mac.
Step 4. You will now have access to the shared folders on your Mac. You can copy files just like you would from any other folder on your PC.
Windows sharing to Mac
Part 1: Enabling File Sharing on Windows
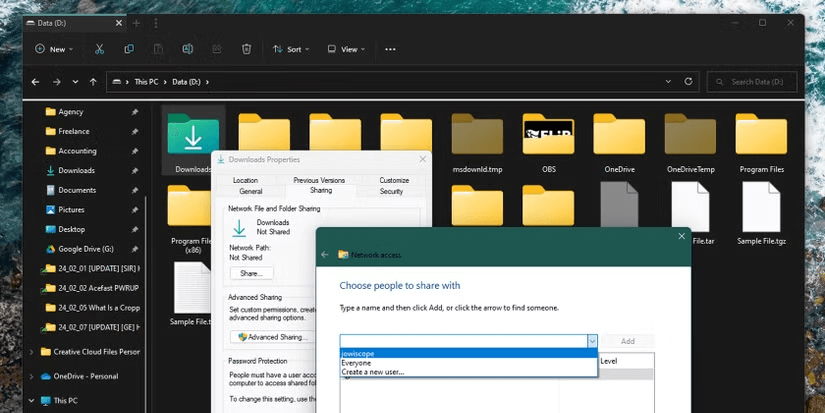
Step 1. Right-click the folder you want to share in File Explorer and select "Properties."
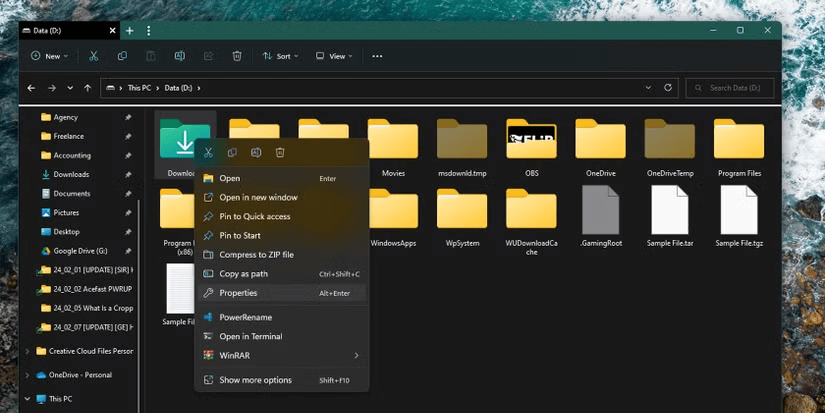
Step 2. Go to the "Sharing" tab and click "Share..."
Step 3. Select a username from the dropdown menu and click "Add."
Step 4. Choose the permission level: "Read" (view-only) or "Read/Write" (full access).
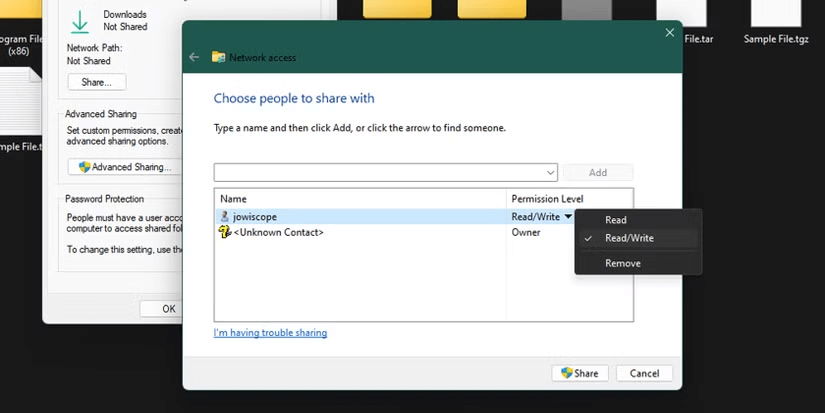
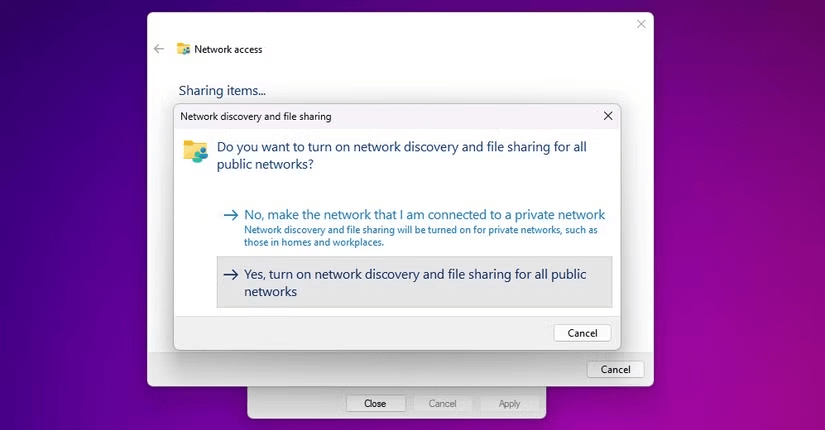
Step 5. Click "Share" to confirm. When prompted, click "Yes" to enable network discovery and file sharing.
Step 6. Open Command Prompt or PowerShell, type "ipconfig," and press Enter. Note the IPv4 Address listed under Ethernet or Wireless LAN.
Part 2: Accessing Shared Windows Files on Your Mac
Once your Windows PC is set up for file sharing, you can access its files from your Mac as long as both devices are on the same local network. Here's how:
Step 1. Click the Finder icon to open a window.
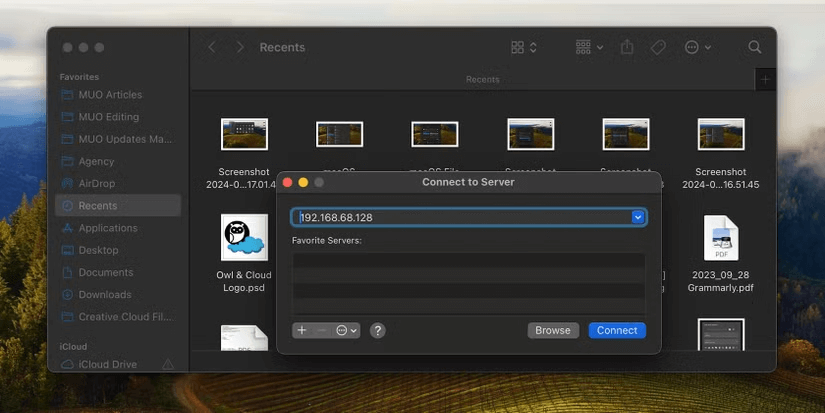
Step 2. Go to "Go" in the menu and select "Connect to Server."
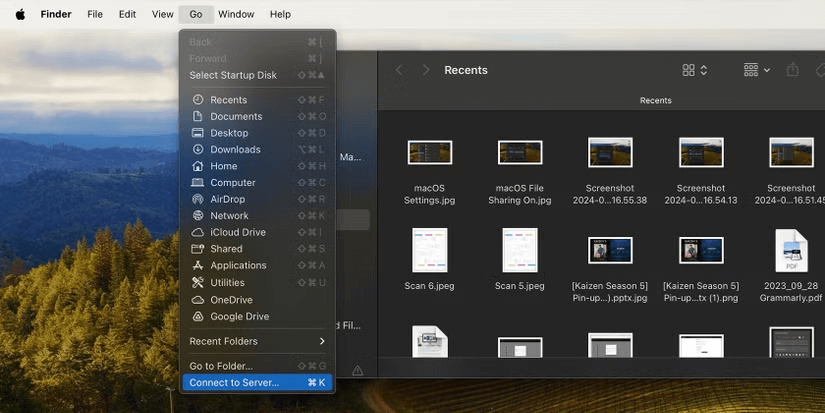
Step 3. Enter your Windows PC's IP address and click "Connect."
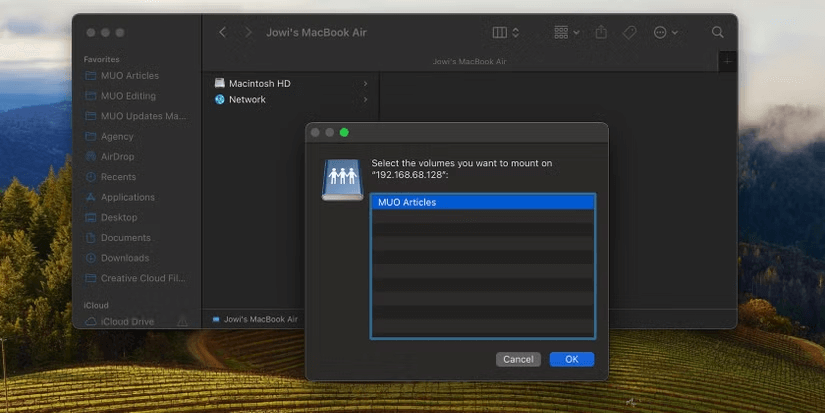
Step 4. Type your Windows username and password, then press "Return."
Step 5. Select the folder you want to open and click "OK."
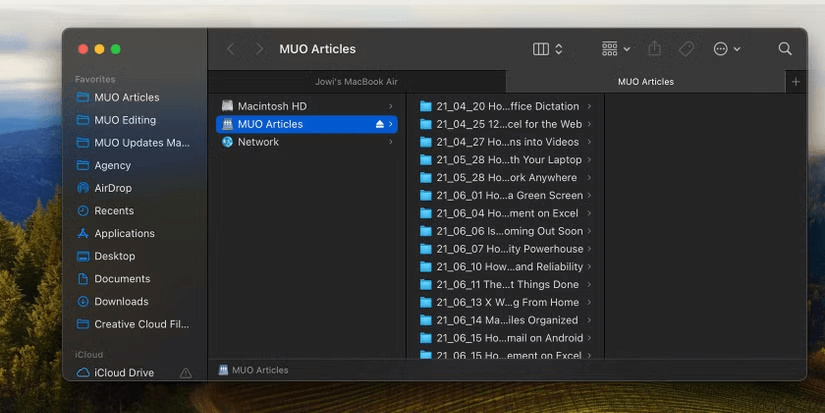
Step 6. The shared folders will appear under "Locations" in the Finder sidebar.
Way 3. Sync folders using cloud storage services
Cloud storage platforms like iCloud provide a convenient way to store and access your files from any location. To transfer data between your Mac and Windows PC, you'll need to install and configure these services on both devices, allowing them to sync automatically.
How to share folder from Mac to PC using iCloud:
Part 1: Enable iCloud Sync on Your Mac
Step 1. Open the Apple menu and go to "System Settings."
Step 2. Click "Apple Account" (or "Apple ID" in older macOS versions).
Step 3. Select "iCloud."
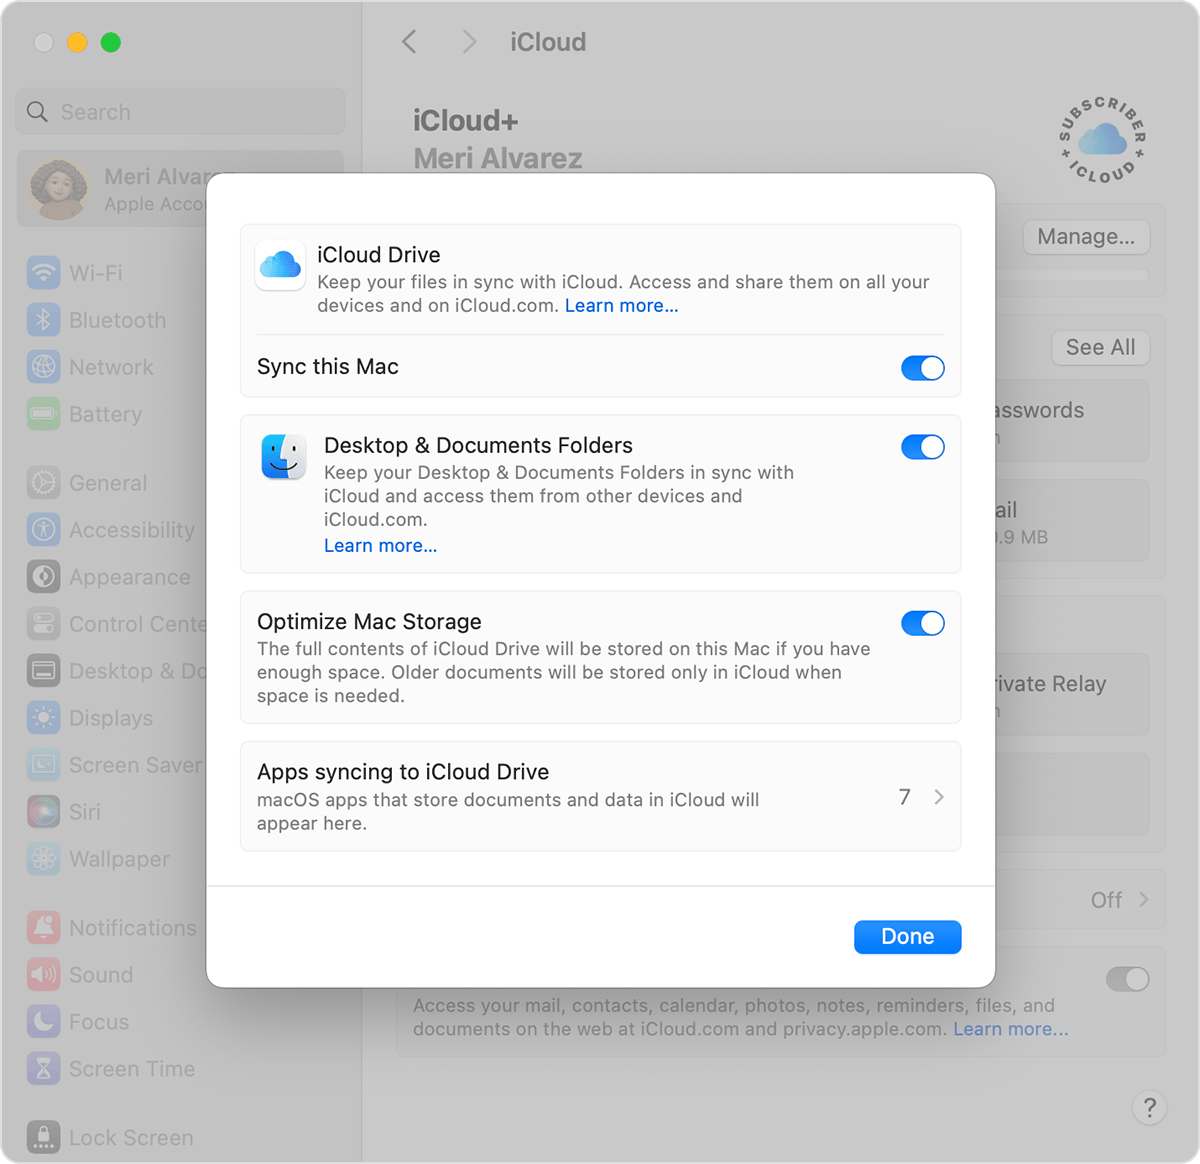
Step 4. Click "Drive" (or "iCloud Drive" in older versions).
Step 5. Turn on "Sync this Mac."
Step 6. Turn on "Desktop & Documents Folders" to sync them.
Step 7. Click "Done" to save.
Part 2: Access Folders on Your PC
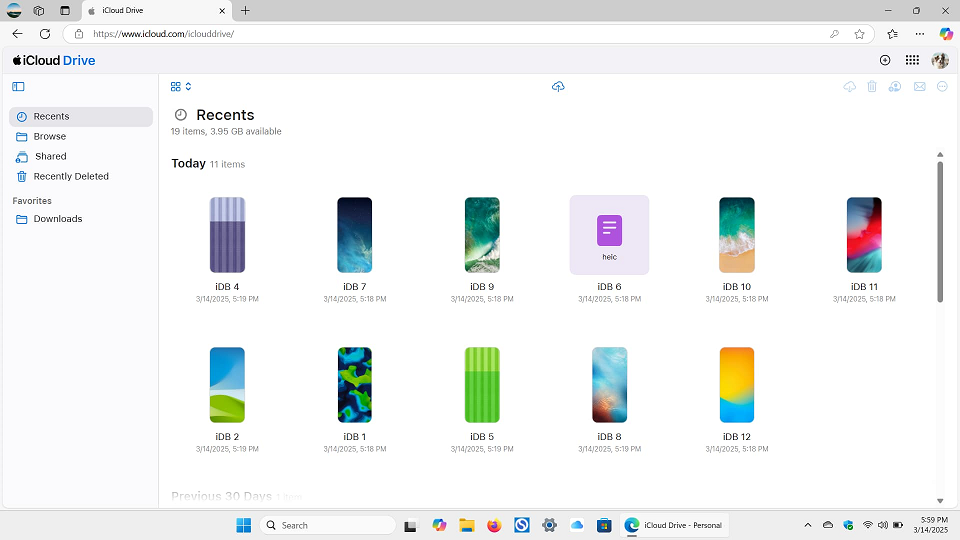
Step 1. Sign in to iCloud.com with your Apple Account.
Step 2. Open "iCloud Drive."
Step 3. Click on the "Desktop" or "Documents" folder to view and download your files.
To transfer files from Windows to Mac, simply sync your files on the Windows PC, and you'll be able to access them from your Mac.
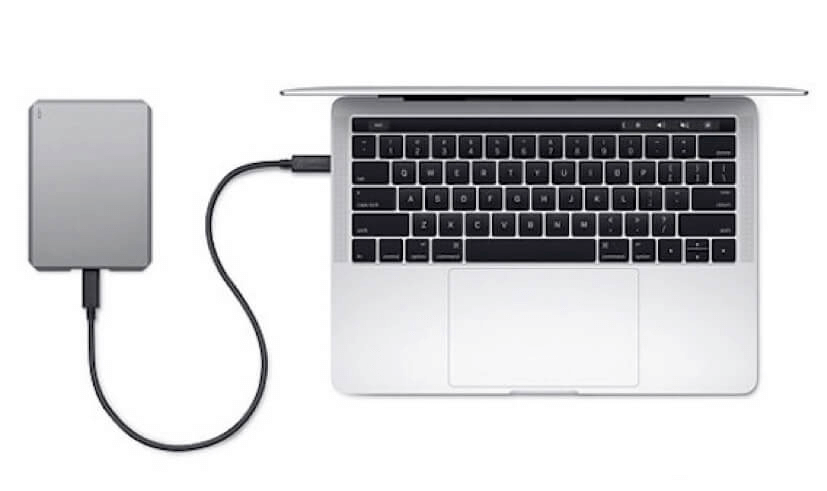
Way 4. Transfer folders between Mac and Windows using a USB drive
One of the simplest ways to transfer files between a Mac and a Windows PC is by using a portable USB storage device, such as an external hard drive or USB flash drive. This way is quick and requires no complicated setup—just copy the files to the device and move them between the two computers.
Important Considerations
- Format the Drive: Make sure your USB drive is formatted with the exFAT file system. This format is compatible with both Windows and macOS, and it supports large file sizes.
- Plug-and-Play: Unlike cloud services, which require a subscription and an internet connection, using a USB drive is simple and doesn't need any extra setup. Just plug the drive into your Mac or PC, and you're ready to transfer files.
- One-Time Cost: Unlike cloud storage, which typically comes with recurring fees, a USB storage device is a one-time purchase, making it a cost-effective solution.
- Choosing the Right Drive: When selecting a USB drive, consider factors like storage capacity, transfer speed, and durability to ensure it suits your needs for moving files between your devices.
Conclusion
In conclusion, sharing folders from Mac to Windows and vice versa can be done easily using various methods like AnyViewer, SMB, cloud services, or even a USB drive. Each method offers its own set of advantages, from seamless file transfers to simple plug-and-play options. By choosing the right solution based on your needs and preferences, you can transfer and access your files effortlessly, making collaboration and file sharing between different operating systems hassle-free.
