
Detailed Steps on How to Set Up RDP on Windows Server 2012 R2
This tutorial introduces you how to set up RDP on Windows Server 2012 R2 with detailed setting steps.
By Ellie / Updated on December 13, 2024
How do I use Remote Desktop Services on Windows Server 2012 R2?
“Last week, I received the notice of job adjustment. What’s disturbing is that I am faced with new computer and new system in my new job, which is Windows Server 2012 R2. And I even need to use RDP on the new system. I’ve never used Windows Server 2012 R2 before. Who can tell me how to set up RDP on Windows Server 2012 R2? It would be better if the setting steps could be more detailed.”
How to set up RDP on Windows Server 2012 R2
The process of setting up RDP on Windows Server 2012 R2 is divided into the following 3 parts. First, you need to enable Remote Desktop Windows Server 2012 R2. Next, set up Windows Firewall to ensure that the Remote Desktop Connection is used normally. Finally, realize the remote connection with Windows Server 2012 R2.
Part 1. Enable RDP on Windows Server 2012 R2 through a graphical interface
How to set up RDP on Windows Server 2012 R2? First of all, you should understand how to open RDP. The most common method is to open it through the graphical interface.
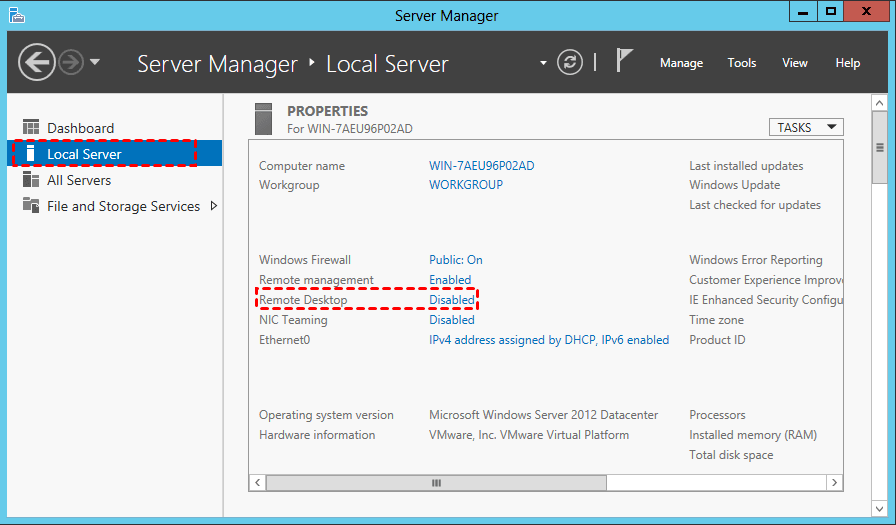
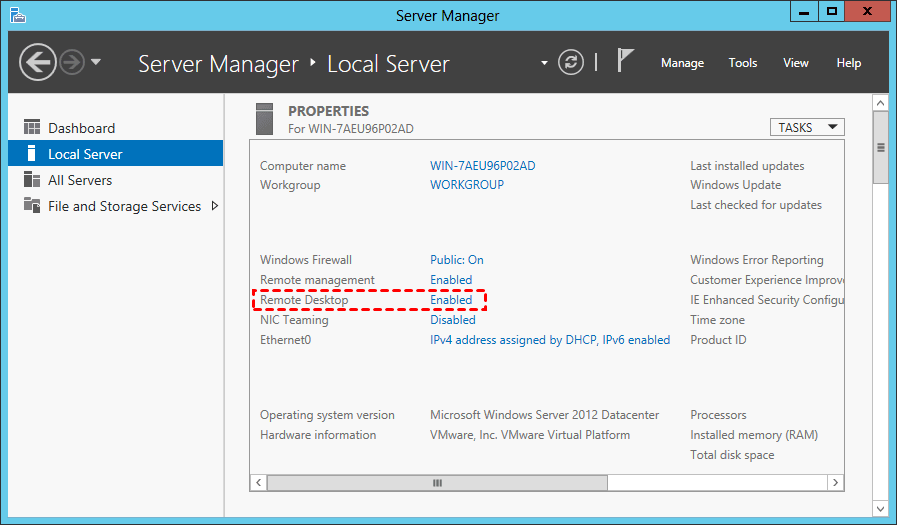
Step 1. Find the computer icon in the lower-left corner of the desktop, and click the icon to open Server Manager.

Step 2. Switch to the Local Server tab in the left sidebar, find the Remote Desktop column in the right window, and click Disable button next to it.
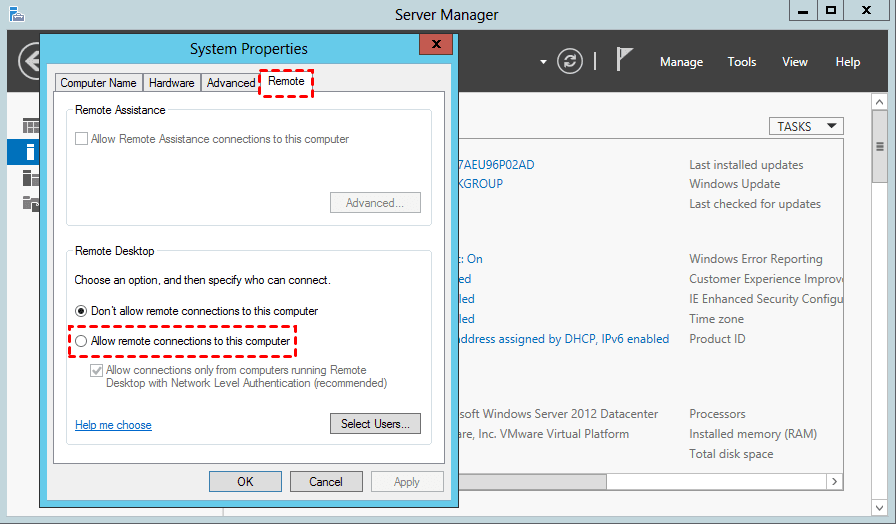
Step 3. In the System Properties window, switch to the Remote tab and click to select Allow remote connection to this computer.
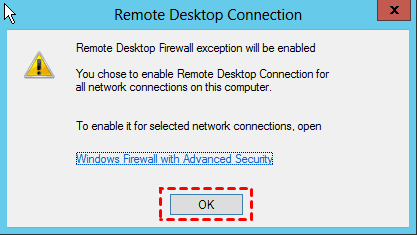
Step 4. A warning window will pop up automatically. Click OK. This pop-up window is mainly used to inform the user to enable the required firewall rules in the server to allow the network from any source to connect to the server remotely.
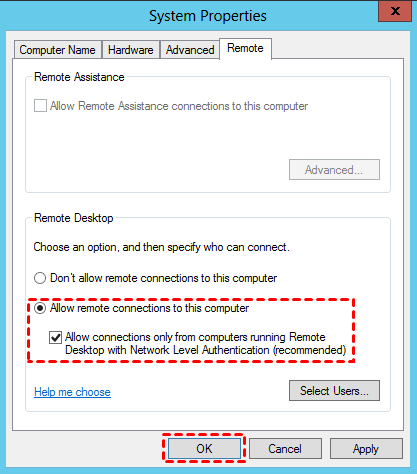
Step 5. Next, you can see that Allow remote connection to this computer has been selected, and then click OK. It is recommended to check the sub-option below as well to improve RDP security.
Step 6. Close and reopen the Server Manager, and then you can see that Remote Desktop is switched to Enabled, indicating that RDP on Windows Server 2012 R2 has been turned on.
Part 2. Set up Windows Firewall
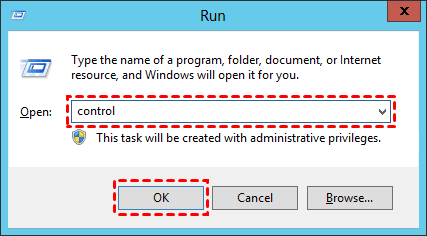
Step 1. Use the Win + R key combination to open the operation dialog box, enter “control” and then click OK to open the Control Panel.
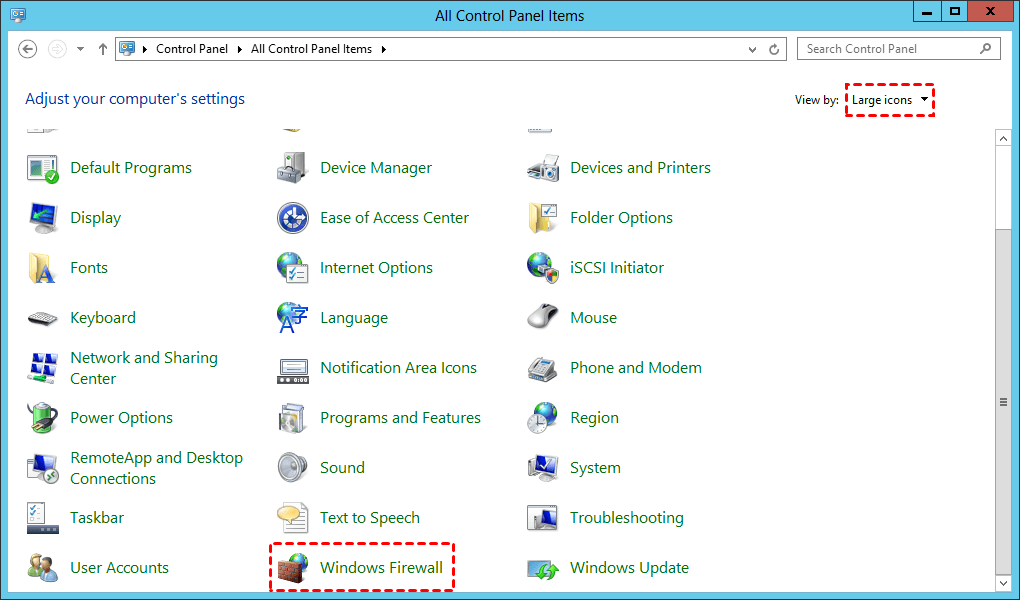
Step 2. In the Control Panel window, find view mode in the upper-right corner, switch to Large icons, and find and click Windows Firewall.
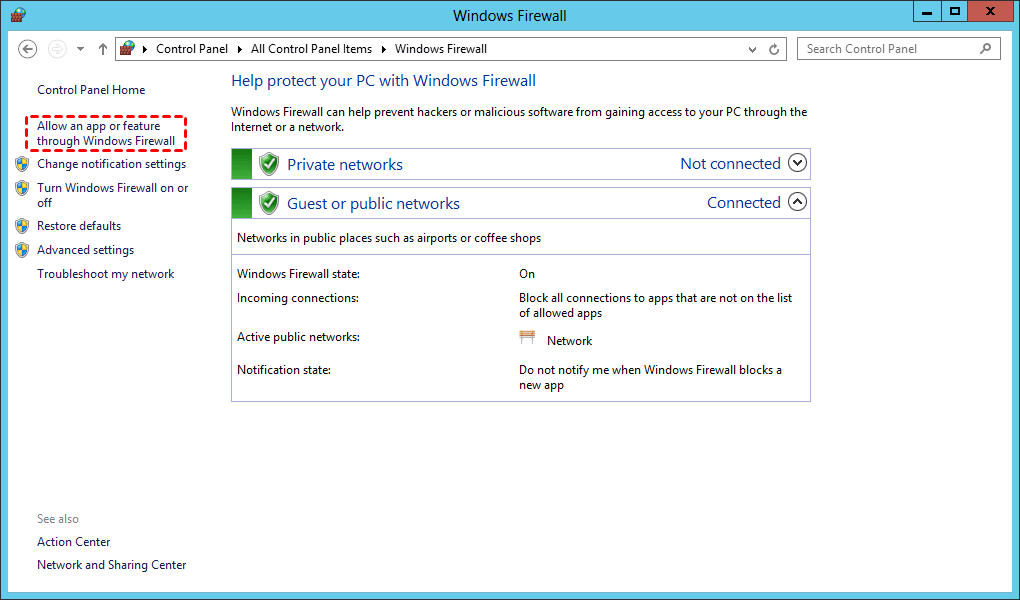
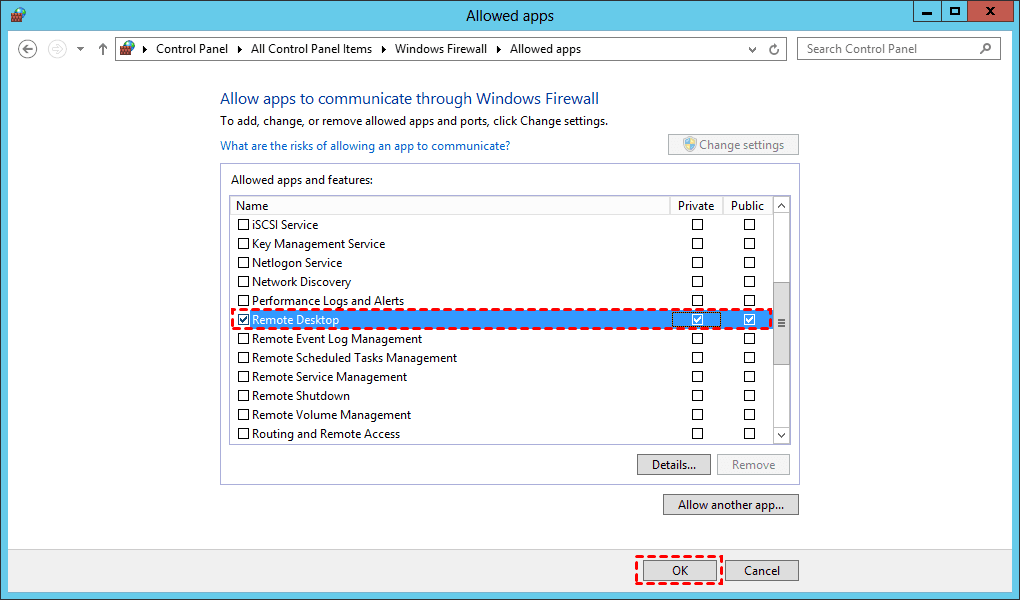
Step 3. In the left sidebar, find and click Allow an app or feature through Windows Firewall.
Step 4. Find Remote Desktop, check the Private and Public options respectively, and then click OK.
Part 3. Start remote connection on Windows Server 2012 R2
After the Windows Firewall setting is completed, it means that the preliminary preparations have been completed. Now you can start remote connection on Windows Server 2012 R2.
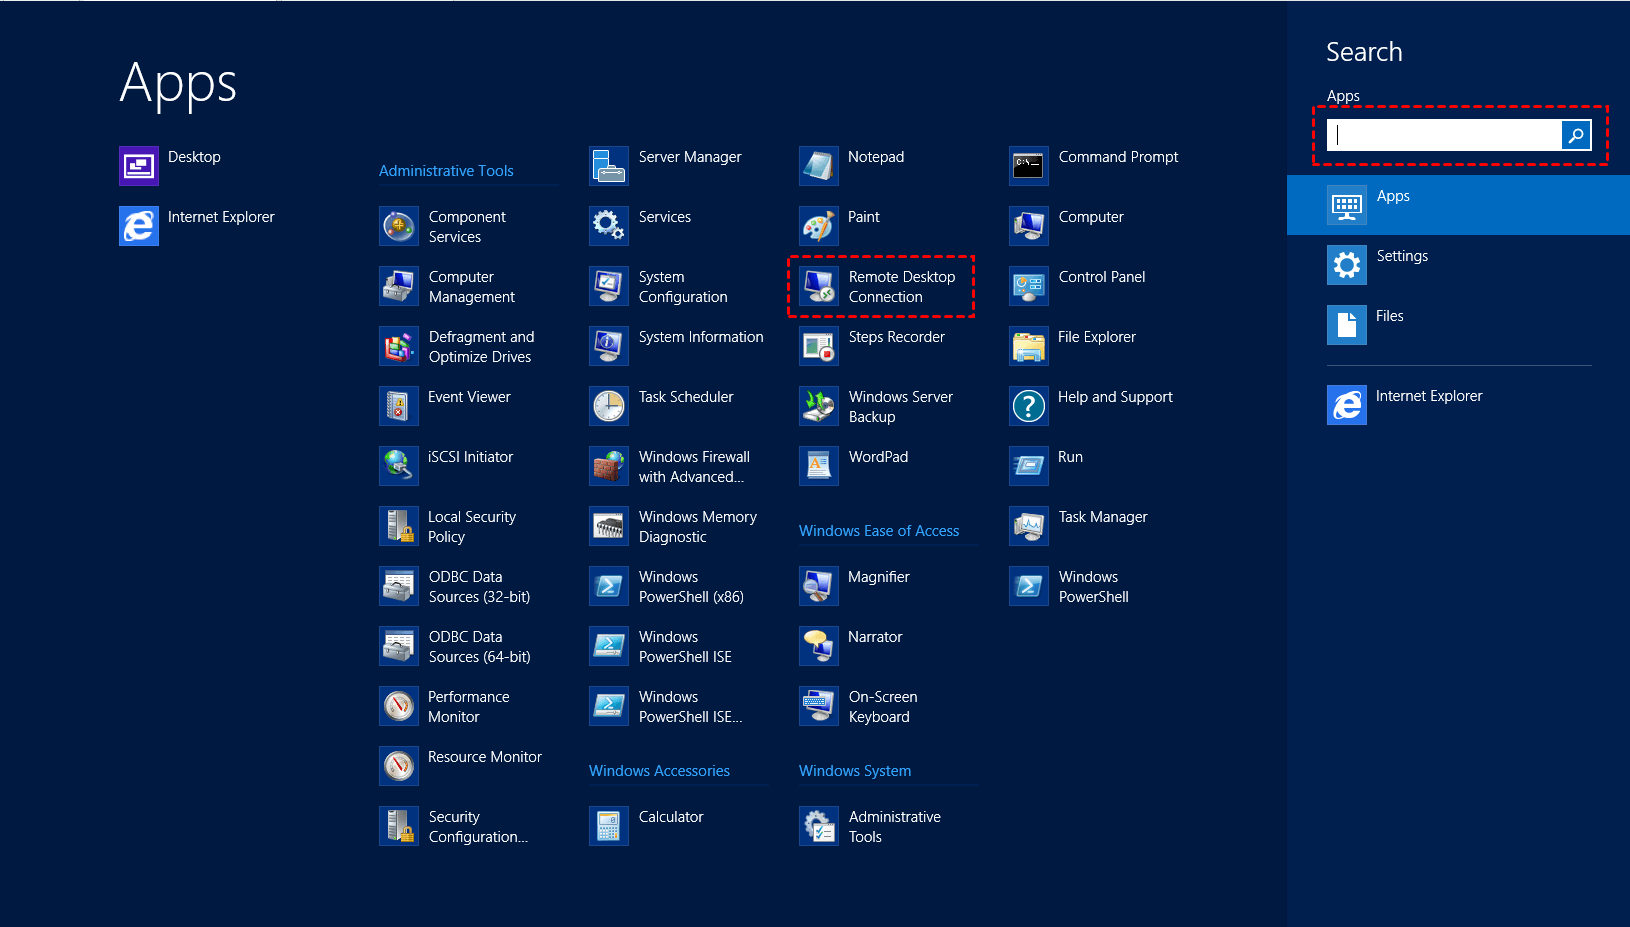
Step 1. On the desktop, move the mouse to the right, click the magnifying glass icon in the pop-up option, find and click Remote Desktop Connection in the search window, or enter Remote Desktop Connection in the search box.
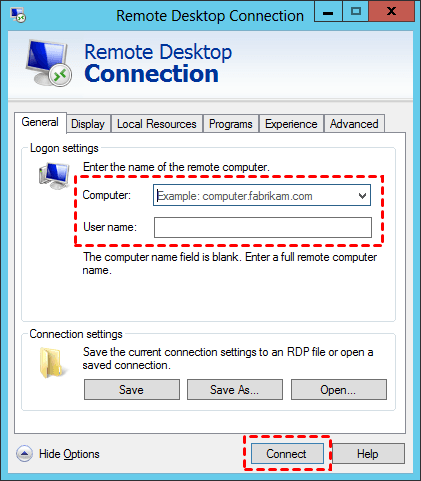
Step 2. In the Remote Desktop Connection window, click Show Options, enter the IP address and user name of the remote computer, and then click Connect. (Just in case you don’t know how to find your computer’s IP address and user name)
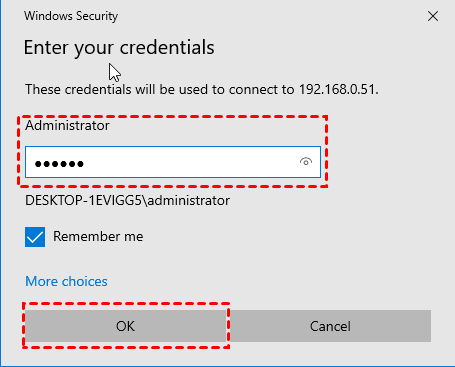
Step 3. In the windows security pop-up window, enter the password of the remote computer, and click OK.
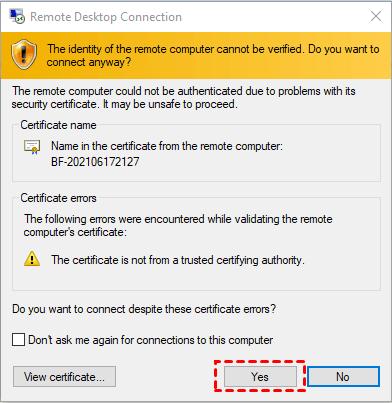
Step 4. In the authentication pop-up window, directly click Yes to successfully establish a remote connection.
How to solve the “unable to connect to remote computer” problem
In some cases, you may encounter Server RDP not working problem when using Remote Desktop on Windows Server 2012 R2.
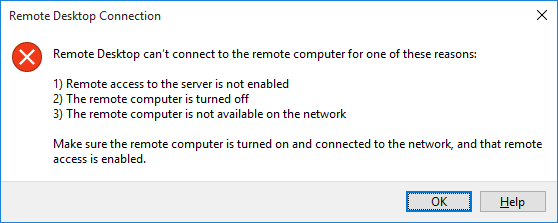
At this time, you can try the following solution to fix it.
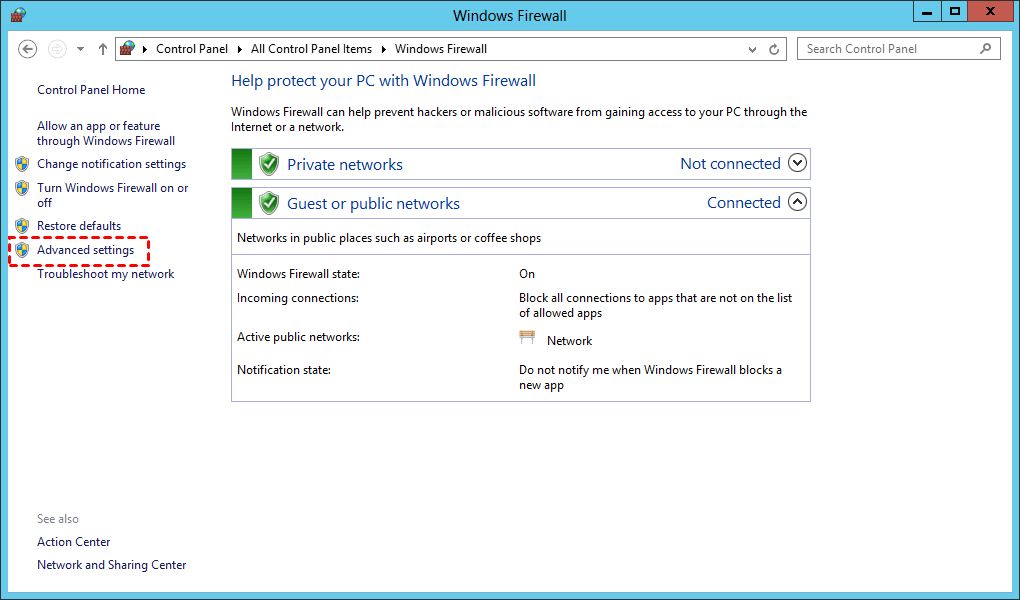
Step 1. Open Windows Firewall in Control panel, find and click Advanced settings in the left sidebar.
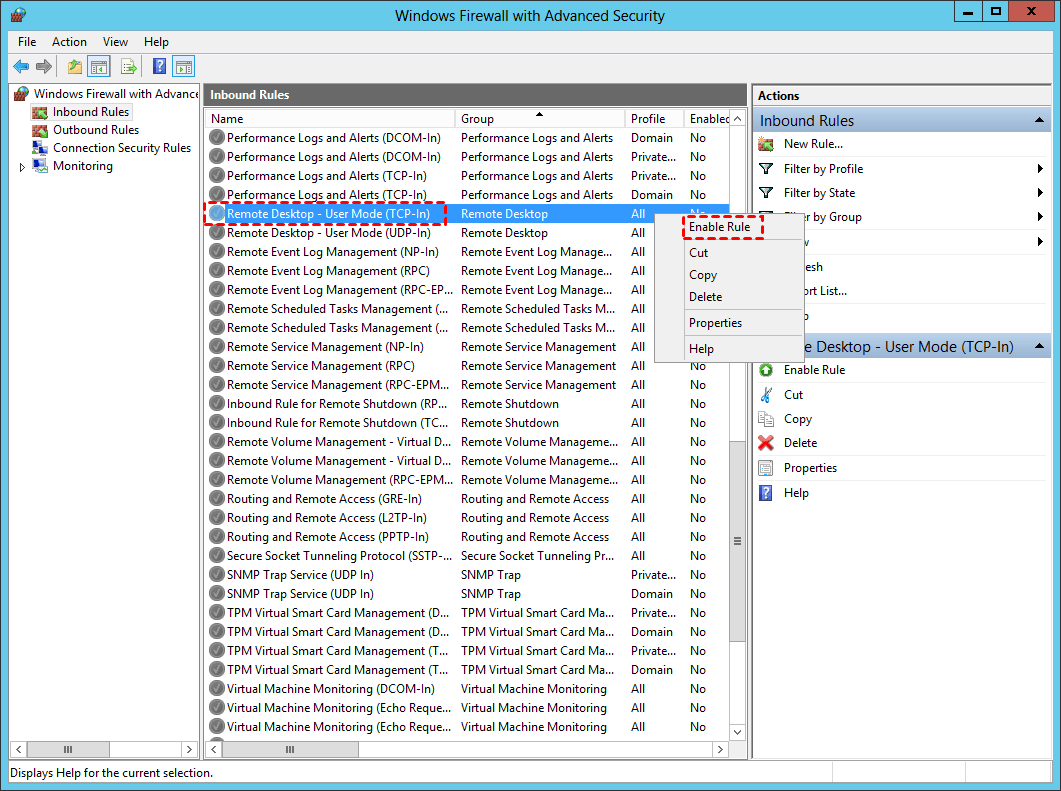
Step 2. Select Inbound Rules in the left sidebar, and then find Remote Desktop - User Mode (TCP in). Right-click the item, select Enable Rule in the expanded menu. After this, try the remote connection again.
In fact, the RDP setting method of the Windows Server operating system is the same. In other words, as long as you can fully understand how to set up RDP on Windows Server 2012 R2, you can also enable RDP on Windows Server 2016, Windows Server 2019 and Windows Server 2022.
As a completely free built-in remote connection tool, RDP can meet most of your needs. But its setup process is a little complicated for some users. Therefore, we recommend you to use AnyViewer, the professional remote control software for Windows.
An easier way of remote control on Windows Server 2012 R2: AnyViewer
As a free remote control software, AnyViewer is simpler in operation compared with RDP. It is compatible with multiple versions of Windows 11/10/8.1/8/7 and Windows Server 2022/2019/2016/2012 R2.
Compared with using RDP on Windows Server 2012 R2, you don’t need to query the IP address, user name, and password of the remote computer to achieve remote control with AnyViewer. In operation, AnyViewer is much easier.
Next, we will introduce how to use AnyViewer to achieve unattended remote access.
Step 1. Download, install, and launch AnyViewer on both computers.
Step 2. Go to Log in, and then click Sign up. (If you already have signed up on its official website, you can log in directly.)

Step 3. Fill in the signup information.

Step 4. Then you can see you successfully logged in to AnyViewer. Your device will automatically be assigned to the account you've logged in to.

Step 5. Log in to the same AnyViewer account on the two devices, then click One-click control to achieve unattended remote access.

- Notes:✎...
-
You can also upgrade your account to a Professional or Enterprise plan. What can a professional or enterprise plan brings to you:
- Faster file transfer speed. Transfer speed for a free account is 500 KB/s, and for a paid account is up to 10 MB/s.
- Increasing number of files transferred in bulk.
- Larger size of a single file that can be transferred.
- More devices can be assigned to the same account for unattended remote access.
- More Currently connected devices are displayed for management.
- Connect in privacy mode to protect privacy.
Conclusion
How to set up RDP on Windows Server 2012 R2? After reading this tutorial carefully, you may already know how to do it. But if you feel the setup process of RDP is too troublesome, you might as well try the free third-party remote control software AnyViewer.
