
Full Guide: How to Run PsExec in PowerShell
Do you know how to run PsExec in PowerShell? You need to set up PsExec tool on your computer, allow the Windows Firewall, and then you can use PsExec in PowerShell. This post offers a step-by-step guide with pictures. Let’s get started!
By AnyViewer / Updated on December 13, 2024
Scenario: Can PsExec be used in PowerShell?
I've looked around but can't find a way to do what I want. Can anybody tell me how to run PsExec in PowerShell? Thanks in advance.”
- Question from a user

What is PsExec?
PsExec is a command-line-based remote administration tool that enables the execution of processes on other systems by running the commands on Command Prompt or PowerShell. Unlike Telnet and RDP, PsExec will not require installing a client program on your PC or any other software on the remote host. Console program input and output can be redirected by PsExec.
In this guide, you will learn how to use PsExec in PowerShell.
How to run PsExec in PowerShell
PsExec is a handy tool to have as part of your IT Tools if you have a demand or a major problem. You can solve it with a single PowerShell script. Here is how to use PsExec to run PowerShell script.
Part 1. Requirements
You need a few things prepared to launch PsExec on the remote computer.
►Enable Windows Firewall
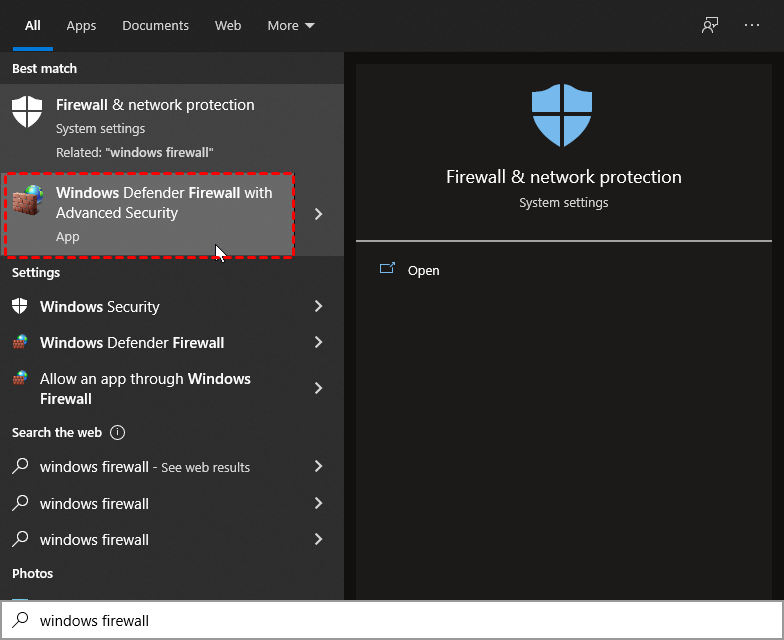
Step 1. Search for Windows Defender Firewall with Advanced Security and open it.
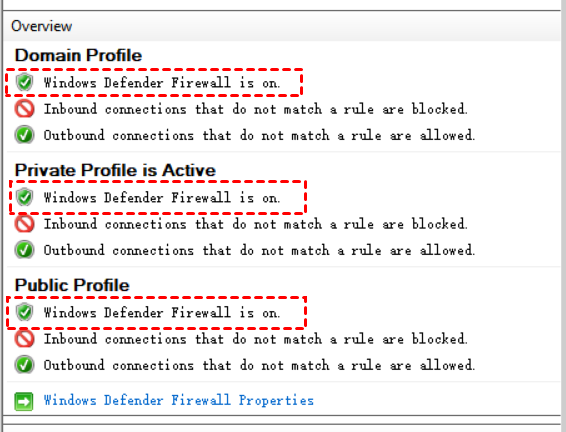
Step 2. Make sure the Firewall enabled for all domain, private, and public profiles.
►Open Port TCP/445and Port UDP/137on the remote computer
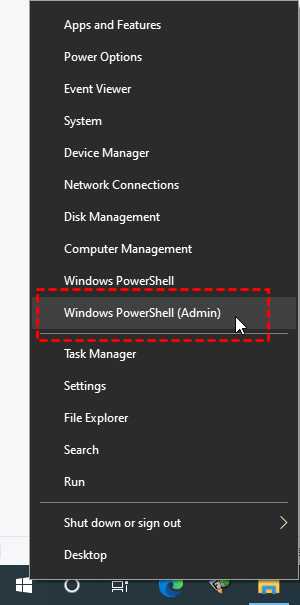
Step 1. Right-click the Start menu and open Windows PowerShell (Admin).
Step 2. Run the following command to enable Port TCP/445.
- New-NetFirewallRule -DisplayName 'TCP/445' -Profile @('Domain') -Direction Inbound -Action Allow -Protocol TCP -LocalPort @('445') -RemoteAddress 192.168.100.10
Replace “192.168.100.10” with your local IP address
Step 3. Run the following command to enable Port UDP/137.
- New-NetFirewallRule -DisplayName 'UDP/137' -Profile @('Domain') -Direction Inbound -Action Allow -Protocol UDP -LocalPort @('137') -RemoteAddress 192.168.100.10
Replace “192.168.100.10” with your local IP address
►Open Remote Service Management (Although it is not necessary, PsExec performs incredibly slowly if the firewall is activated and this service is blocked.)
Open the PowerShell and run the following command:
- Set-NetFirewallRule -DisplayGroup “Remote Service Management” -Enabled True -Profile domain -RemoteAddress "192.168.100.10"
Replace "192.168.100.10" with your local IP address
Part 2. Set up PsExec on your local computer
Then you need to download, install, and test PsExecon your local computer.
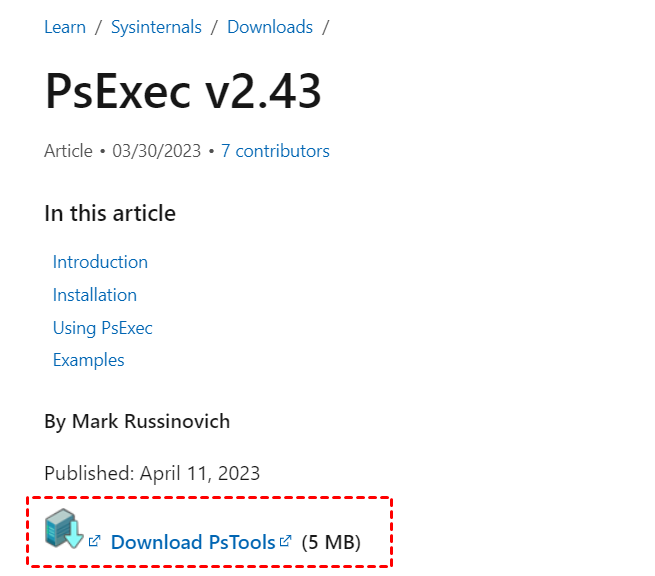
Step 1. Download the latest version of PsExec.
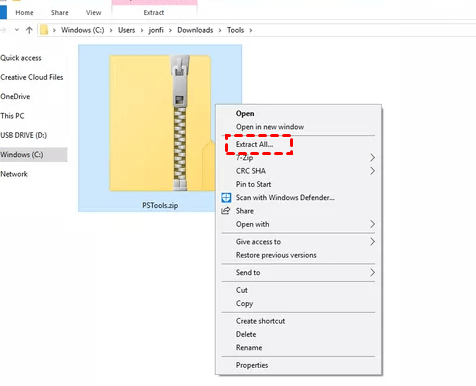
Step 2. Extract the download file and go to the path the PsExec folder located.
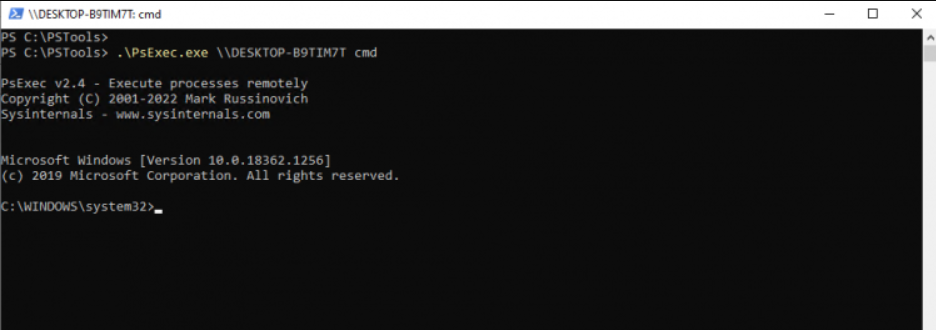
Step 3. Run the following command in PowerShell to verify that you can log in using PsExec on a remote computer.
- .\PsExec \\ cmd
You'll see something like this if you don't have a firewall rule blocking psexec.
An access error like the one below will appear if the firewall blocks psexec.
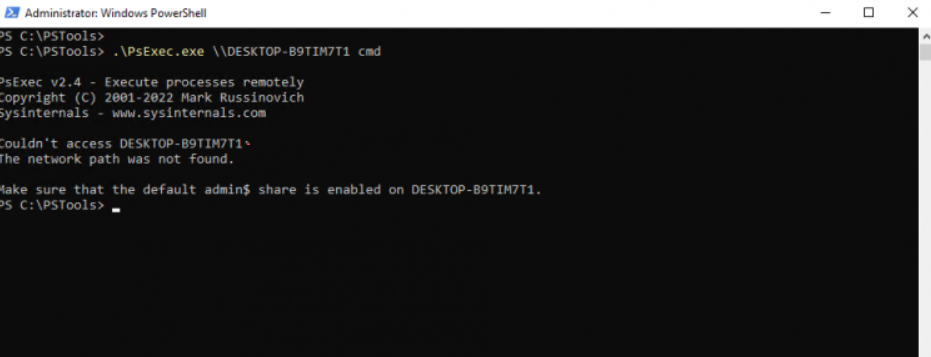
The only option if the remote computer's Windows Firewall prevents PsExec from being used is to accept PsExec in Windows Firewall from the remote computer manually.
Part 3. Use PsExec in PowerShell
Now you can execute PowerShell commands on the remote computer with the help of PsExec.
The basic syntax is:
- psexec \\remotecomputer command [arguments]
Let's take some common situations as examples.
Situation 1: Run command on a remote computer
To run the ipconfig command on a remote computer named pc1, input the following command:
- psexec \\pc1 ipconfig
Situation 2: Run command on multiple remote computers
To run command on multiple computers, you need to separate the devices with a comma. Here is the command to run ipconfig on pc1 and srv-vm1:
- psexec \\pc1,srv-vm1 ipconfig
Situation 3: Use specify username and password
Use this command to establish a connection to a remote computer using an identified usernameand password:
- psexec \\pc1 -u user -p password ipconfig
Situation 4: Terminate process on a remote computer
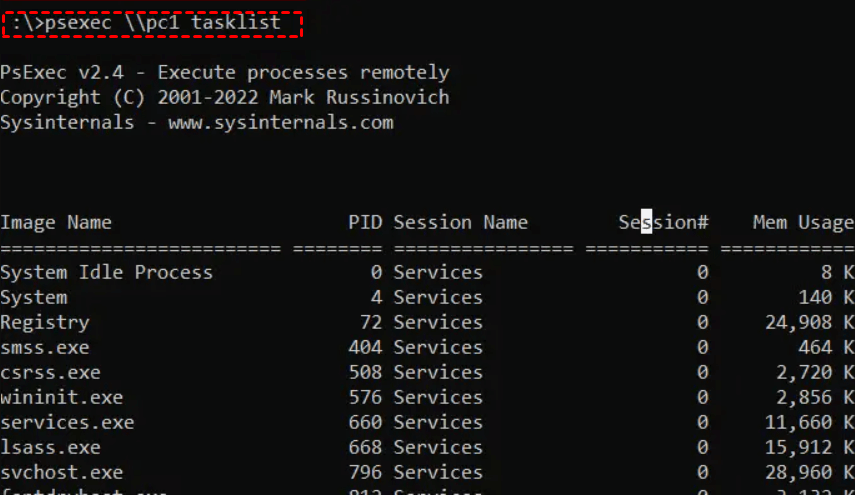
Step 1. To terminate a process on the remote computer, you first need to enter the following command to get the process PID from the tasklist.
- psexec \\pc1 tasklist
Step 2. Find its PID number and run the following command:
- psexec \\pc1 taskkill /pid 2892 /f
Situation 5: Install software remotely
To install software on the remote computer, you need to copy the installation file to the remote computer. For example, use this command to copy the file 7zip on the computer pc1.
- psexec \\pc1 msiexec.exe /i "c:\it\7z2201-x64.msi"
Situation 6: Remote reboot the remote computer
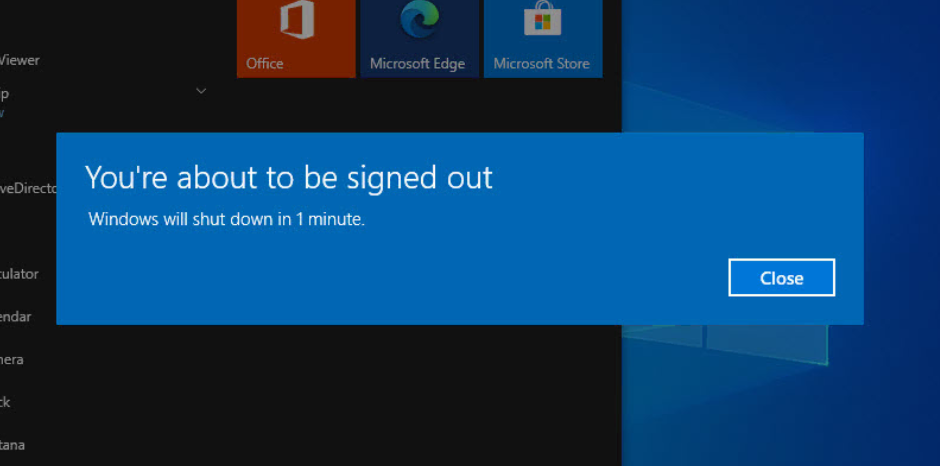
You can use this command to restart a remote PC. For example, you are going to restart the pc1 in 60 seconds.
- psexec \\pc1 shutdown /r /t 60
Then the remote computer will get a message saying the computer will restart.
Situation 7: Delete a file from the remote computer
For example, if you want to delete the file users.txt from the remote computer, enter the following command:
- psexec \\pc1 cmd /c del /f c:\it\users.txt
Situation 8: Open Command Prompt on remote computer
You can open the Command Prompt on the remote computer with this command:
- psexec \\pc1 cmd
Situation 9: Start a program on remote computer
The -i option allows you to open a program on the remote computer. For example, if you are going to open notepad on the remote computer, input the following command:
- psexec \\pc1 -i notepad
We mentioned nine useful commands, and you can also run other commands to manage the remote computer as long as you send the correct syntax.
Bonus tip: An easier way to manage your remote computer
Run PsExec in PowerShell requires specific IT knowledge, or you may get errors due to the wrong command. Besides, since many hackers used the PsExec tool, a lot of antivirus programs may block it as a trojan. Therefore, we recommend using professional remote desktop software to manage your remote computer easily. You can use AnyViewer, which allows you to remotely control a computer like you were sitting in front of it.
With AnyViewer, you can quickly start or terminate a program on the remote desktop without sending the PowerShell commands. You can also reboot the computer with one click. In short, you can do anything you want on your remote computer.
AnyViewer has easy operations and high-level security, and you only need to create an account for unattended remote access. The whole session will be protected by strong 256-Bit Elliptic Curve Cryptography (ECC) algorithm.
Download AnyViewer on your devices and see how to use it:
Step 1. Sign up for a new account on the host server by clicking Sign up, then log in.

Step 2. On the client computer, log in with the same account you used on the host computer.

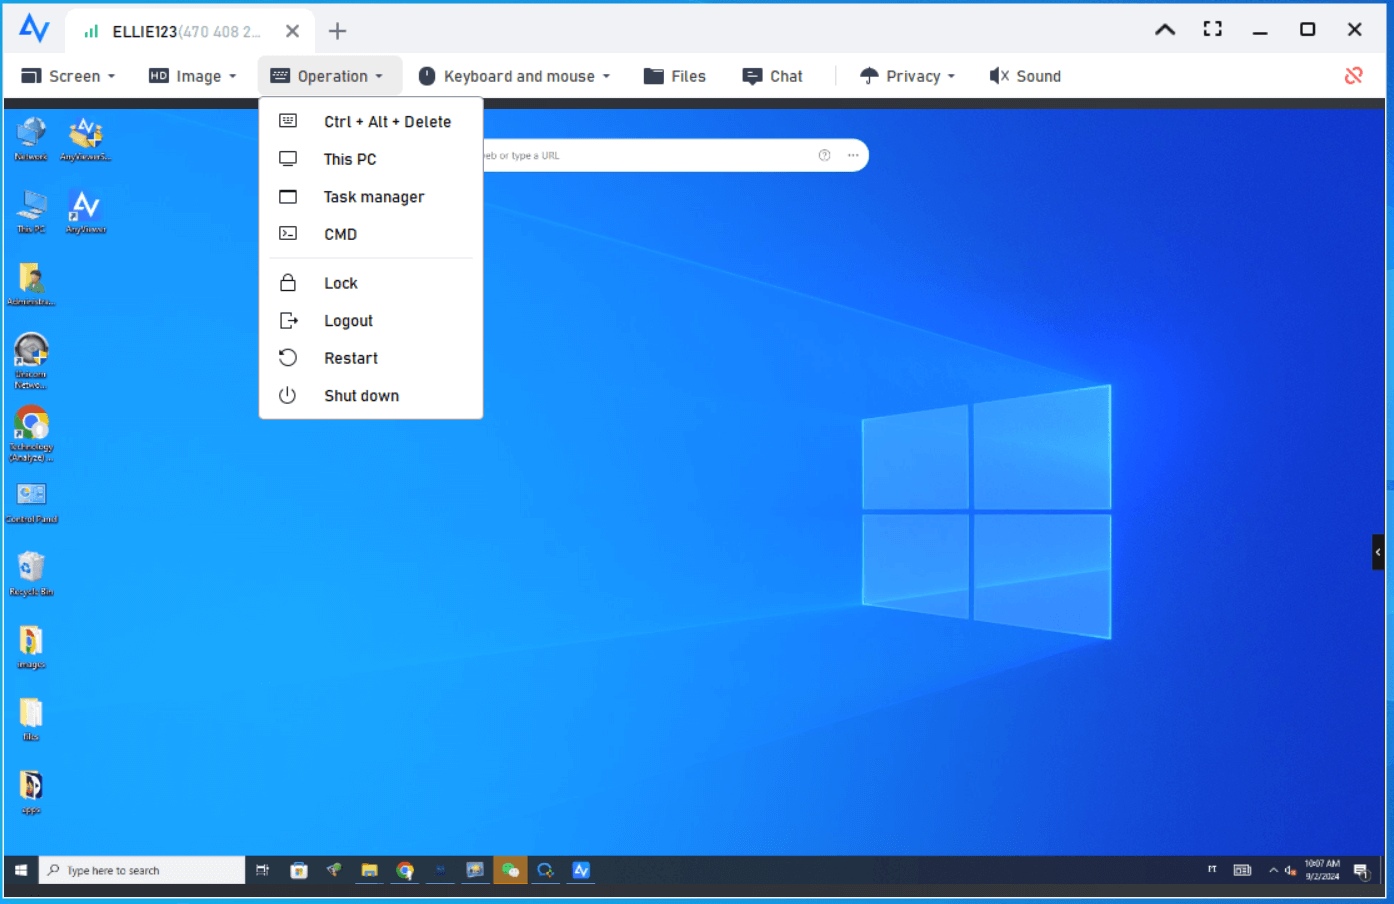
Step 3. Visit the Device interface to see the list of your assigned devices. Select the device you want to connect to and click One-click control.

You can now control the computer from a distance as if sitting in front of it. On the upper toolbar, there are a lot of handy options. File transfer, chat, run CMD, and more.
- ★Tips: AnyViewer also provides affordable subscriptions for business use. For extra rights, you can enroll in the Professional or Enterprise plan!
- Up to 100 designated devices can be set up for one-click control.
- Access in privacy mode which enables blacking the physical screen and disabling the physical keyboard of the remote device.
- Enjoy high-quality images.
The bottom line
That’s all for how to run PsExec in PowerShell. We just mentioned a few examples of situations in which PsExec and PowerShell can be combined. Once you start utilizing them yourself, you'll see no end to what they can do. Suppose you are not familiar with those commands. In that case, you can also use remote desktop software AnyViewer, which offers an easier way to remotely manage device, software, troubleshoot problems, and much more.
