
Four ways to Disable Network Level Authentication on Windows 10, 11
Did you encounter Network Level Authentication problem and need to disable it when using RDP? Don’t worry, here we provide you with four ways to disable Network Level Authentication on Windows 10 to ensure RDP works normally.
By Ellie / Updated on December 13, 2024
How can I disable Network Level Authentication on Windows 10?
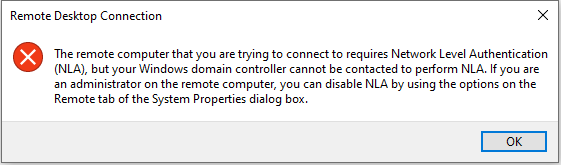
I’m in desperate need of assistance! When I tried to use RDP on my Windows 10 computer, I received the following error notice. According to it, the issue could be remedied by disabling Network Level Authentication. So, could someone please explain to me how to turn off Network Level Authentication in Windows 10?”
- Question from Reddit
Four ways to disable Network Level Authentication on Windows 10, 11
When Network Level Authentication is enabled, users may encounter a “The remote computer requires Network Level Authentication” error, which is pretty much annoying. Therefore, there are different ways to disable Network Level Authentication on Windows 10. Here we listed four methods and their detailed operating steps.
Method 1. Disabling NLA using Properties
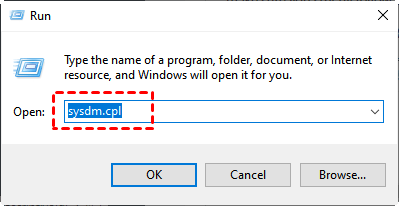
Step 1. Press Win + R to invoke the Run dialog box. Then type in “sysdm.cpl” and hit OK to open System Properties.
Step 2. Go to the Remote tab and uncheck Allow connections only from computers running Remote Desktop with Network Level Authentication (recommended).

Method 2. Disabling NLA using Registry
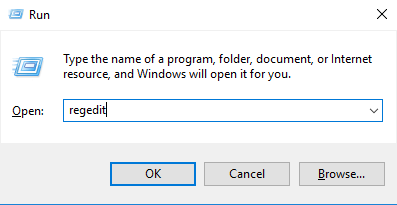
Step 1. Open the Run dialog box and then type in “regedit” to open the Registry Editor.
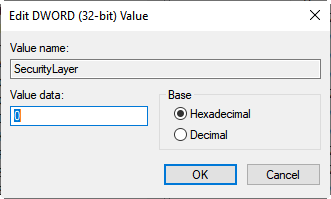
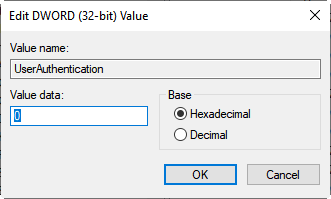
Step 2. Navigate here: HKEY_LOCAL_MACHINE > SYSTEM > ControlSet001 > Control > Terminal Server > WinStations > RDP-Tcp. On the right pane, find SecurityLayer and UserAuthentication.
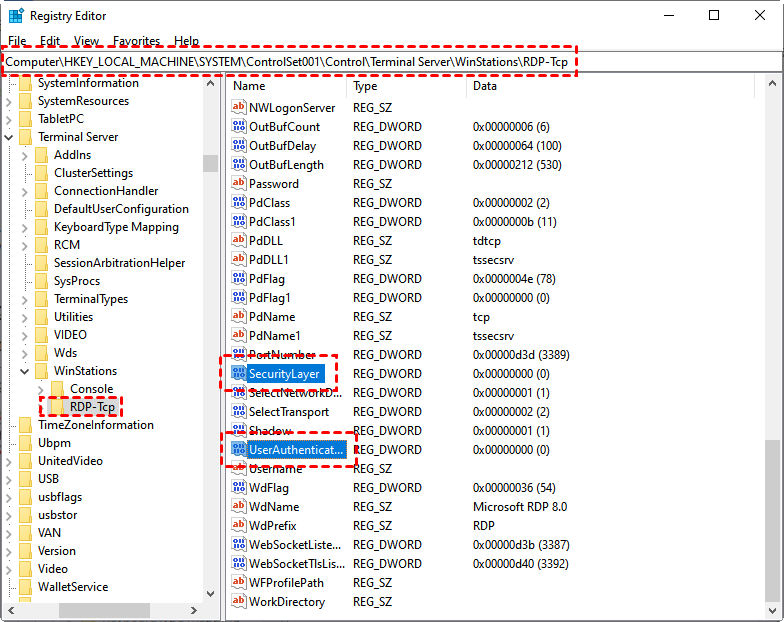
Step 3. Double-click SecurityLayer and UserAuthentication, then set their values to 0 respectively.
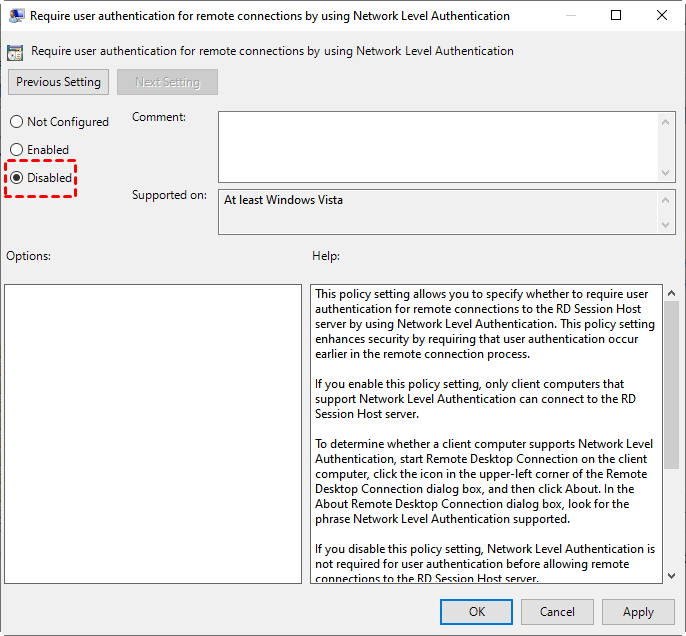
Method 3. Disabling NLA using Group Policy Editor
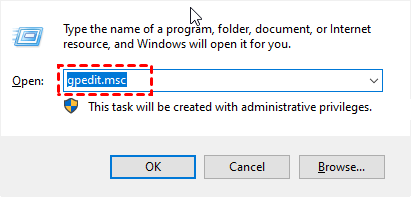
Step 1. Open Run dialog and then type in “gpedit.msc” to open the Local Group Policy Editor.
Step 2. Navigate here: Computer configuration > Administrative Templates > Windows Components > Remote Desktop Services > Remote Desktop Session Host > Security. On the right pane, find Require user authentication for remote connections by using Network Level Authentication.
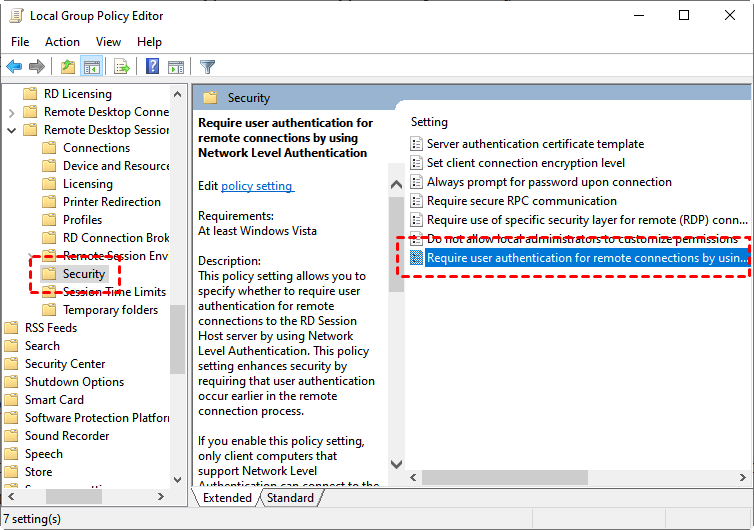
Step 3. Double-click it and then set it to Disabled.
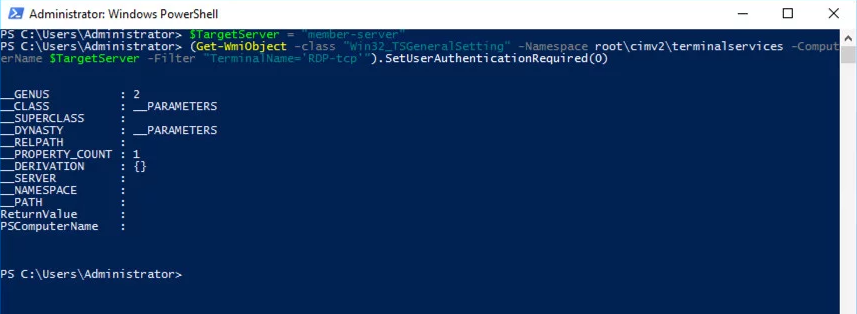
Method 4. Disabling NLA using PowerShell
If you want to disable NLA on the remote computer from the local computer, you can use PowerShell. Here’s how to do it.
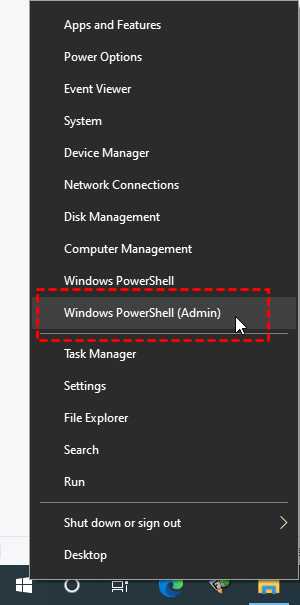
Step 1. Right-click Start, then choose Windows PowerShell (Admin).
Step 2. In the PowerShell, execute the following command:
$TargetMachine = “Target-Machine-Name”
(Get-WmiObject -class “Win32_TSGeneralSetting” -Namespace root\cimv2\terminalservices -ComputerName $TargetMachine -Filter “TerminalName=’RDP-tcp'”).SetUserAuthenticationRequired(0)
Replace the “Target-Machine-Name” with the name of the remote computer. For example, if the name of the remote computer is “member-server”.
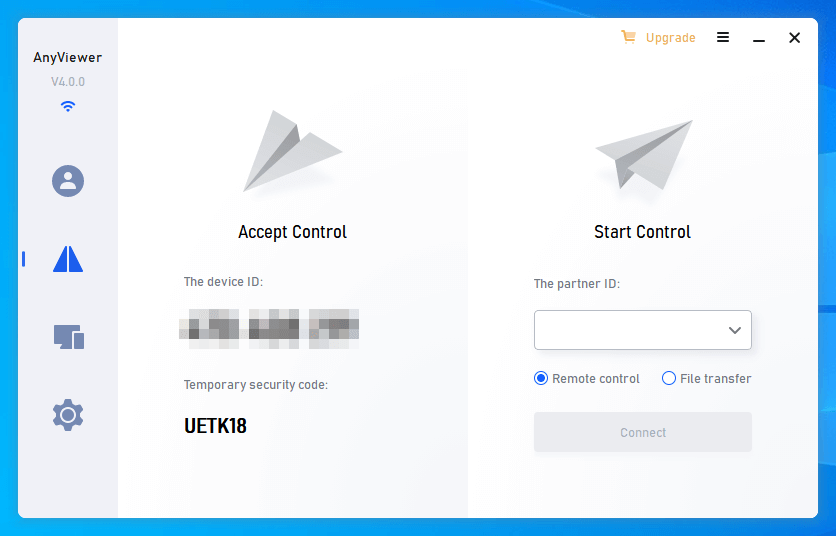
AnyViewer: Secure & stable remote desktop software
If you have ever encountered an RDP problem as we mentioned at the beginning of this post, you need to disable Network Level Authentication to make RDP work normally. However, NLA was designed to allow users who have authenticated themselves to the network before they can connect to your computer, so as to protect your computer. Once you disable it, your computer will be at risk of malicious users and software.
But don’t worry, you can choose a secure remote desktop software to protect the safety of your computer when remotely accessing another computer. For example, AnyViewer. It is secured by Elliptic Curve Cryptography (ECC) encryption and maintained by a strong technical team, protecting your computer from malicious attacks. Let’s start our secure remote connection.
Part 1. For unattended remote access with one-click
Step 1. Download, install and launch AnyViewer on both computers. Go to Log in, and then click Sign up. (If you already have signed up on its official website, you can log in directly.)

Step 2. Fill in the signup information and you can see you successfully logged in to AnyViewer. Your device will automatically be assigned to the account you've logged in.

Step 3. Log in to the same AnyViewer account on the two devices, then you can achieve a direct connection by clicking One-click control.

✍ Upgrade to Professional or Enterprise plan. Then you'll have the following rights:
◆ Assign more devices to achieve unattended remote access to more devices.
◆ Connect to another computer in privacy mode, which means you can black the screen and block the mouse and keyboard of the remote computer.
◆ Transfer files at a faster speed. Transfer speed for a free account is 500 KB/s, and for a paid account is up to 10 MB/s.
◆ ...
Part 2. Two connection methods of AnyViewer
If you do not want to log in to the same account on the two devices for any reason, we also provide you with other two connection methods. But you should note that you're unable to enjoy some features, for example, transferring files between computers using these two connection methods, as they are designed for logged-in users.
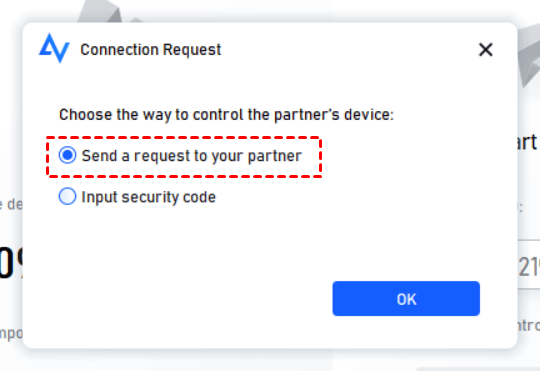
Connection method 1. Send a control request
Step 1. On the client computer, input the device ID of the host computer and then click Connect.
Step 2. Click Send a control request to your partner.
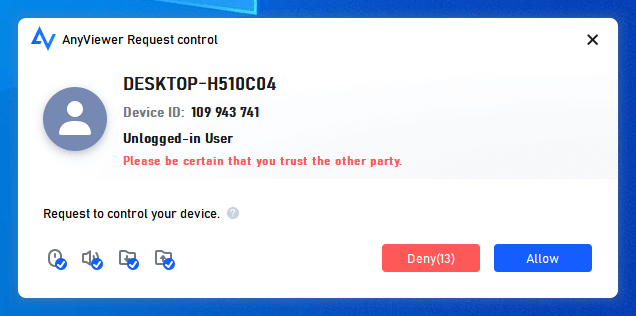
Step 3. On the host computer, click Allow to make the connection successful.
Connection method 2. Input security code
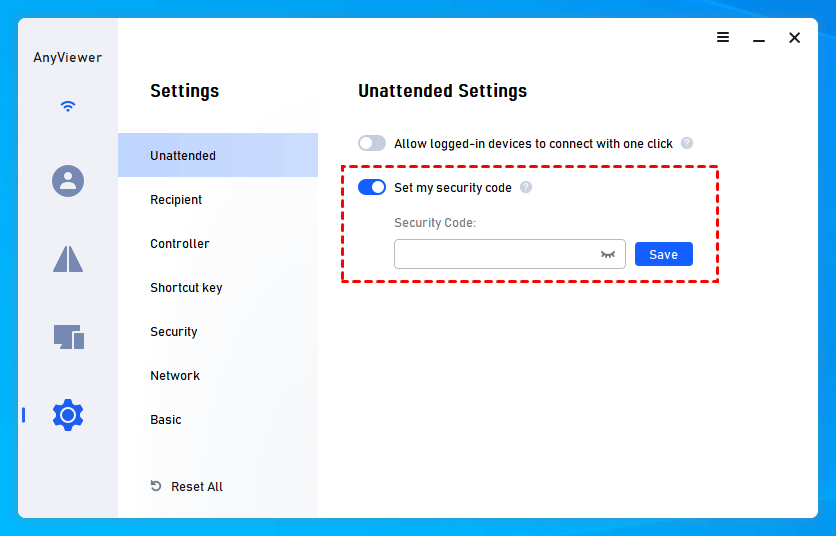
Step 1. On the host computer, go to Settings > Recipient. Tick the third option and then set the permanent security code.
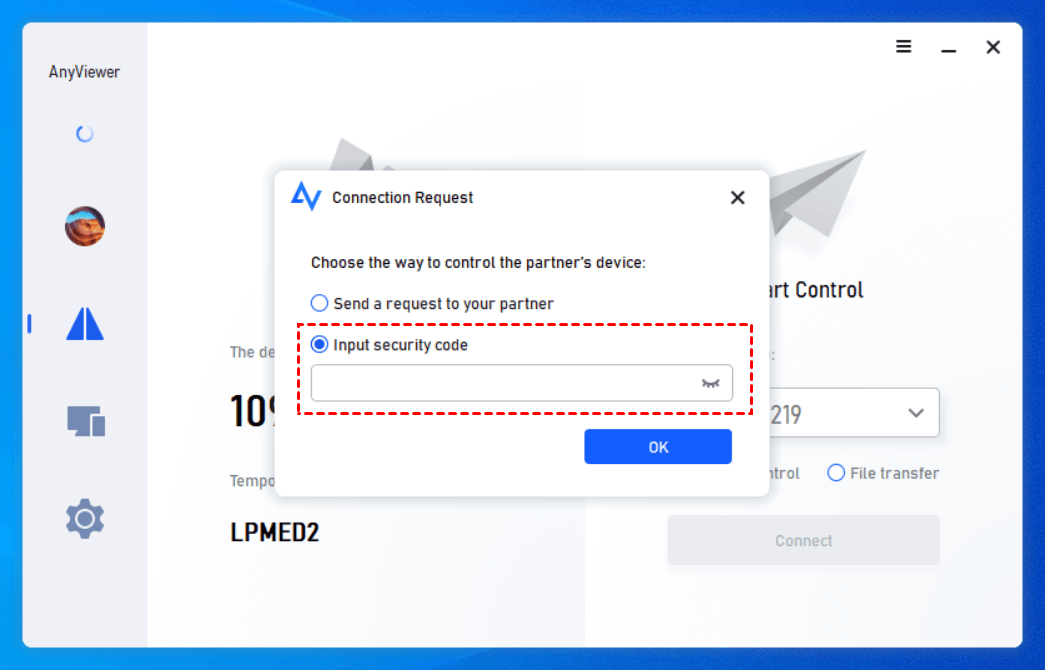
Step 2. On the client computer, input the device ID of the host computer and then click Connect. Choose Input security code and enter the code. Click OK to achieve remote access.
Conclusion
How to disable Network Level Authentication on Windows 10? In this post, we’ve introduced four different methods. But remember, disabling NLA may make your computer vulnerable to malicious users and software. If you want secure remote connections, you can use the third-party remote desktop software, AnyViewer, which can protect your computer and meanwhile, provide you with fast and stable connections.
