
Tutorial: How to Copy Files Over an RDP Connection to Your VM
This post is a tutorial on copy files over an RDP connection to VM. To perform this task, you need to select drives on RDP and then connect to your VM using RDP. Besides, we also introduce you to another easier way to transfer files between devices.
By AnyViewer / Updated on December 13, 2024
How do I copy files to a virtual machine remotely?
I have enabled Remote Desktop on my computer, can anybody help me with how I copy files to a virtual machine remotely using RDP?”
- Question from a user

How to copy files over an RDP connection to your VM
Virtual Machine (VM) is a hypervisor-based encapsulation of a computer or server that supports building and deploying apps to the cloud, storing files in the virtual disk, etc. To store files from host, we will introduce how to copy files over an RDP connection to virtual machine in the following part.
Make sure you enabled Remote Desktop and let’s get started.
Part 1. Confirm shared drives on RDP
To copy files over an rdp connection to your VM, firstly you need to select the target drives that can be accessed during the session.
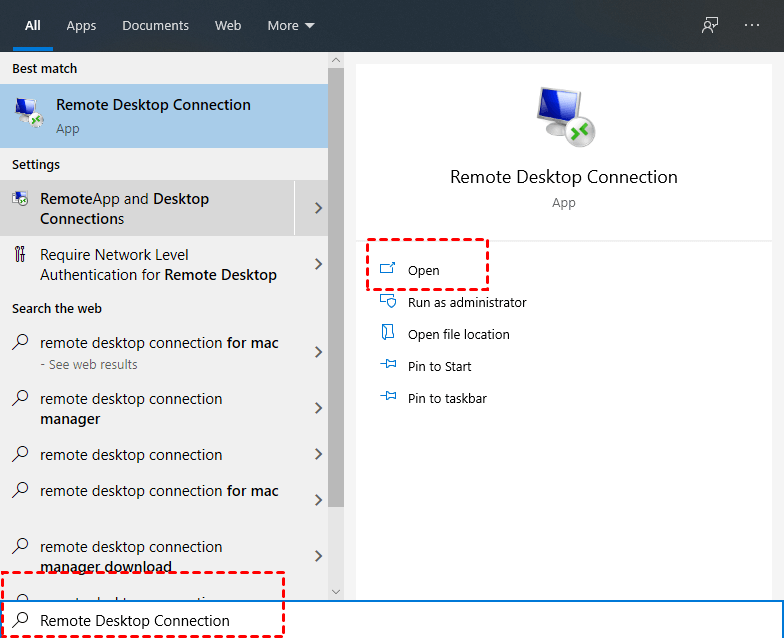
Step 1. On your computer, search for Remote Desktop Connection in the Search box and then click Open.
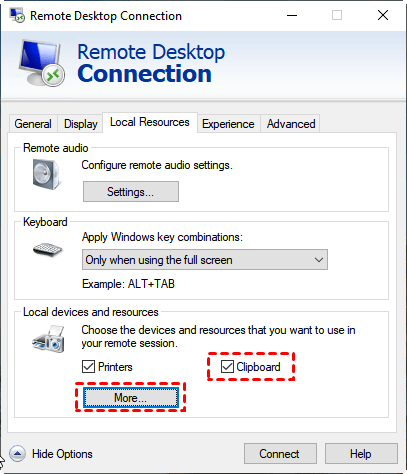
Step 2. Click Show Options and select Local Resources, and then click the button More in the last section. Please also make sure that the Clipboard option is ticked (copy and paste files will fail if the RDP clipboard is not working).
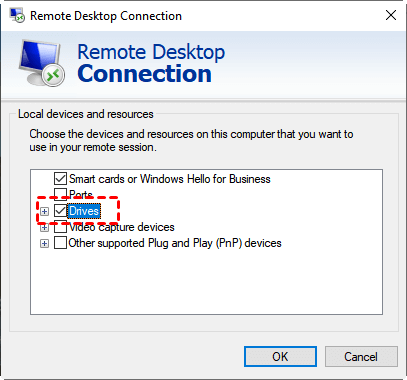
Step 3. Click “+” beside Drives and then select the drives you want to use and then hit OK.
Part 2. Copy files to VM via RDP
After confirming target drives on RDP, follow the next steps to connect to VM and copy files.
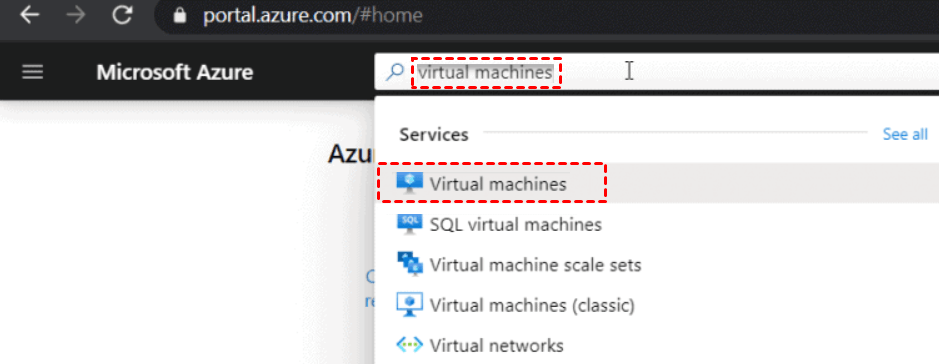
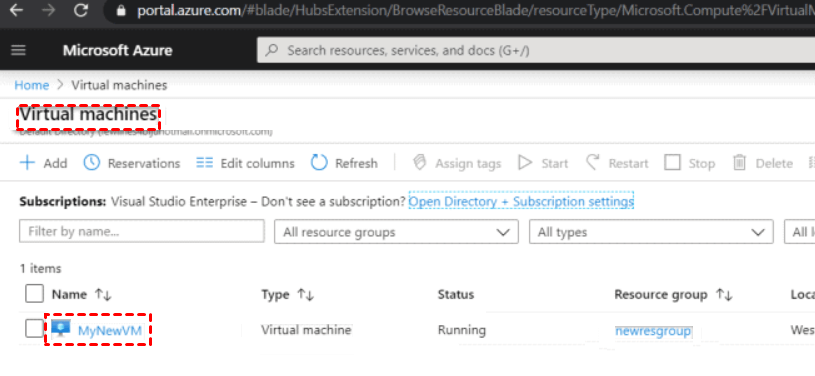
Step 1. Search and select Virtual machines in the Azure portal.
Step 2. A list of the VMs that have been generated in your Azure subscription will appear. Click MyNewVM.
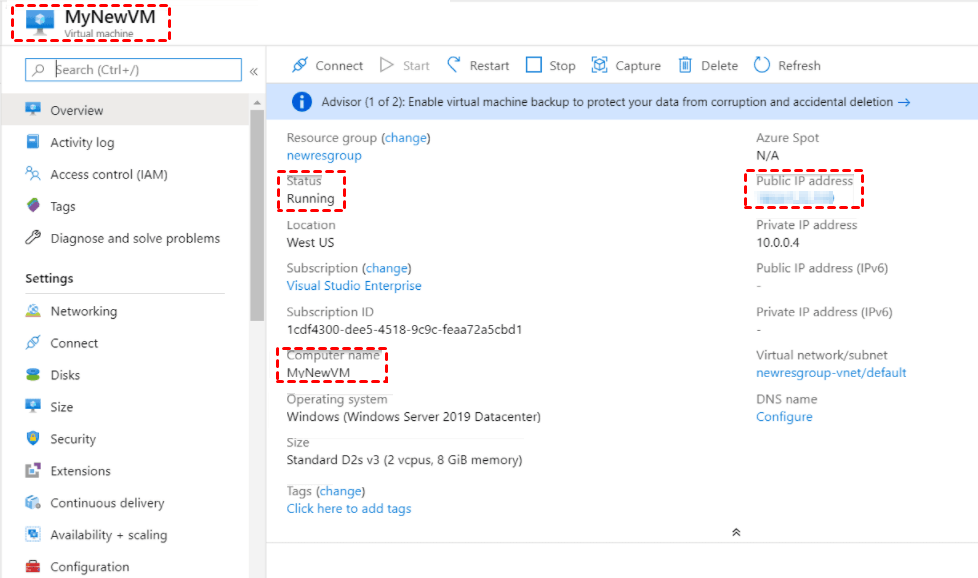
Step 3. Now you can see the details of your VM like status, Public IP address, Computer name, etc.
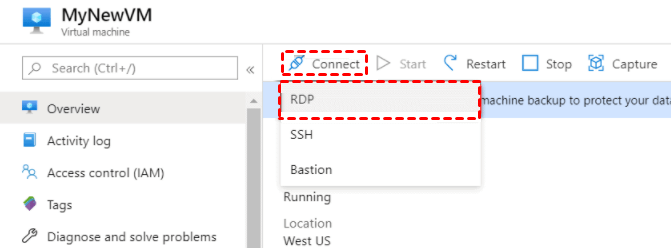
Step 4. Click Connect in the upper toolbar and then select RDP.
Step 5. Check the IP address and port number of your virtual machine. Click Download RDP File if they are right.

Step 6. Open the downloaded RDP file and then click Connect.
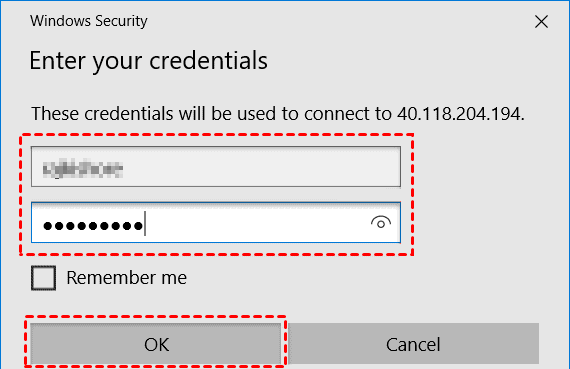
Step 7. Enter your credentials and then click OK.
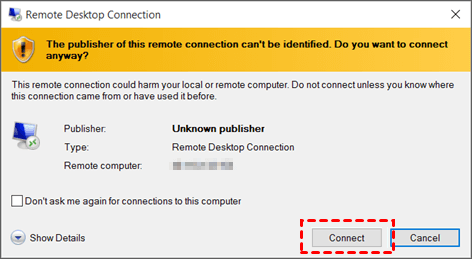
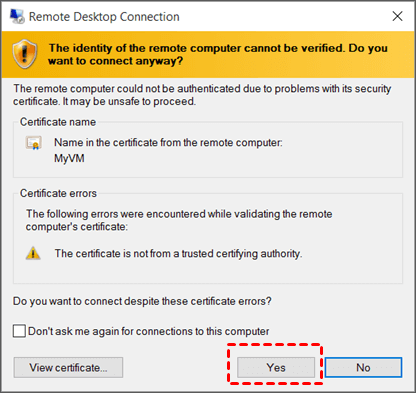
Step 8. Click Yes to connect to your virtual machine.
Step 9. After connecting successfully, go to Windows Explorer on your VM, the local drives that you selected on your local computer are available there. Then you can copy files over an RDP connection to your VM.
RDP alternative: Transfer files to VM in an easier way using AnyViewer
You may feel confused transferring files to physical machines or virtual machines via RDP for its complicated settings. If you are seeking an easier way to transfer files between devices, we recommend you use a free file transfer tool without restrictions. AnyViewer is a professional RDP alternative that is highly appreciated for the following advantages.
- Easy-to-use. It has a simple interface and easy operations to transfer files without limitations.
- Fast. It has a fast file transfer speed, for example, it only costs about 20 seconds to transfer a 2 GB zip file when both computers are on LAN.
- Compatible. It supports several Windows versions, including Windows OS and Windows Server OS, while RDP does not support Windows Home editions.
- Multi-function. In addition to file transfer, AnyViewer also allows you to share screen, manage your computer remotely, communicate via the chat box in a remote session, etc.
- Secure. It is secured by Elliptic Curve Cryptography (ECC) encryption, preventing your data loss during the whole remote session.
- Multi-session. AnyViewer supports multiple remote desktop connections to one PC, while for RDP, you need to buy more CALs to have multiple connections.
Download and install AnyViewer on both your local computer and virtual machine, then follow the next steps to transfer files.
Step 1. On the host PC, go to Log in interface and then click Sign up (log in directly if you have already signed up).

Step 2. Fill in the sign up information.

Step 3. When you successfully logged in to AnyViewer, your devices are automatically assigned to the account you’ve logged in to.

Step 4. On the client PC, go to the Device interface to choose the target device you want to achieve file transfer, and then click File transfer.

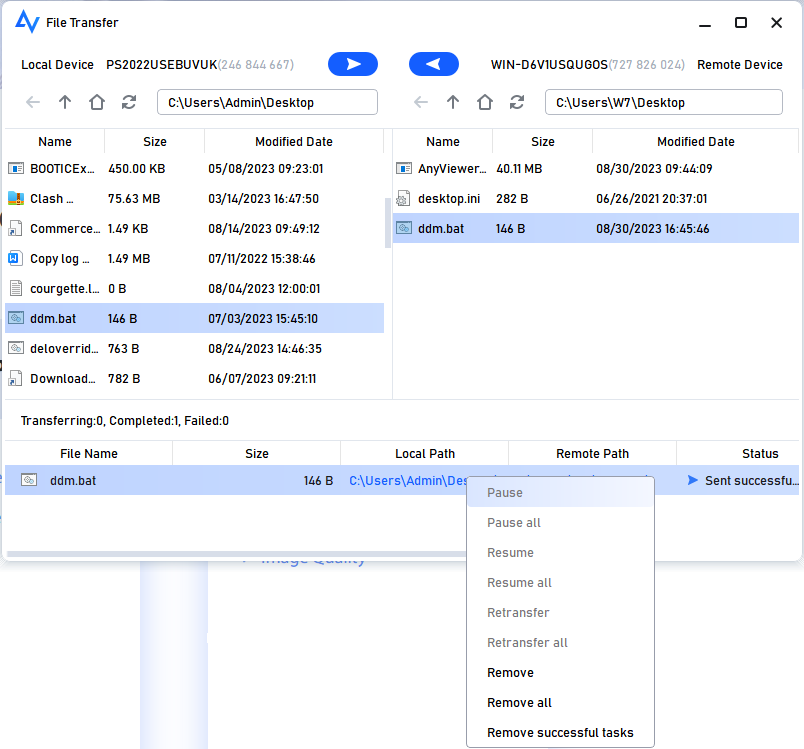
Step 5. Now you can see a File Transfer dialog box. The host PC is displayed there on the left of the box, while the client PC is displayed there on the right. To send the selected files to the client PC, click the right arrow after selecting the files you wish to send. To transfer files to the host PC, select the files and click the left arrow on the opposite side.

The transfer status is at the bottom of the box. Right-click to pause or remove the tasks.
- ✍ Notes: AnyViewer file transfer support for a single file smaller than 100 MB for the free account, and you can transfer no more than 100 files per time. Upgrade to a Professional or Enterprise plan to transfer larger files. Then you'll have the following rights:
- Transfer multiple files at once.
- Assign more devices to the same account to achieve direct file transfer.
- Connect to distant computers in privacy mode so that you can disable the remote device’s keyboard and mouse and completely black out its screen.
- Speedier file transfer speed. Transfer speed for a free account is 500 KB/s, and for a paid account is up to 10 MB/s.
Conclusion
You might have understood how to copy files over an RDP connection to your VM after reading this page. However, the procedure to do this work is complex. Therefore, AnyViewer would be your ideal option if you want to transfer files more quickly and easily.
