
Fixed: Remote Connection Fails Because of a Security Error RDP
Does your remote connection ever fail because of a security error on RDP? Don’t worry, we introduce three ways in detail to help you troubleshoot the Remote Desktop connection problem.
By Ellie / Updated on December 13, 2024
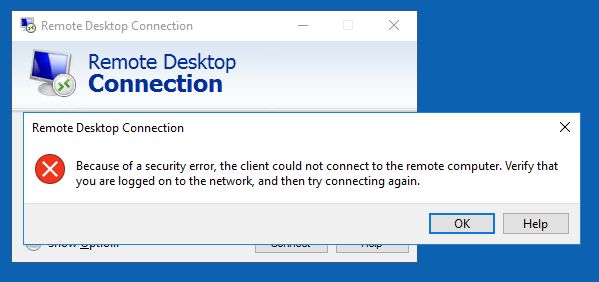
The issue: Because of a security error on RDP
“I’m the IT Manager for a firm with five offices, and we usually use Remote Desktop to connect to our office servers. Recently, I have had a computer having an issue getting into one server. When I type in the IP address and user name and try to connect, I get the error message: ‘Because of a security error, the client could not connect to the remote computer.’ Any thoughts on what could cause this? Thanks for your time.”
Three confirmed solutions to fix Because of a security error
"Because of a security error" on Remote Desktop Connection is a typical RDP problem. Don't worry, here in this post, we provide you with three solutions to help you easily fix the "Because of a security error on RDP".
Solution 1. Disable the firewall rules
The main function of the Windows Defender Firewall is to manage incoming and outgoing connection requests. In some cases, it may block RDP connection requests. Therefore, we need to disable it to fix the problem.
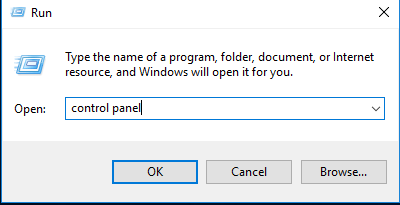
Step 1. Press Win + R and then type in “control panel” and hit OK to open Control Panel.
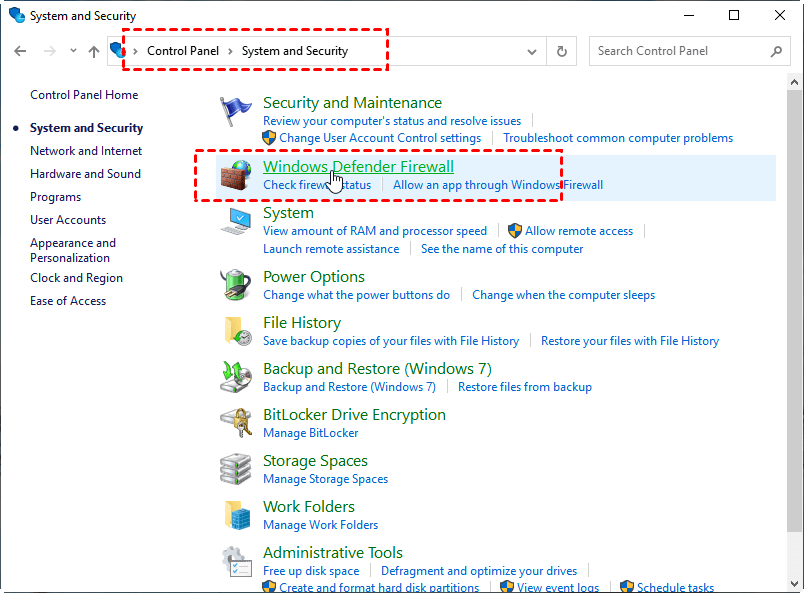
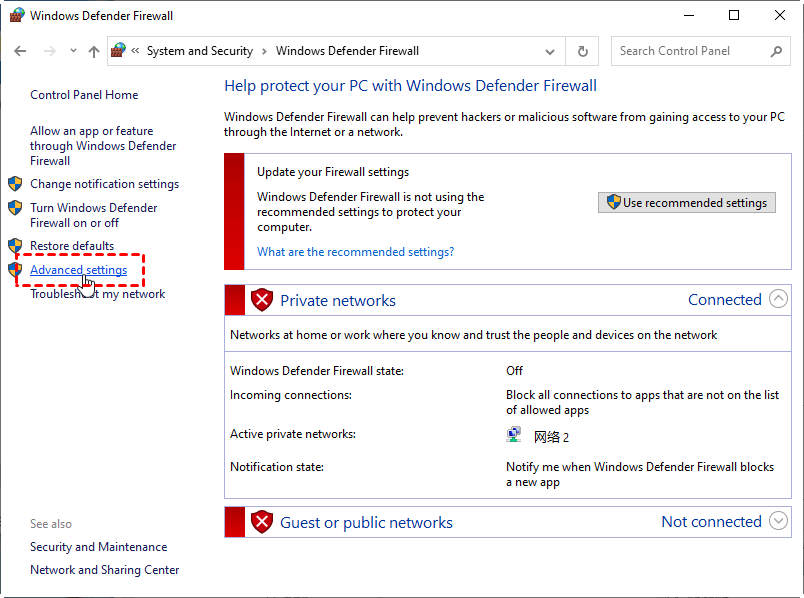
Step 2. Navigate here: Control Panel > System and Security > Windows Defender Firewall.
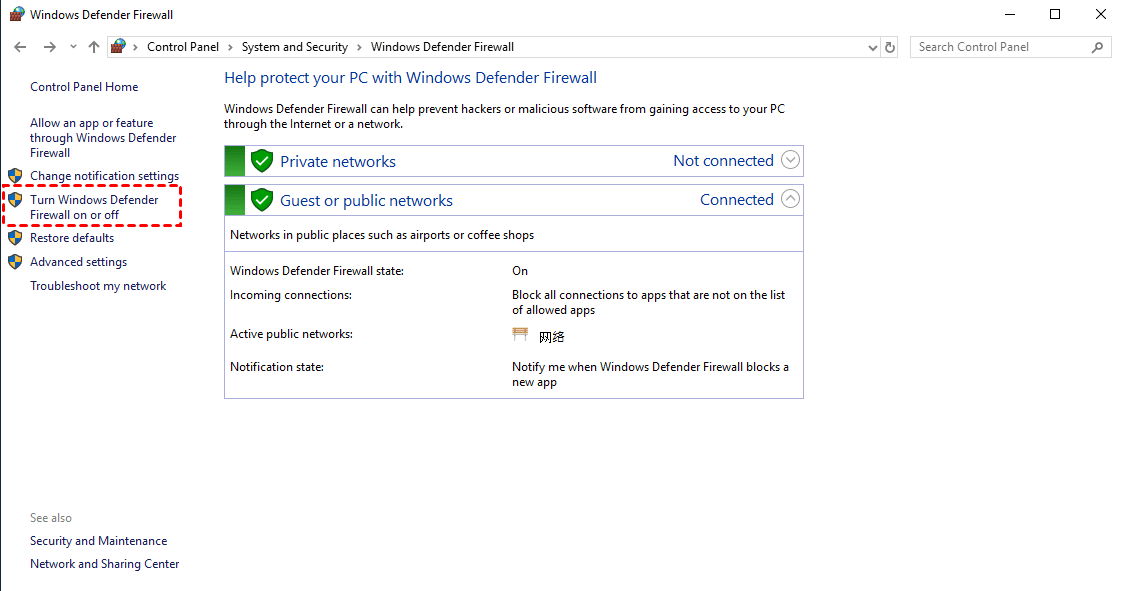
Step 3. Click Turn Windows Defender Firewall on or off in the left sidebar.
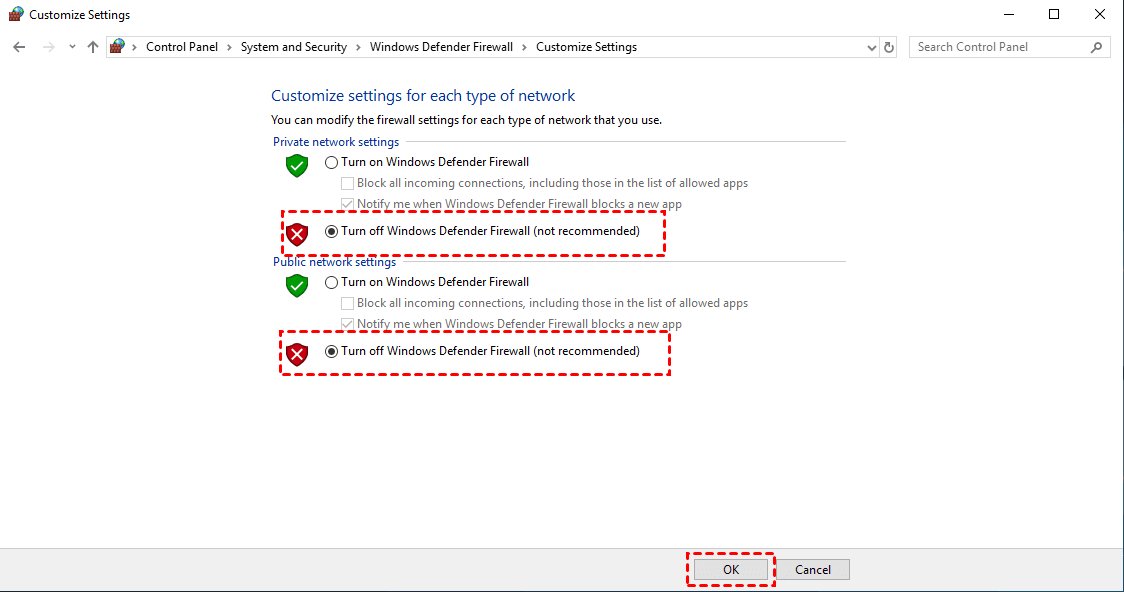
Step 4. Select Turn off Windows Defender Firewall under the Private network settings, and select Turn off Windows Defender Firewall under the Public network settings.
Step 5. Then go back to the Windows Defender Firewall page, find and click Advanced settings.
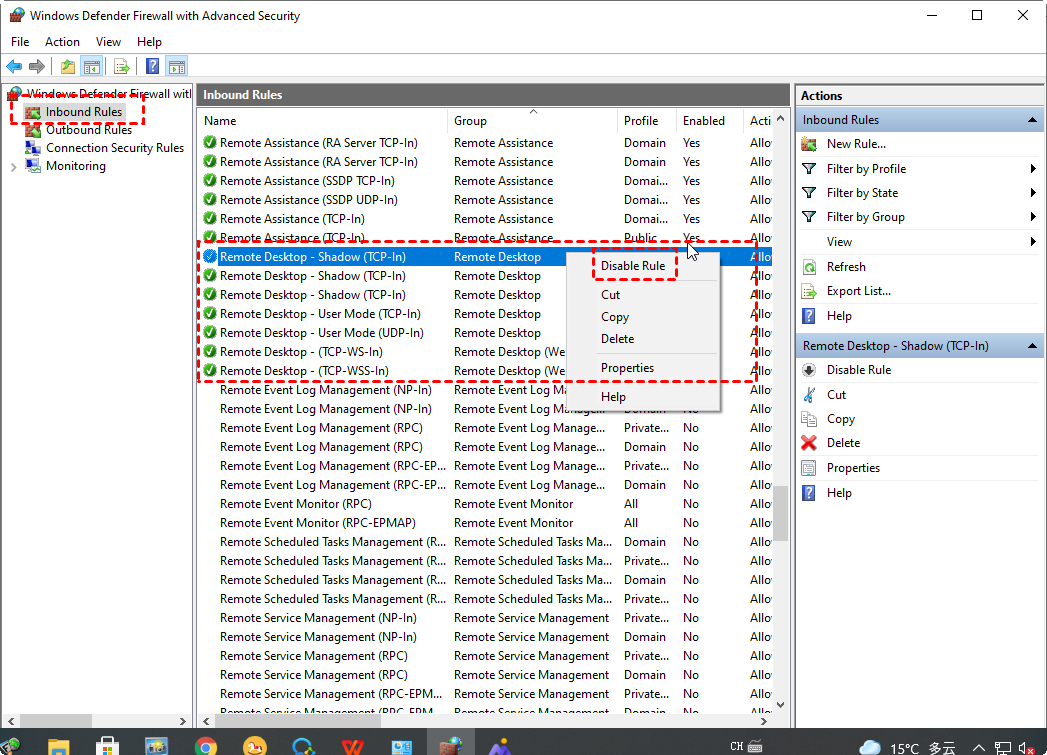
Step 6. Click Inbound Rules, right-click the items related to Remote Desktop and select Disable Rule in the expanded menu. After this, try the remote connection again.
Solution 2. Delete Registry values
This “Because of a security error on RDP” issue may occur if a certificate on the Remote Desktop server is corrupted. To solve the problem, you can delete the corrupted or misplaced certificate.
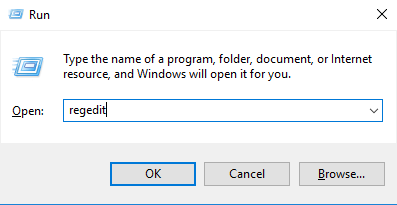
Step 1. Invoke the Run dialog box and then type in “regedit” and hit OK to open Registry Editor.
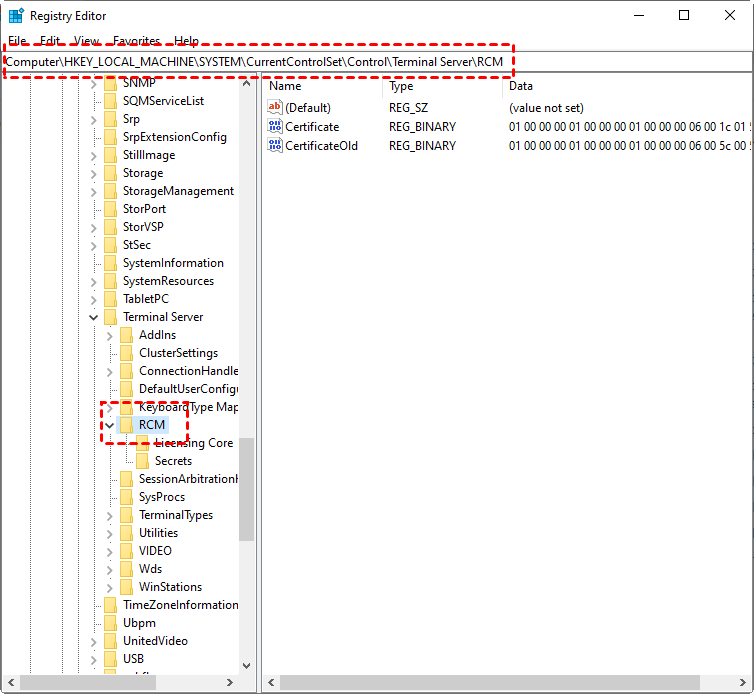
Step 2. Navigate here: Computer > HKEY_LOCAL_MACHINE > SYSTEM > CurrentControlSet > Control > Terminal Server > RCM.
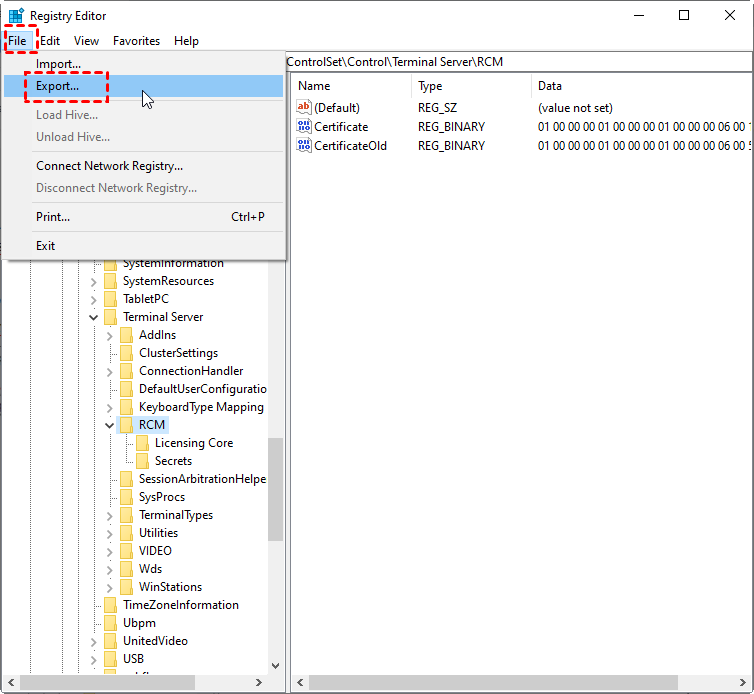
Step 3. Click File and then Export to export the Registry File, type exported-Certificate in the File name box, and then click Save.
Step 4. On the right pane of the RCM, right-click each of the following values, click Delete, and then click Yes to verify the deletion:
- Certificate
- X509 Certificate
- X509 Certificate ID
- X509 Certificate2
Step 5. Quit Registry Editor, and then restart the Remote Desktop.
Solution 3. Configure authentication and encryption
You can also try to resolve the issue by configuring authentication and encryption.
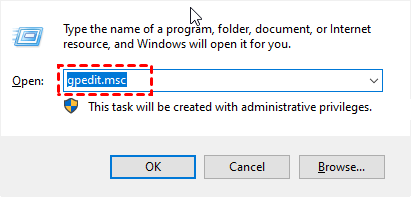
Step 1. Invoke the Run dialog box and then type in “gpedit.msc” and press OK to open the Local Group Policy Editor window.
Step 2. Navigate here: Computer Configuration > Administrative Templates > Windows Components > Remote Desktop Services > Remote Desktop Session Host > Security.
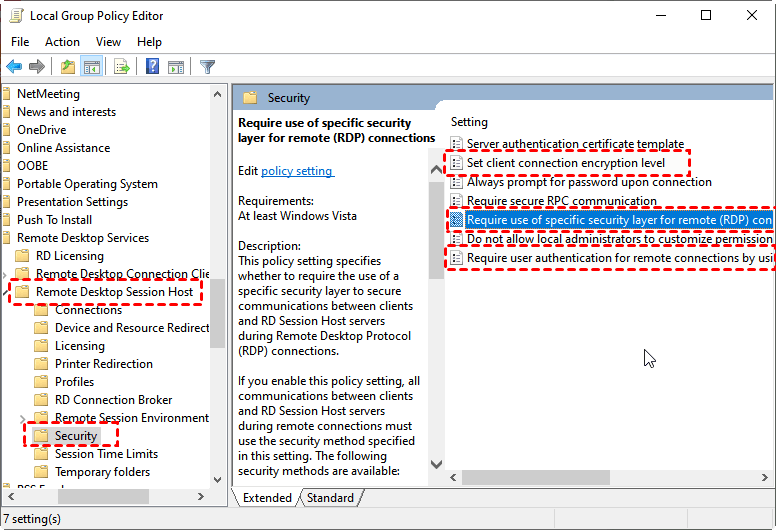
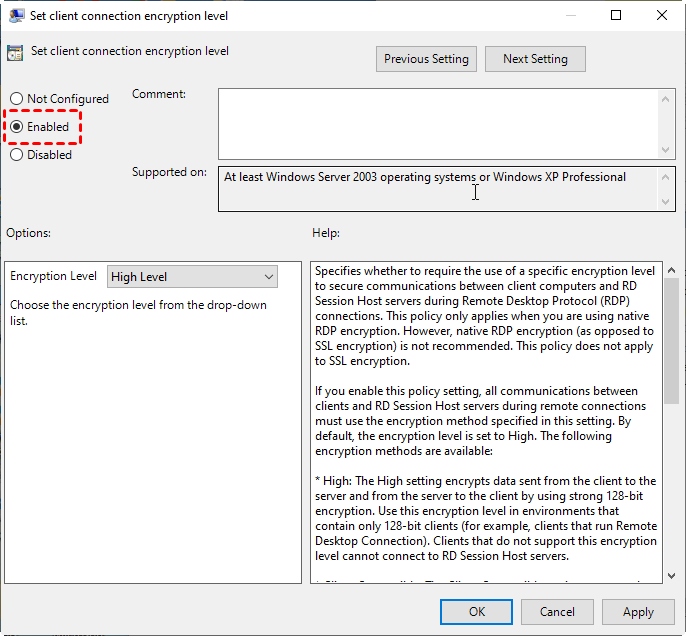
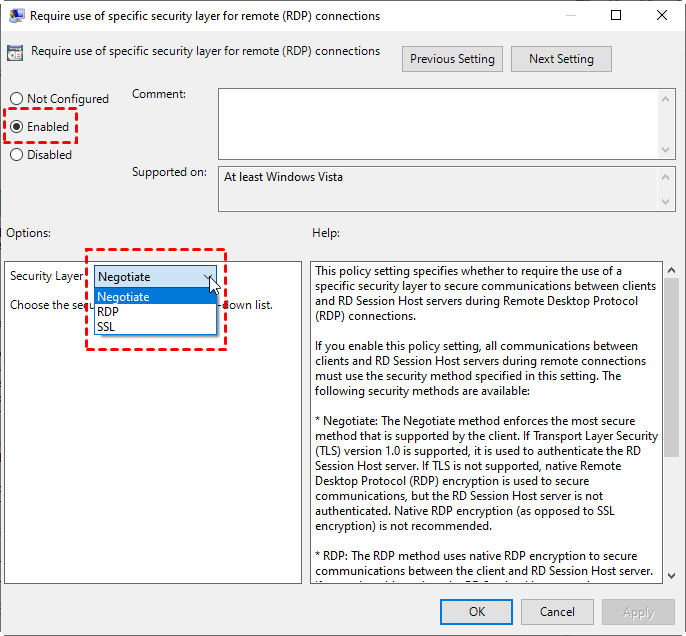
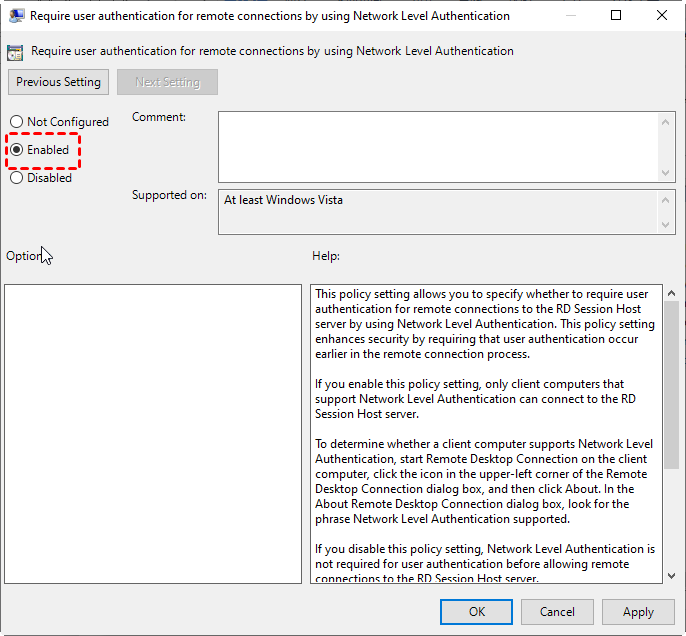
Step 3. Find and click Set client connection encryption level, Require use of a specific security layer for remote connections and Require user authentication for the remote connection by using Network Level Authentication. Change their status to Enabled respectively.
Remote control without security error: AnyViewer
If you still can’t solve the “Because of a security error on RDP” issue after trying the above three solutions, here we recommend you a remote control solution without security error, AnyViewer. It is a free remote control utility, especially for Windows and Windows Servers.
It provides you with the easiest way to achieve an unattended remote connection. Next, we’ll introduce the connection method in detail.
Step 1. Download, install and launch AnyViewer on both computers.
Step 2. Go to Log in, and then click Sign up. (If you already have signed up on its official website, you can log in directly.)

Step 3. Fill in the signup information.

Step 4. Then you can see you successfully logged in to AnyViewer. Your device will automatically be assigned to the account you've logged in to.

Step 5. Log in to the same AnyViewer account on the two devices, then you can achieve a direct connection by clicking One-click control.

- Notes:✎...
-
You can also upgrade your account to a Professional or Enterprise plan. What can a professional or enterprise plan brings to you:
- Faster file transfer speed. Transfer speed for a free account is 500 KB/s, and for a paid account is up to 10 MB/s.
- Increasing number of files transferred in bulk.
- Larger size of a single file that can be transferred.
- More devices can be assigned to the same account for unattended remote access.
- More Currently connected devices are displayed for management.
- Connect in privacy mode to protect privacy.
In conclusion, as you can see, the whole connection process with AnyViewer is pretty straightforward. You won’t encounter any security errors anymore. So if you are looking for a better remote desktop experience, try AnyViewer right now.
