
How to Access Local Drive from Remote Desktop on Windows 10, 11
This post primarily introduces how to access local drive from Remote Desktop on Windows 10, 11. Follow the steps here to redirect the local disk drives and then transfer files between the local host and the remote computer.
By Ellie / Updated on December 13, 2024
How do I access a local drive in an RDP session?
“How can I gain access to my disk drives on the local computer during a Remote Desktop session? My final purpose is to transfer files from between the local host and the remote computer. Any suggestions?”
How to access local drive from Remote Desktop on Windows 10, 11
Accessing a local drive from Remote Desktop on Windows 10, 11, is simple. You can also redirect local disk drives, such as hard disk drives, floppy disk drives, and mapped network disk drives, to allow files transfer between the local host and the remote computer. Let’s look at how to access and RDP map local drives from Remote Desktop.
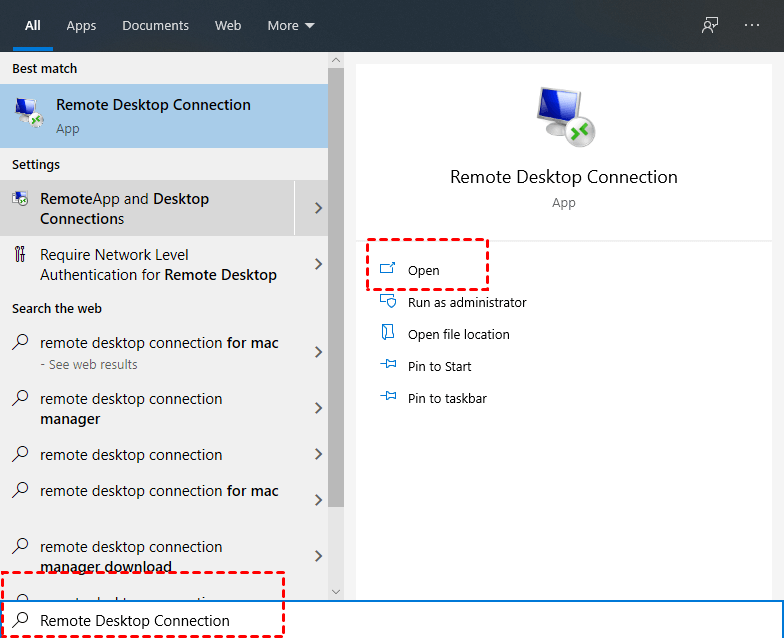
Step 1. On the office laptop, search for Remote Desktop Connection in the Search box. And then open it.
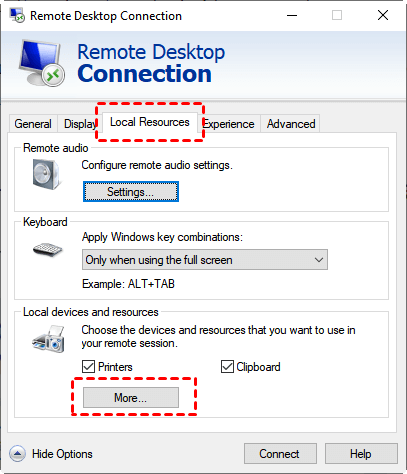
Step 2. On the main interface of Remote Desktop Connection, switch from the General tab to the Local Resources tab, and in the Local devices and resources column, click More.
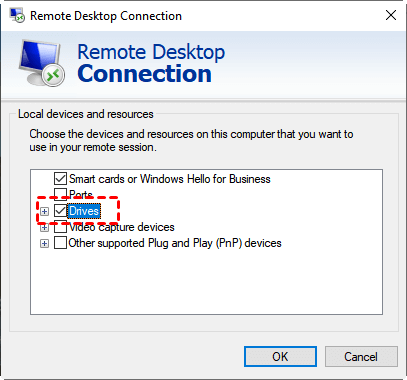
Step 3. On the Local Devices and Resources interface, check the Drives and click OK. You are also able to expand the Drives tree and select specific local drives you would like to have access to, for example, remotely accessing the C drive.
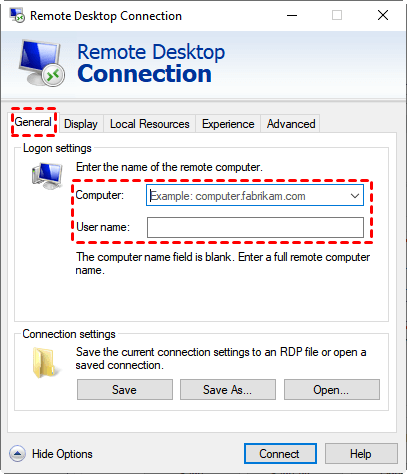
Step 4. Go back to the General tab. Enter the IP address and user name in the Remote Desktop Connection interface to achieve connection.
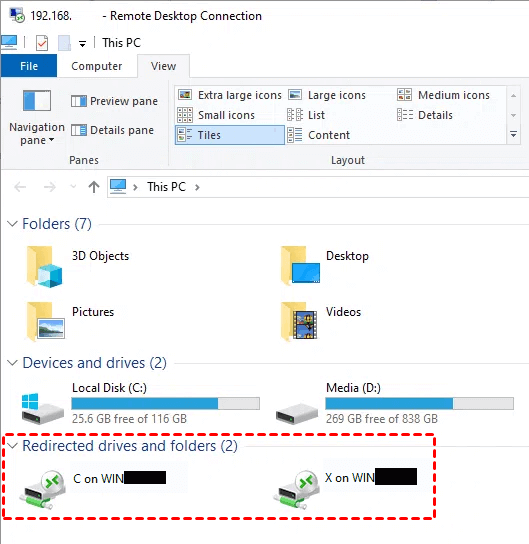
Step 5. You can view the disk drives and files for redirected disk drives in Microsoft Windows Explorer. You can also view the files for each redirected disk drive in My Computer. In both Windows Explorer and My Computer, the drives are labeled “drive_letter on terminal_server_client_name”.

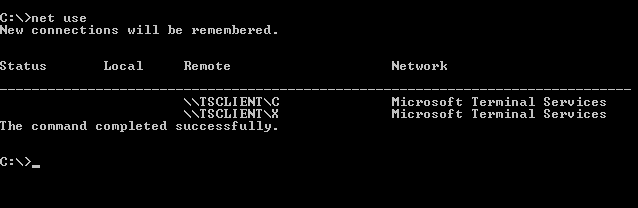
Step 6. Run PowerShell inside of your RDP session, and run a simple net use command. You will see the redirected drives appear.
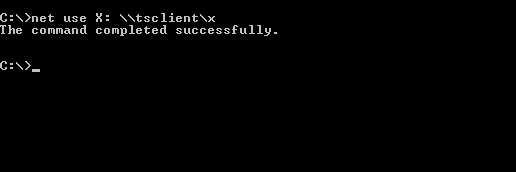
Step 7. Run a simple net use \tsclient to map these drives in a true sense to a network drive letter.
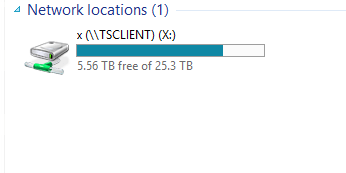
Step 8. Now if you look in Windows Explorer, you will see a true network drive mapped under your Network Locations section. If you copy files to the mapped drive on the remote computer, you can find the files in the same drive on your local computer.
Bonus tips: Easier way to access local drives and transfer files between remote computers
We'd like to show you an easier way to access local drives from a remote desktop on Windows 10, 11, and transfer files between two computers. AnyViewer, a free and fast file transfer tool, can be used. It has a much faster transfer speed compared with the slow transfer speed of Remote Desktop. For example, transferring a 2 GB zip file from the local to the remote computer takes only about 20 seconds.
Step 1. Download, install, and launch AnyViewer 3.0 on both Windows computers. If your version is lower, please upgrade first.
Step 2. On the local computer, go to Log in, and then click Sign up. (If you already have signed up on its official website, you can log in directly.)

Step 3. Fill in the signup information.

Step 4. Then you can see you successfully logged in to AnyViewer. Your device will automatically be assigned to the account you’ve logged in to. Don’t forget to log in to the same AnyViewer account on the remote computer.

Step 5. Choose your remote computer, and click File Transfer to access all the files on the local drives.


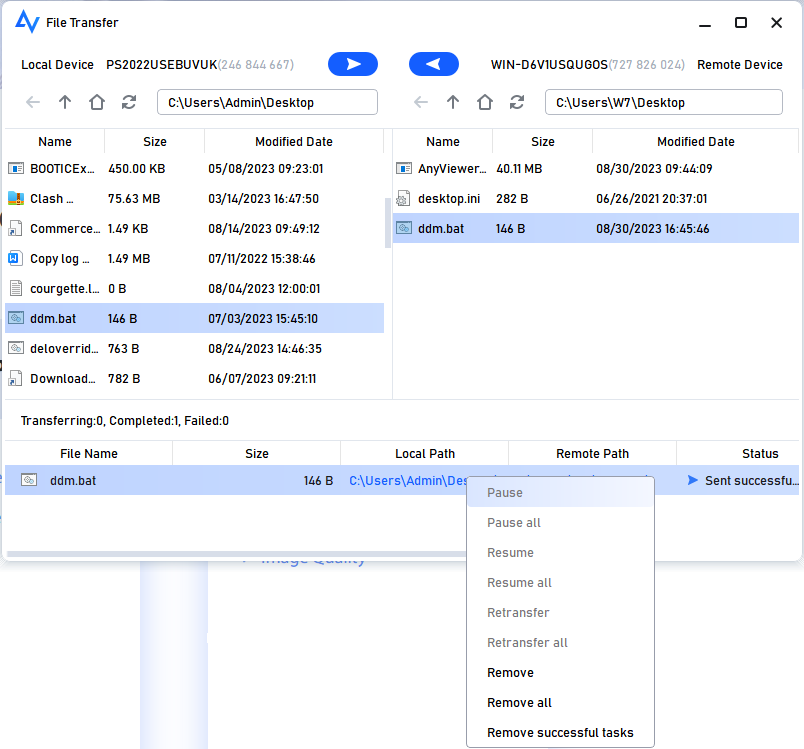
Step 6. Then a File Transfer dialog box will appear. All the files on the local device and the remote device will be displayed here.

Step 7. Click the blue buttons with an arrow to transfer files between to local device and the remote device. You can see the transfer status at the bottom of the File Transfer dialog box. Right-click to pause or remove the transfer task. The dialog can be closed when the transfer is complete.
- ★Tips:
- The maximum size of a single file that can be transferred for the free account is 100 MB, and the maximum number of files that can be transferred per time is 100. You can also upgrade your account to a professional or enterprise plan. What can a professional or enterprise plan brings to you:
- Faster transfer speed. Transfer speed for a free account is 500 KB/s, and for a paid account is up to 10 MB/s.
- Increasing number of files transferred in bulk.
- Larger size of a single file that can be transferred.
- More devices can be assigned to the same account for unattended remote access.
- More Currently connected devices are displayed for management.
- Connect in privacy mode to protect privacy.
Conclusion
This post primarily introduces how to access local drive from Remote Desktop on Windows 10, 11. Detailed steps on how to redirect the local disk drives and then transfer files between the local host and the remote computer are given. Aside from RDP, there are other file transfer tools. For example, AnyViewer, a perfect file transfer tool that could help you transfer files at a faster speed.
