
TeamViewer ID Is IP Address: Why & How to Fix
Why my TeamViewer ID is IP address instead of generated ID? This post primarily answers why and gives a method to make TeamViewer display again valid “Your ID”. Keep reading if you’re interested!
By Ellie / Updated on December 13, 2024
TeamViewer displays IP address instead of generated Your ID
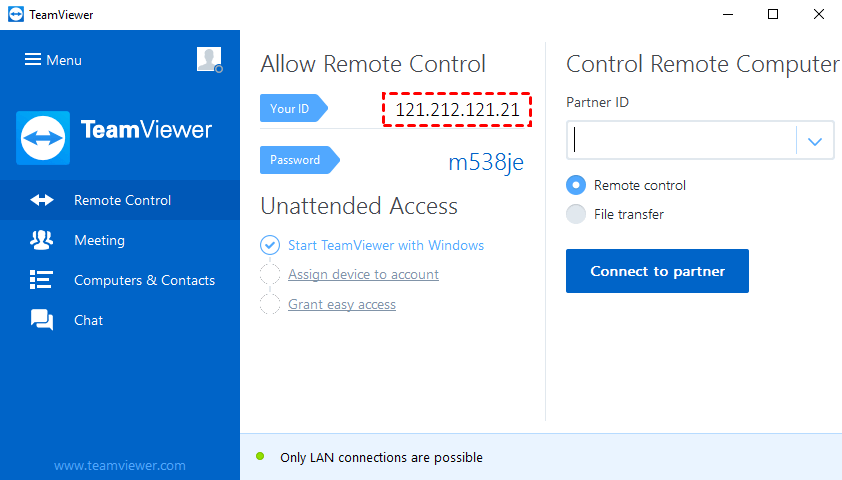
I'm having the following issue. My computer runs Windows 8.1. I installed VirtualBox, which created a new network adapter during the installation process. Following that, TeamViewer behaves poorly. Instead of the TeamViewer-generated ID, I see two IP addresses of network adapters in the 'Your ID' column. What need I alter so that TeamViewer displays a legitimate 'Your ID' again?”
- Question from Stack Overflow
TeamViewer is a remote desktop tool free for private use. But sometimes, users may run into annoying problems when using TeamViewer, for example, TeamViewer showing IP address instead of ID. Why does this happen and how to change it back to ID again? Keep reading.
Why TeamViewer ID showing IP address?
The “TeamViewer ID is an IP address” issue is caused by using TeamViewer on a LAN. When your computer is configured to allow only inbound LAN connections, TeamViewer will disconnect from the internet, making it impossible to initiate or receive connections using the TeamViewer ID, and the Computer & Contacts list will be unavailable. As a result, under the “Your ID” section, TeamViewer will display your computer's internal IP address. To connect to you over the LAN, the user can put this IP address into their Partner ID box on their own TeamViewer software.
How to fix TeamViewer ID is IP address
To fix TeamViewer ID showing IP address, it is necessary to change network settings.
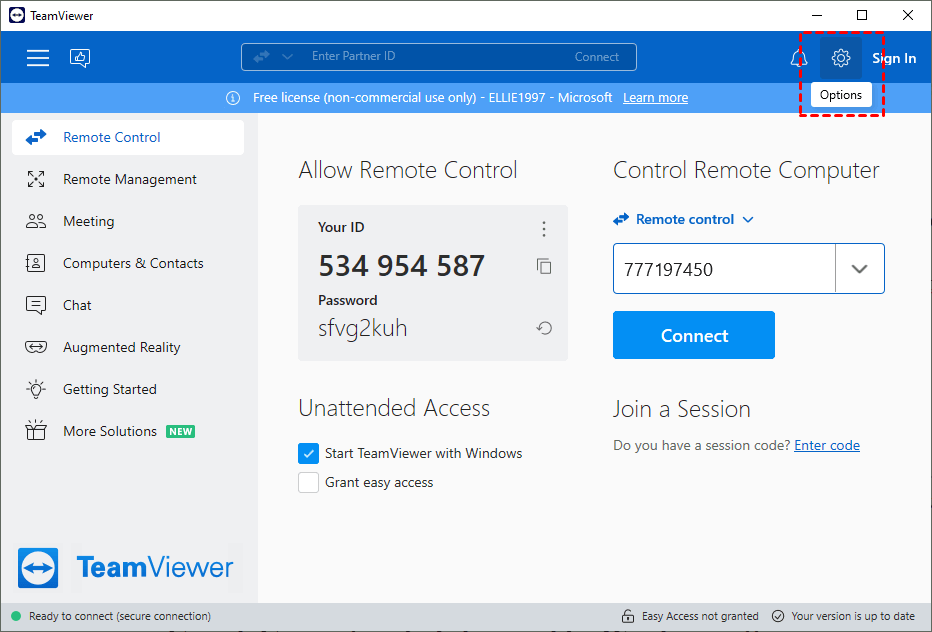
Step 1. In TeamViewer, open Options.
Step 2. In the General category, find Network settings, and under Incoming LAN connections, select the Accept option.
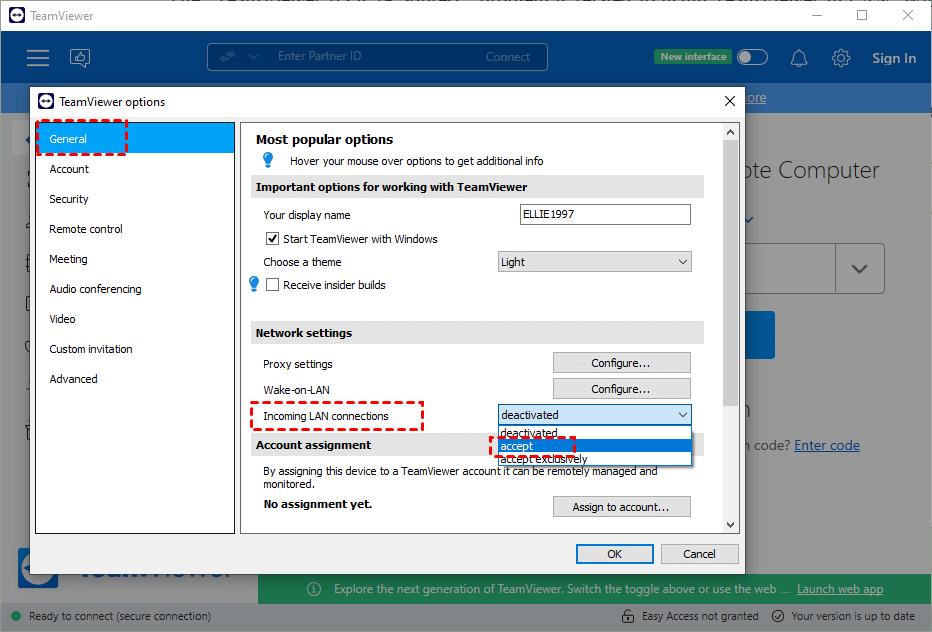
Step 3. Then the “Your ID” field will display the automatically generated ID again.
AnyViewer: Connect to remote devices without ID [Best TeamViewer alternative]
AnyViewer is a free remote access & remote support software. It provides you a way to remotely access devices without ID or IP address. With simple previous configuration steps, you can connect to an unattended computer with just one click.
Besides, AnyViewer is also the best TeamViewer alternative. It provides users with completely free services, despite what purposes users are using it for.
Step 1. Download, install, and launch AnyViewer on both computer. On the Controller computer, go to Log in, and then click Sign up. (If you already have signed up on its official website, you can log in directly.)

Step 2. Fill in the signup information.

Step 3. Then you can see you successfully logged in to AnyViewer. Your device will automatically be assigned to the account you’ve logged in to.

Step 4. Log in to the same AnyViewer account on the two devices, then you can click One-click control to achieve unattended remote access.

Step 5. After connecting successfully, you’ll see the remote desktop.
- Notes:✎...
- You can also upgrade your account to a Professional or Enterprise plan. What can a professional or enterprise plan brings to you:
- More devices can be assigned to the same account for unattended remote access.
- Connect in privacy mode to protect privacy, which means the Controller can black the remote PC screen and disable the remote keyboard & mouse click.
- Faster file transfer speed. Transfer speed for a free account is 500 KB/s, and for a paid account is up to 10 MB/s.
The bottom line
This post primarily answers why TeamViewer ID is IP address and how to make TeamViewer display again valid “Your ID”. Besides, it also introduces a TeamViewer alternative that could allow you to connect to a remote device without an ID or IP address. With proper configuration, you can achieve remote connections via AnyViewer with one click. Try it right now.
