
Fixed: Local Drive Redirection Not Working in RDP Session 2016
This post mainly introduces five things that you need to check in order to four local drive redirection not working in RDP Session 2016.
By Ellie / Updated on December 13, 2024
Local drive redirection not working in RDP Session 2016
When connecting to a Windows Server 2016 using RDP from Windows 10, the local drives are not redirected in the RDP session. Has this ever happened to you before, and do you know how to solve it?”
Question from Reddit
Four things to check to fix local drive redirection not working
Normally, local drive redirection not working makes it impossible for users to achieve file transfer between remote computers via RDP. To fix local drive redirection not working in RDP Session Server 2016, 2012 R2, 2019, and 2022, you need to check the following four things.
Part 1. Configure Client Settings on the Server
Step 1. Open Server Manager.
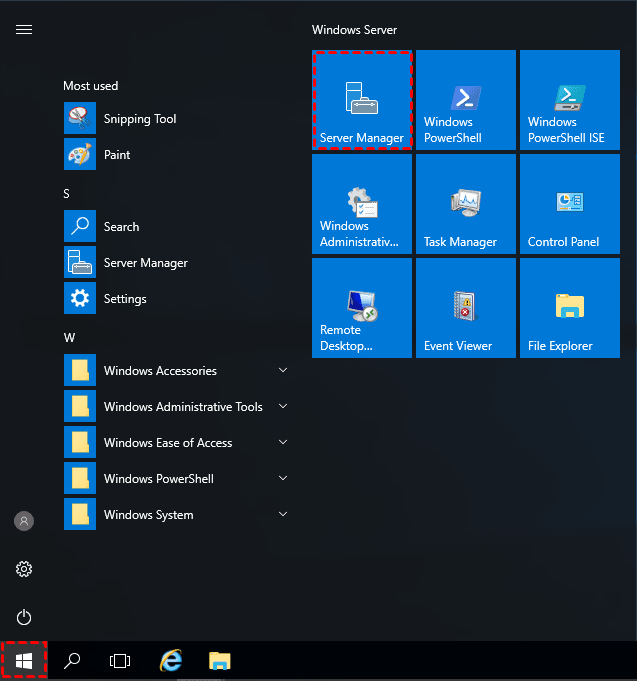
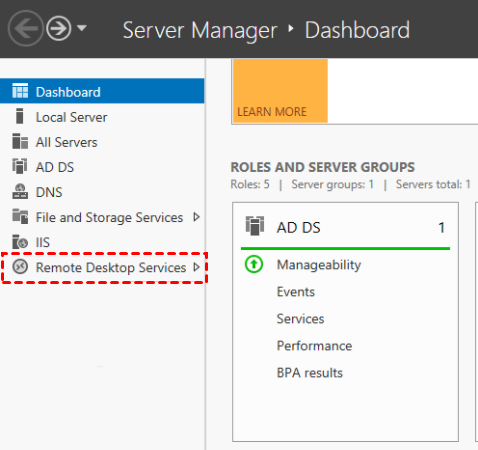
Step 2. Click Remote Desktop Services.
Step 3. Navigate here: Collections > YourCollection > Tasks > Edit Properties. (Replace YourCollection with your remote session.)
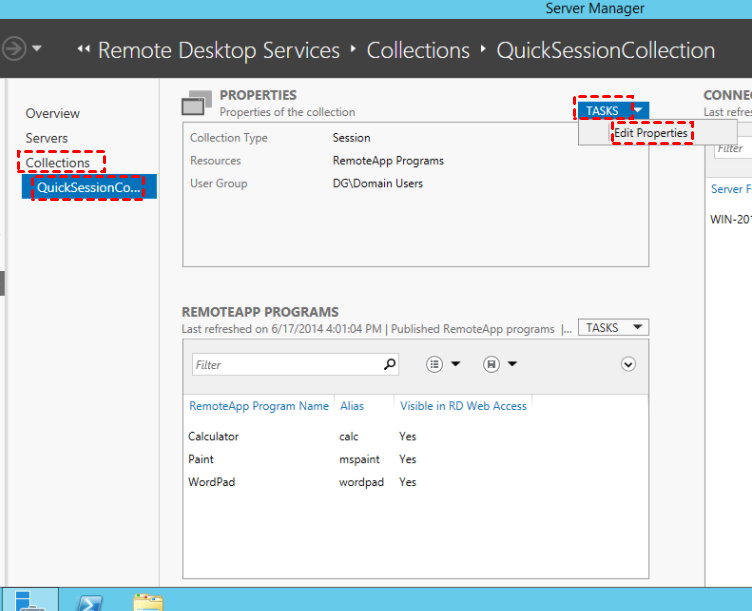
Step 4. Click Client Settings, and make sure the Drives option is checked. Then click Apply.

Part 2. Select Drives on the Client
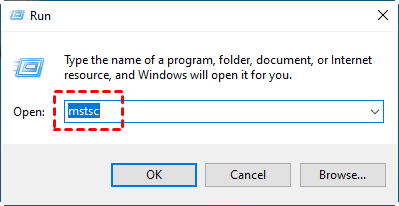
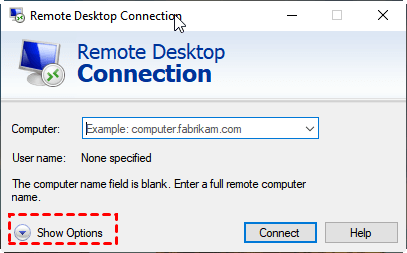
Step 1. Press Win + R, and then type in “mstsc” to open Remote Desktop Connection.
Step 2. In the Remote Desktop Connection dialog box, click Show Options.
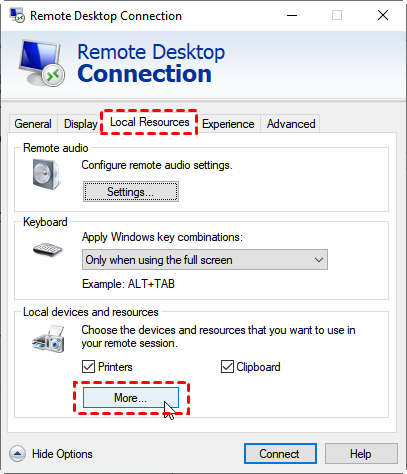
Step 3. Click the Local Resources tab, click More to open the Local devices and resources window.
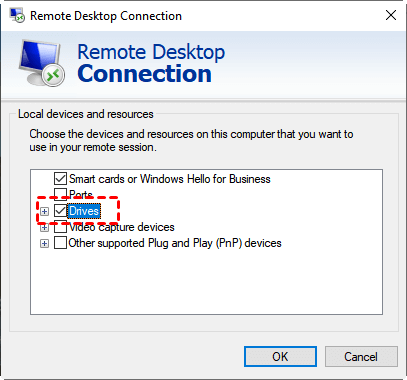
Step 4. Then you need to check Drives. Click OK to finish the setting.
Part 3. Disable Don’t allow drive redirection on both Client and Server
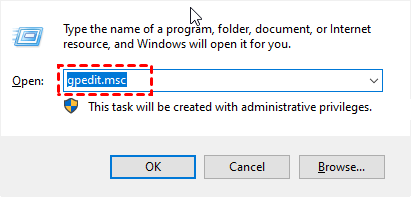
Step 1. Press Win + R, then type in “gpedit.msc” to open the Local Group Policy Editor window.
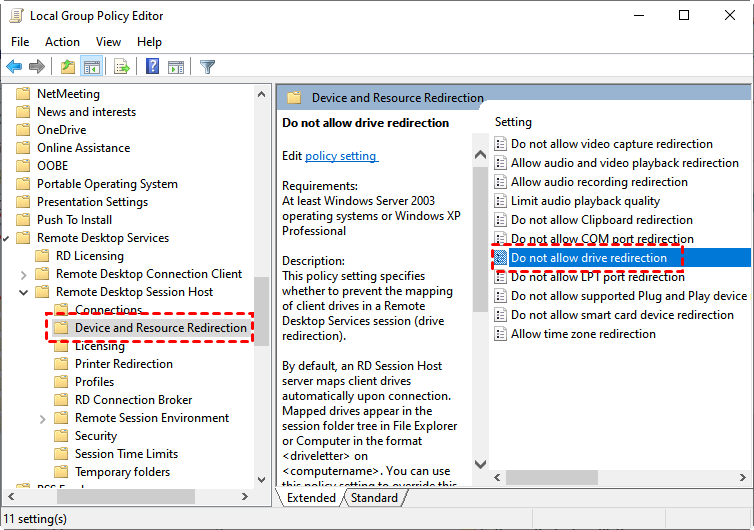
Step 2. Navigate here: Computer Configuration > Administrative Templates > Windows Components > Remote Desktop Services > Remote Desktop Session Host > Device and Resource Redirection. On the right pane, find Do not allow drive redirection.
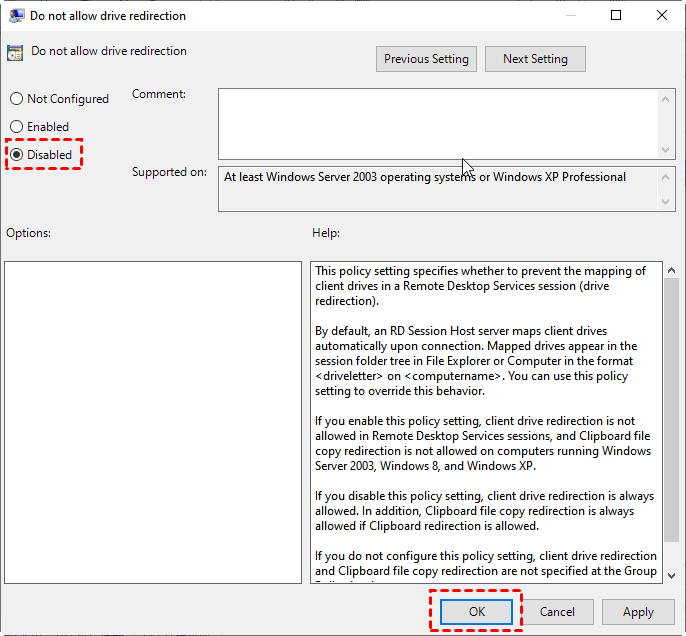
Step 3. Double-click it, and then change the state of it from Not configured or Enable to Disable. Click OK to save the change.
Part 4. Make sure the Network Providers entry has the default entries
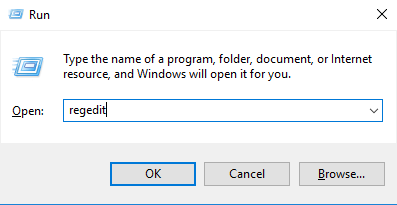
Step 1. Press Win + R, then type in “regedit” to open the Registry Editor.
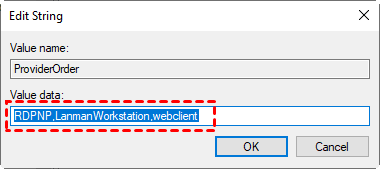
Step 2. Navigate here: HKEY_LOCAL_MACHINE > SYSTEM > CurrentControlSet > Control > NetworkProvider > Order. On the right pane, find and double-click ProviderOrder.
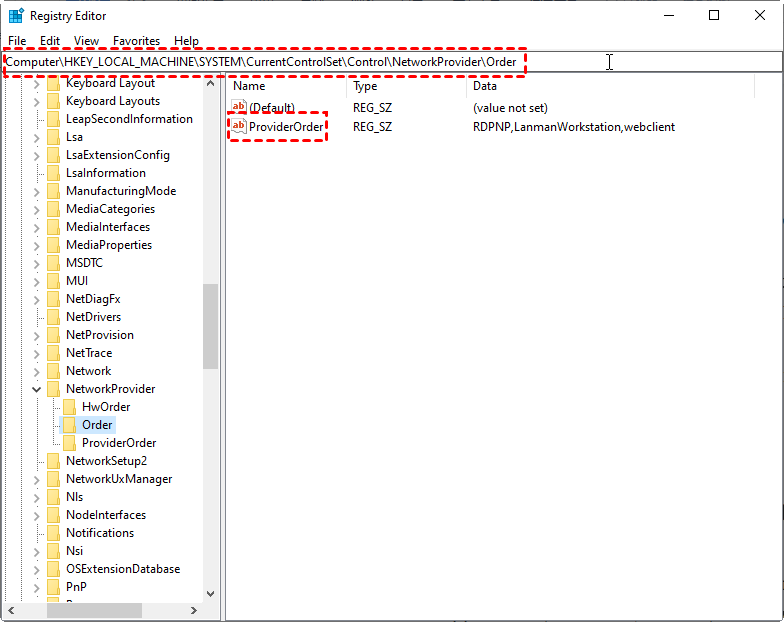
Step 2. Make sure the Network Providers entry has at least the following three default entries:
- RDPNP
- LanmanWorkstation
- web client

Bonus tips: Achieve file transfer between computers in an easier way
You can transfer files between Windows machines using remote desktop freeware AnyViewer. It is the remote desktop software, and also a file transfer tool. It allows you to transfer a batch of files at a really fast speed. For example, it only costs about 20 seconds to transfer a 2 GB zip file from the local to the remote computer.
Step 1. Download, install, and launch AnyViewer 3.0 on both Windows computers. If your version is lower, please upgrade first.
Step 2. On the Controller computer, go to Log in, and then click Sign up. (If you already have signed up on its official website, you can log in directly.)

Step 3. Fill in the signup information.

Step 4. Then you can see you successfully logged in to AnyViewer. Your device will automatically be assigned to the account you’ve logged in to.

Step 5. Choose your target computer, and then click File Transfer.

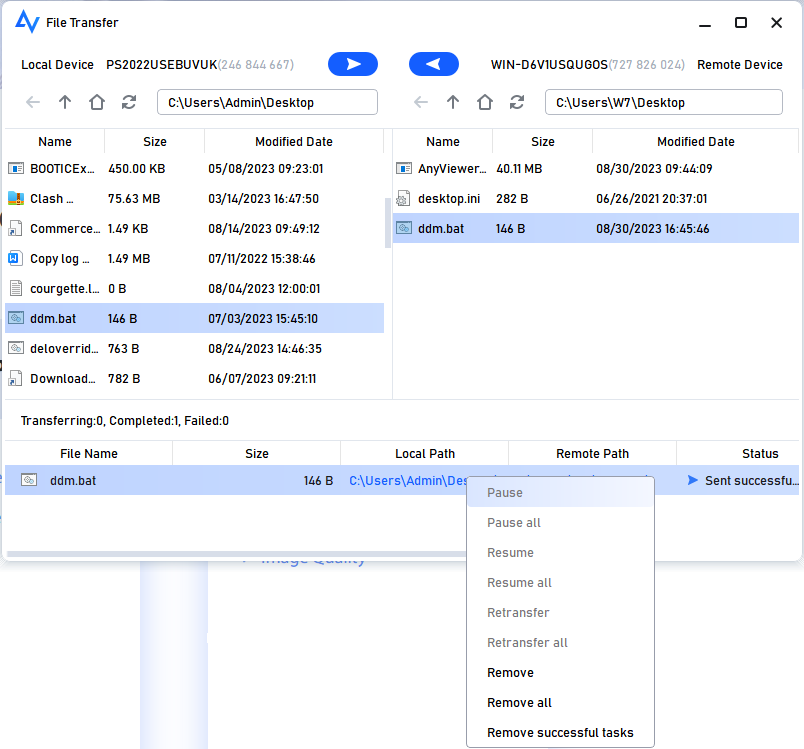
Step 6. Then a File Transfer dialog box will appear. The path of the Controller computer is shown on the left of the box, and the path of the Recipient computer is shown on the right. You’re able to transfer files between devices freely by clicking the arrows after choosing the target files.

Step 7. You can see the transfer status at the bottom of the File Transfer dialog box. Right-click to pause or remove the transfer task. The dialog can be closed when the transfer is complete.
Conclusion
How to fix local drive redirection not working in RDP Session 2016? Here in this post, we listed four things that you need to check in order to troubleshoot this problem, check the Drives option on Client Settings on the Server, check the Drives option under Local devices and resources option, disable Don’t allow drive redirection on both Client and Server, and make sure Network Providers entry has the default entries on both Client and Server respectively.
By the way, if you want easier remote desktop software that provides table connections and powerful functions, you can use AnyViewer. It can provide you with fast, stable, and secure remote connections and file transfer.
