
How to Use WinSCP to Transfer Files Between Computers
We'll go through how to install WinSCP and move files with it in this tutorial. There are certain limitations, though. For instance, using an SSH server is necessary to use WinSCP as a client. Consequently, we also advise you to use a less complex file transfer tool.
By Ellie / Updated on December 13, 2024
How do I transfer files between two computers using WinSCP?
Hey there! I'm new to WinSCP and looking to facilitate file transfers between computers to manage my work tasks effectively. Can anyone lend a hand? Thanks!”
- Question from WinSCP Forum

WinSCP is a popular open-source file transfer tool for Windows, designed to provide secure file transfers between local and remote computers using various protocols such as FTP, SFTP, SCP, and WebDAV. With it, you can easily transfer files between two computers.
How to use WinSCP to transfer files between computers [full tutorial]
Follow the detailed steps below to learn how to use WinSCP to transfer files between computers.
Part 1. Preparation work: install WinSCP on both computers
How to use WinSCP to transfer files between computers? Firstly you need to install WinSCP on both computers.
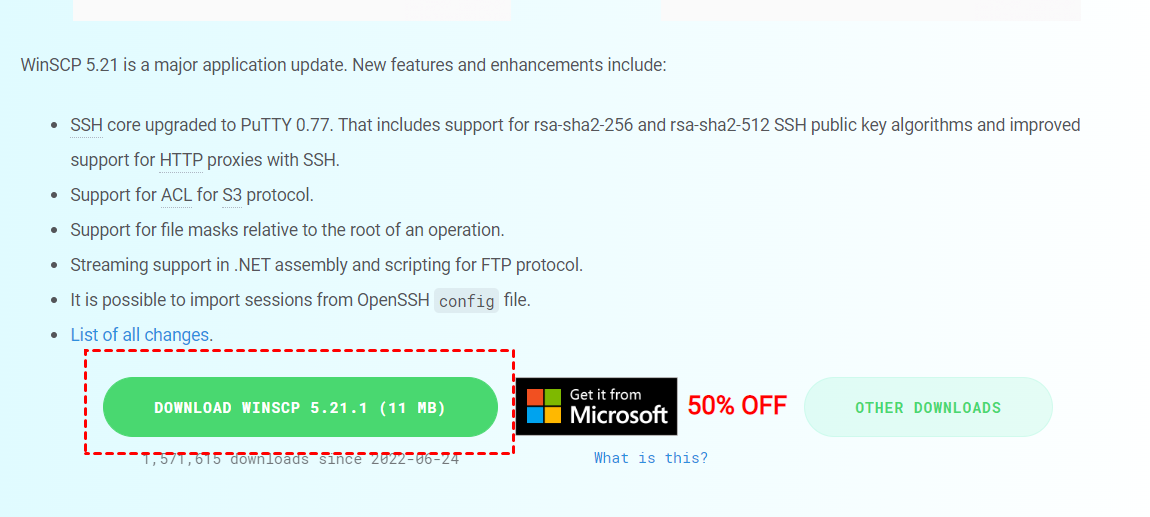
Step 1. Download WinSCP.
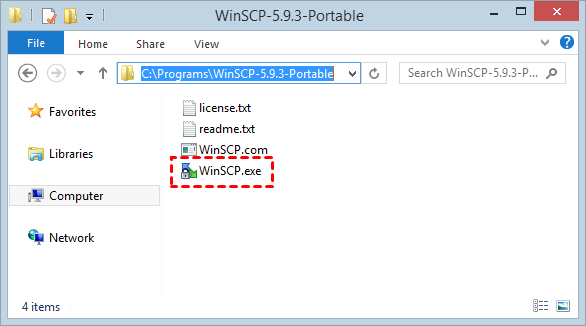
Step 2. Double-click WinSCP.exe to install it.
Part 2. Transfer files via WinSCP between computers
After installation, follow the next steps to transfer files from one computer to another remotely. Before operations, make sure your remote PC has already installed SSH Server.
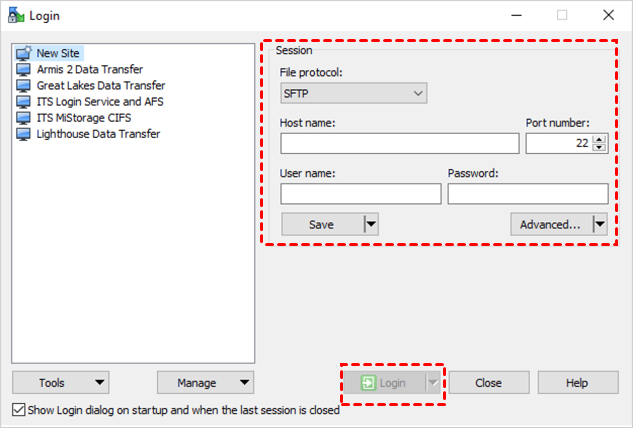
Step 1. To connect to another PC, open WinSCP, and type in the information in the Login interface. And then click Login.
- ✦Host name: The IP address of the remote PC to be connected.
- ✦Port number: The default value is 22.
- ✦User name: Your username, for example, admin.
- ✦Password: Your password.
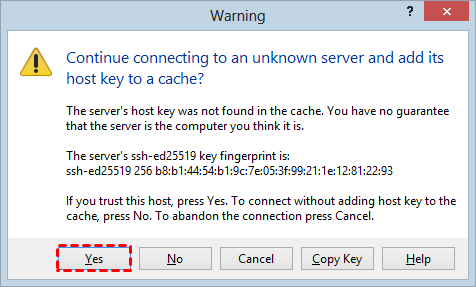
When you first attempt to connect to another computer, you may receive a warning notice. Select Yes to proceed.
Step 2. The WinSCP file transfer window is displayed after connection. On the left presents the local computer while on the right presents the files of the remote computer. Drag the target file you want to transfer and drop it to another side.
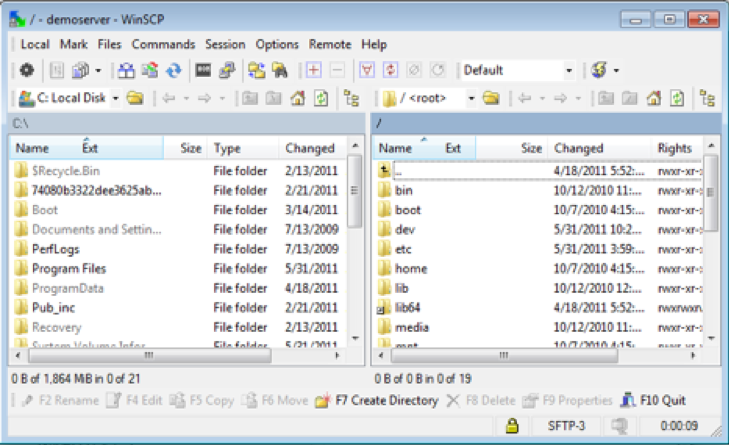
- An Error pop-up window will appear if you don’t have permission to write to the file system.
- The lock on the lower right corner of the interface means that your connection is secure.
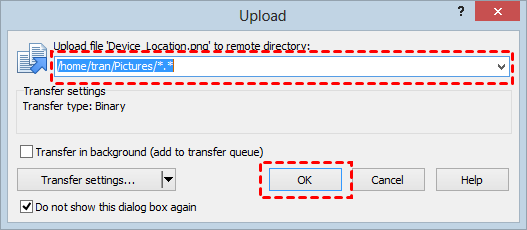
Step 3. Choose the file location in the pop-up window, and then click OK to achieve the file transfer.
What are the disadvantages of using WinSCP?
Being open-source, WinSCP is freely available, benefiting numerous users. Nonetheless, it does come with certain drawbacks:
- Limited support: While there are communities around WinSCP, the level of support may vary. Users might not receive immediate assistance or guaranteed fixes for their issues.
- Complexity for beginners: WinSCP can be more challenging for beginners due to its often complex nature and lack of user-friendly interfaces or documentation.
- Security concerns: While WinSCP benefits from community scrutiny, it can also be vulnerable if there aren't enough eyes reviewing the code for security flaws.
WinSCP alternative: Transfer files easily & securely with AnyViewer
If you're seeking an alternative to WinSCP, consider AnyViewer. AnyViewer is a free remote file-transfer software designed for Windows. It offers effortless and secure file transfers. In comparison to WinSCP, it presents the following advantages:
-
Support: AnyViewer offers extensive support options including online guides, tutorials, and a dedicated support team. Users can also access community forums for assistance. Compared to WinSCP, AnyViewer generally provides more robust and readily available support resources.
-
Ease of Use: AnyViewer is designed with user-friendliness in mind, featuring intuitive interfaces across its various platforms. It offers straightforward file transfer functionalities alongside remote desktop access, making it accessible even to beginners. WinSCP's interface, on the other hand, can be more complex, particularly for novice users.
-
Security: AnyViewer has implemented various security measures to bolster its protocols, including frequent updates and encryption techniques such as end-to-end encryption and two-factor authentication, ensuring the safety of data.
Download and install AnyViewer on all your devices, then follow the next steps to transfer files.
Step 1. On the client computer, go to Log in and then click Sign up. Fill in the sign-up information.

Step 2. Log in to the same account on other PCs. Then you can see the assigned devices.

Step 3. Go to the Device to select the target computer you want to transfer files to, and then click File Transfer.

Step 4. A File Transfer dialog box for transferring files between the PCs is now available. The right of the box presents the client PC, and the host PC is on the left. Select the files and click the right arrow to transfer them to the client PC. Select the files and then click the left arrow to transfer them to the host PC.

- Notes:
- It is recommended to upgrade to a Professional or Enterprise plan to gain access to the following rights thereafter:
- The maximum file transfer speed is 10 MB/s.
- It supports up to 5 concurrent threads for file transfer.
- There is no limit on the number of files that can be transferred simultaneously.
- Individual files can reach a maximum size of 1 TB.
Conclusion
This post primarily introduces how to use WinSCP to transfer files between computers. WinSCP stands as a versatile solution for seamless file transfers between computers, offering security and reliability. By following the provided tutorial, users can easily install WinSCP and utilize its features to transfer files efficiently.
However, it's important to acknowledge its limitations, including limited support and complexity for beginners. For those seeking alternatives, AnyViewer emerges as a compelling option, offering enhanced support, user-friendly interfaces, and robust security measures. Whether opting for WinSCP or exploring AnyViewer, users can streamline their file transfer processes and enhance productivity effectively.
