
How to Transfer Photos from PC to iPhone 7 with/without iTunes
What are the ways to transfer photos from PC to iPhone 7? Actually, you have multiple choices. You can transfer photos between PCs and iPhones with iTunes or without iTunes. Here are the detailed steps.
By Ellie / Updated on December 13, 2024
Transfer photos from PC to iPhone 7
“I usually store my photos on my PC as the storage of my iPhone 7 is too small, only 16 GB. But sometimes, I’ll need to transfer some photos from my PC to my phone. So how can I do this?”
Normally, you’ll have a lot of ways to transfer files from PC to iOS devices, for example, the iPhone 7. You can use iTunes to connect iPhone 7 to PC. If you feel it is not convenient enough and its transfer speed is too slow, you have other choices, for example, iCloud, Files, or OneDrive. In this post, we’ll guide you through how to move photos from PC to iPhone 7 with or without iTunes.
How to transfer photos from PC to iPhone 7 with iTunes
Traditionally, you can transfer photos from PC to iPhone 7 using iTunes. But notice, using iTunes to sync will erase all the things on your iPhone. So you’d better backup your iPhone in advance to avoid losing data.
Step 1. Create a folder on your computer and save all the pictures that you wish to transfer to your iPhone 7 in it.
Step 2. Connect your iPhone to the computer with a USB cable.
Step 3. Download and install the latest version of iTunes on your computer.
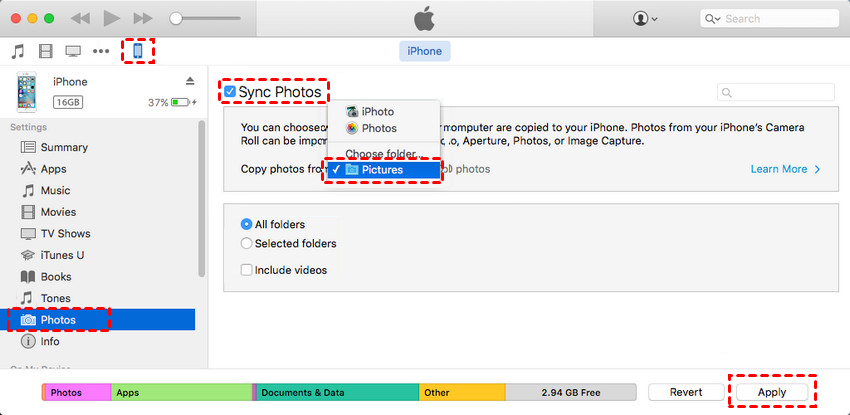
Step 4. Go to the Device Tab, choose Photos, and tick Sync Photos. Then select the folder that you just created on your PC and choose Apply.
How to transfer photos from PC to iPhone 7 without iTunes
Of course, you can move photos from PC to iPhone 7 without iTunes. Here we introduce three tools, namely, iCloud, Files, and OneDrive.
Method 1. iCloud
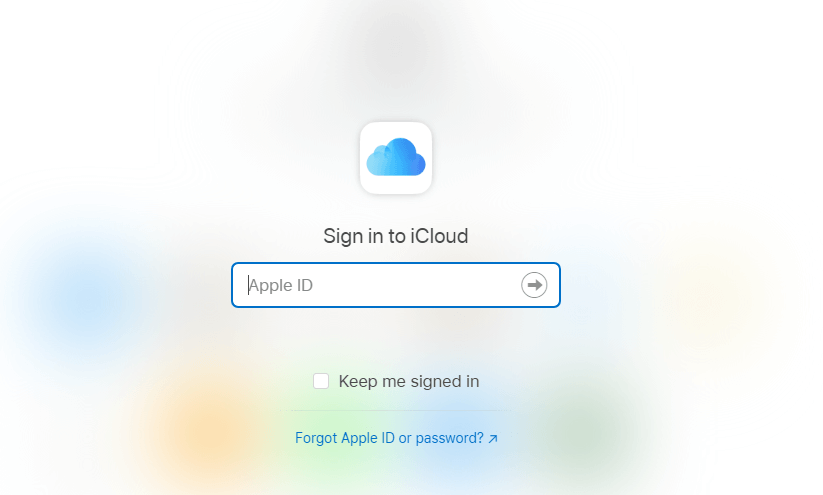
Step 1. On the computer, open the iCloud Drive page in the browser. And then enter your Apple ID and password to log in to your iCloud account.
Step 2. After you’ve logged in to iCloud Drive, you’ll see a row of icons on the upper middle of the screen. Click the second icon (Upload) to upload your computer files to your iCloud Drive.

Step 3. On your iPhone, go to the Files app and navigate to iCloud Drive, you’ll see the photos you just uploaded on your computer. You can long-press the photos and then download them.

Method 2. Files app
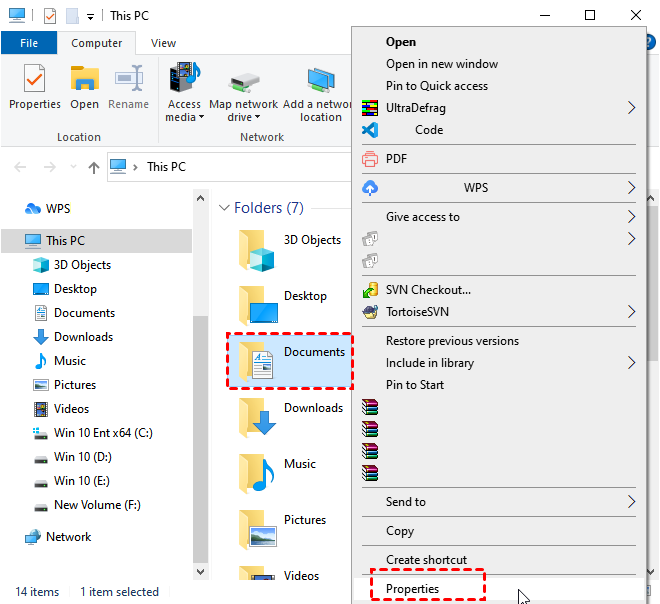
Step 1. On the computer, save the photos you want to transfer to your iPhone 7 in a folder. Right-click the folder, then choose Properties.
Step 2. Go to Sharing tab, then click Share.

Step 3. Choose people to share with, then click Share.

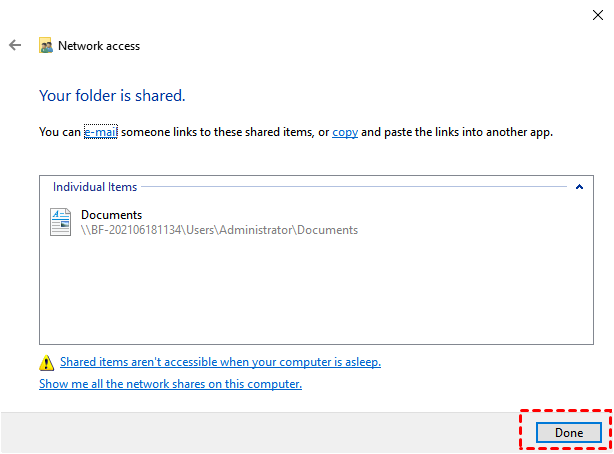
Step 4. Click Done to finish the process.
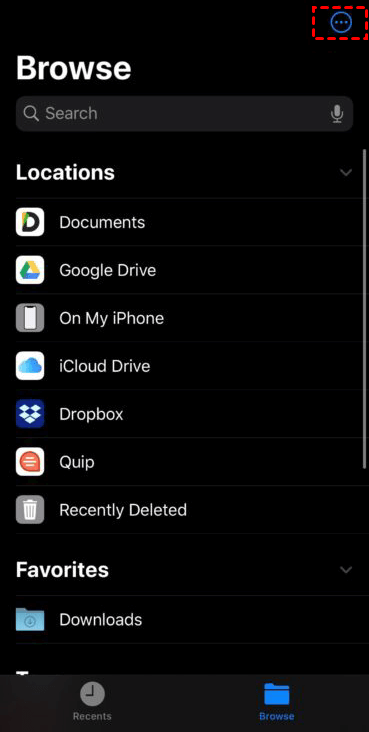
Step 5. Open the built-in Files app on your iPhone. Tap on the “triple-dot” icon located at the top-right corner.
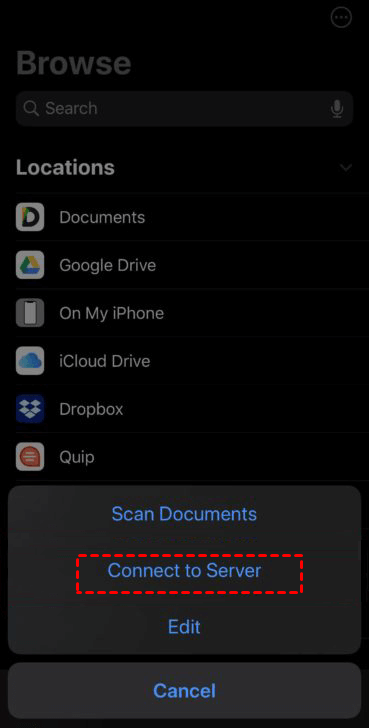
Step 6. Choose Connect to Server.
Step 7. Enter the IP address of the computer and click on Connect.

Step 8. After that, you can access the shared folder on Windows. You’re able to copy photos that you saved in this folder in advance and then paste them to your iPhone.

Method 3. OneDrive
Step 1. Click This PC, then find and click OneDrive - Personal on the left pane.

Step 2. Sign in to your Microsoft account to activate OneDrive.

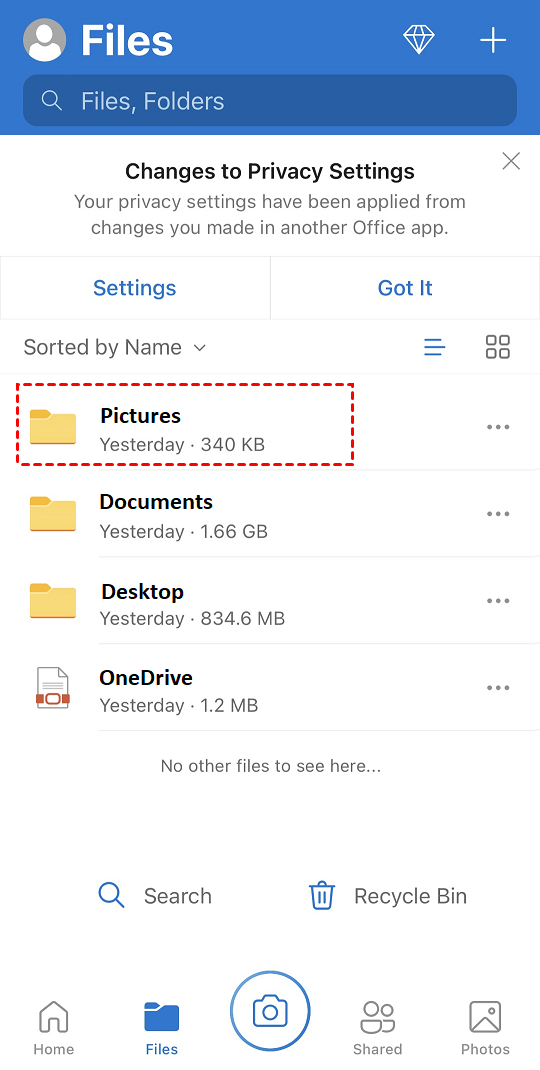
Step 3. Save the photos that you want to transfer from PC to iPhone in Pictures.

Step 4. Download OneDrive on your iPhone from App Store. Open it and sign in to your Microsoft account.

Step 5. Click Pictures.
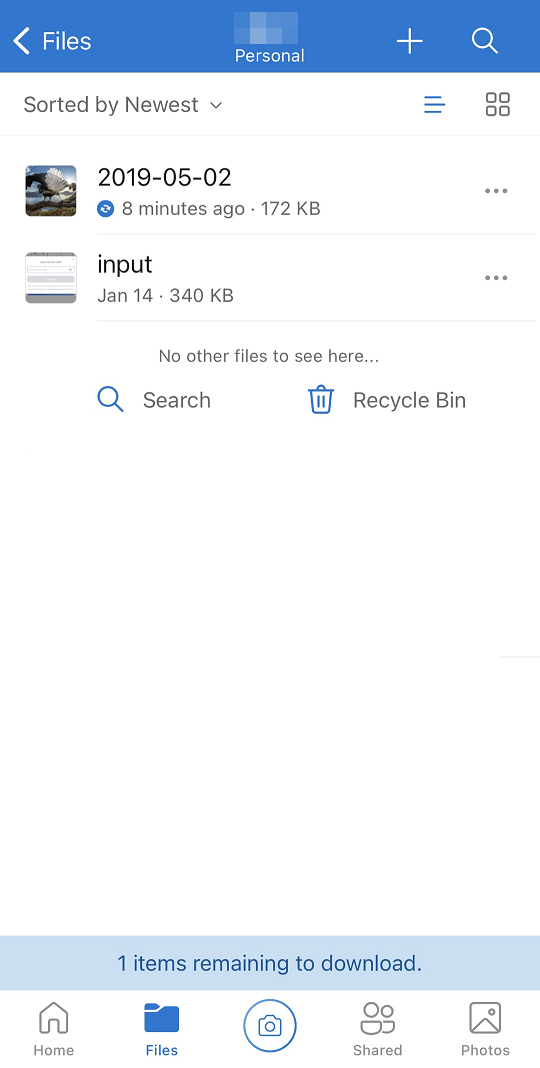
Step 6. Then you can see the photos you’ve saved from your PC on your iPhone.
Conclusion
This post mainly introduces how to transfer photos from PC to iPhone 7 with or without iTunes. If you use iTunes, please remember to backup your iPhone in advance to avoid losing data. If you want to use other tools, you can choose iCloud, Files, or OneDrive. By the way, another way to remotely access your PC photos from your iPhone is to use the remote desktop software AnyViewer. It supports multiple Windows versions and iOS devices, allowing you to connect your iPhone or iPad to your PCs from anywhere.
