
Three Free Remote Access Software with File Transfer
This post introduces three free remote access software with file transfer: AnyViewer, Microsoft Remote Desktop and Chrome Remote Desktop.
By Hester / Updated on November 21, 2022
How do I transfer files from one computer to another for free?
“I’m trying to transfer files from my work PC to my home PC, so I can handle work emergencies without going to the office. But now I still have no ideas about which freeware I should choose to have a remote control between the PCs. Could anybody offer me some free remote desktop freeware with file transfer? ”
Free remote access software with file transfer [3 options]
Why you need free remote access software with file transfer? Sometimes you have to handle some work issues at home but you don't have the files, in this case, you may want to access the work computer from home to transfer files between the PCs. In this post, we present three free remote file transfer tools for you to choose from.
Option 1. AnyViewer: the easiest file transfer tool [highly appreciated]
We would like to suggest AnyViewer if you’re seeking remote desktop freeware with file transfer for the following reasons:
- Easy-to-use. It has easy operations to transfer files without limitations, you can transfer files between PCs directly if you’ve logged into the same account.
- Fast. It has a fast file transfer speed to improve your work efficiency and save time.
- Compatible. It supports several Windows versions, for example, it’s available on Windows 11/10/8.1/8/7.
- User-friendly. It offers a chat box for text communication and it won’t lock the host PC during connection.
After downloading and installing AnyViewer, log in the same account on PCs to transfer your files.
Step 1. On the client computer, go to Log in on the left pane and then click Sign up (log in directly if you have already signed up).

Step 2. Fill in the sign up information.

Step 3. Then you can see your client computer successfully logged in to AnyViewer. Log in to the same account on other devices. All the logged-in devices will be assigned to the account.

Step 4. Go to Device to select the target device you want to transfer files to, and then click File Transfer.

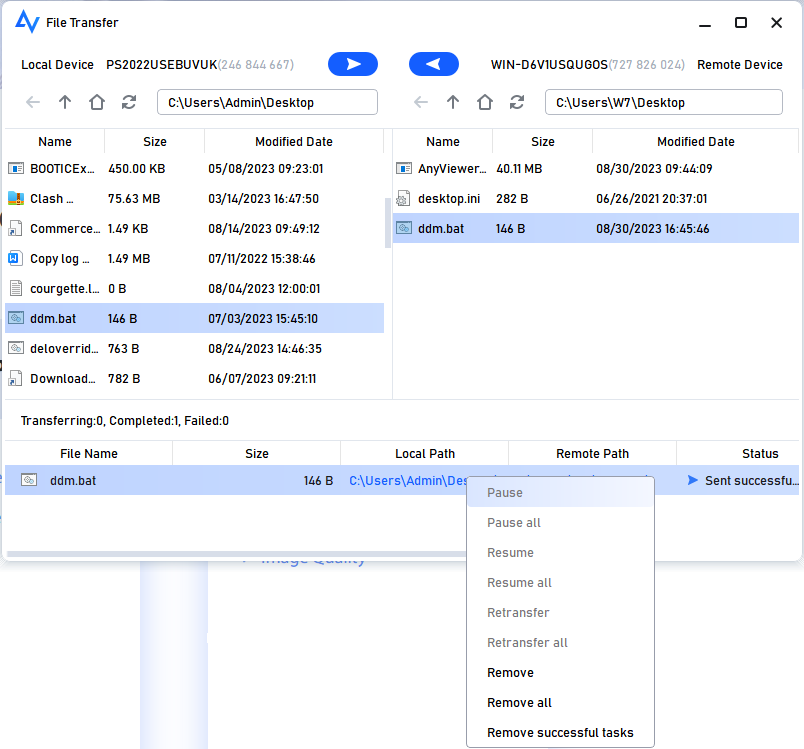
Step 5. A File Transfer dialog box for transferring files between the PCs is now available. The right of the box presents the client PC, and the host PC is on the left. Select the files and click the right arrow to transfer them to the client PC. Select the files and then click the left arrow to transfer them to the host PC.

You can see the transfer status at the bottom of the box. Right-click to pause or remove the tasks.
- Notes:✎...
- A single file smaller than 100 MB can be transferred using AnyViewer's free account, and you are only permitted to transfer up to 100 files at once. To transfer larger files, upgrade to a Professional or Enterprise plan. The following rights will thereafter be yours:
- Transfer multiple files all at once.
- Speedier file transfer. Transfer speed for a free account is 500 KB/s, but it can reach 10 MB/s for a paid account.
- Assign more devices to the same account to achieve direct file transfer.
- Connect to the host computer in privacy mode so that you can block the remote PC's keyboard and mouse and black its screen.
Option 2. Microsoft Remote Desktop: the build-in program in Windows
The second free remote access software with file transfer is Microsoft Remote Desktop, a free built-in program in Windows, here are some tips you need to know before transferring files via RDP.
- Windows Home Editions are not supported to receive remote control, please upgrade to Pro or Enterprise Editions.
- If your PCs are on different networks, you need to perform port forwarding or use a VPN.
- It’s fairly slow when transferring files, and the transfer speed can be affected by many factors.
- It will lock the host PC during the remote session, which means you can’t use your PC when someone is controlling you.
Before starting file transfer, you need to set up Remote Desktop Connection on your host PC. If you have already done the preparation work on the host computer, skip the steps below and continue with establishing a remote connection.
Preparation work: Set up Remote Desktop Connection on the host PC
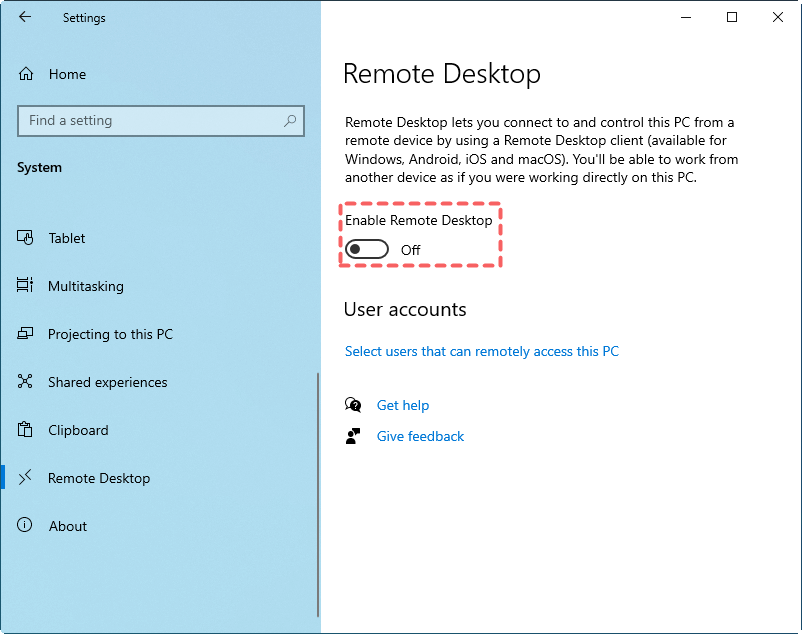
1. Enable Remote Desktop Connection
Navigate to: Settings > System > Remote Desktop > Turn on the Enable Remote Desktop switch, and then click the Confirm button.
2. Allow remote connections to the host PC
Step 1. Select Control Panel > System and Security > System, under the “System” section, and then click Remote Settings on the left pane.
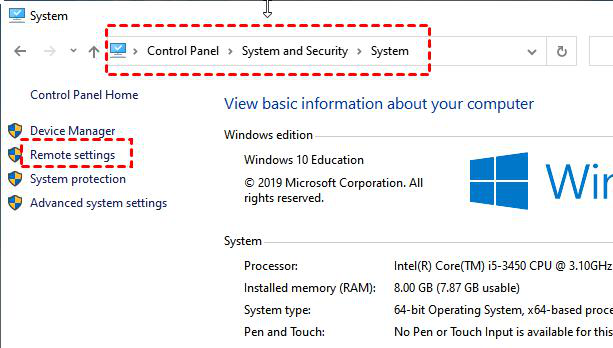
Step 2. On the Remote interface, select "Allow remote connections to this computer" and click OK.

3. Get the IP address and username
Step 1. Press Win + R to open the Run dialog box. Enter "cmd" and then click OK.

Step 2. Enter the command “ipconfig” and note down the IP Address for Remote Desktop.

Step 3. Enter “query user” to get the username of the host PC.

When you have done these above, follow the next steps to learn how to transfer files via RDP.
Establish a remote connection
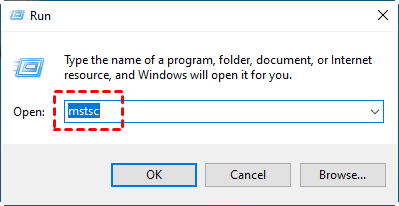
Step 1. Press Win + R on the client computer to open the Run Dialog Box, type “mstsc”, and then click OK.
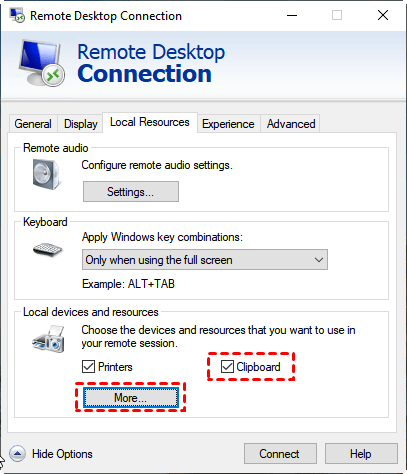
Step 2.Click Show Options and go to Local Resources. Check the Clipboard option and then click the button More.
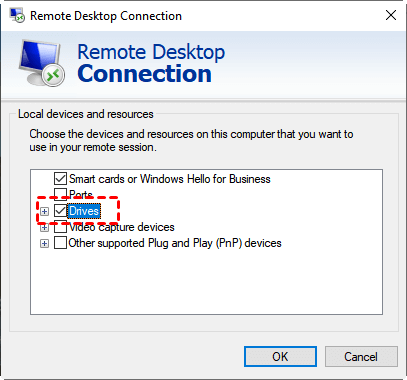
Step 3. Click “+” beside Drives and then select the disks you want to perform file transfer and then hit OK.
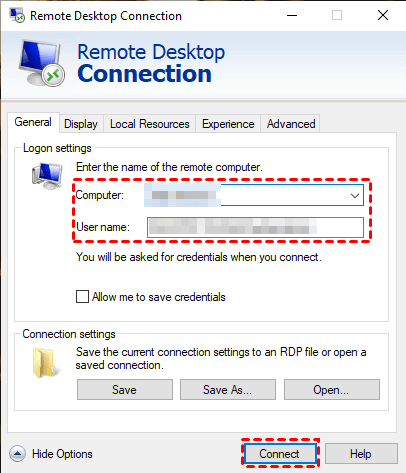
Step 4. Back to the General interface, type in the IP address and username of the host PC, and then select Connect.
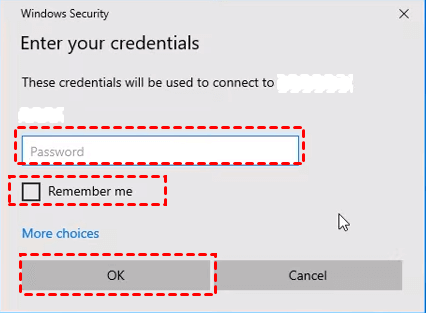
Step 5. If you see a pop-up window, type in the password of the host PC and hit OK.
Transfer files via Microsoft Remote Desktop
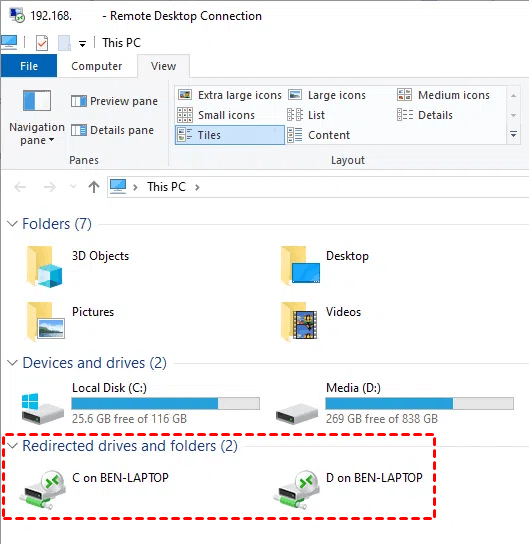
Step 1. Click This Computer on the host computer desktop to find the Redirected drives and folders you selected before.
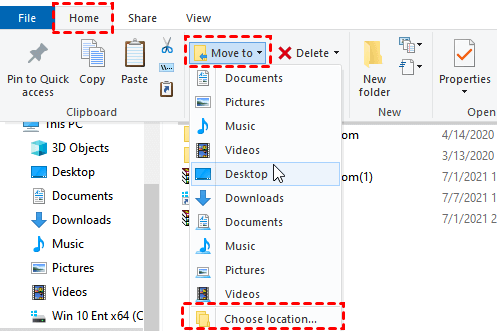
Step 2. Find the disk that stores the files you need and select the files. Go to Home > Move to > Choose location, and then choose the client drives you redirected before to achieve RDP file transfer between PCs.
Note: If the files you select are no larger than 2 GB, you can copy and paste them directly between the PCs.
Option 3. Chrome Remote Desktop: Google Chrome browser extension
Chrome Remote Desktop is also a free remote file transfer tool. It’s an extension of the Google Chrome browser, and please read the tips below before operations.
- Chrome Remote Desktop only supports for Google Chrome browser.
- Make sure you have a Google account.
- Try to make your net connectivity fast enough, or the file transfer process will be clumsy.
- File transfer via Chrome Remote Desktop is only allowed when the host computer is running Windows 10/11 .
Preparation work: Add extension on PCs and get a PIN.
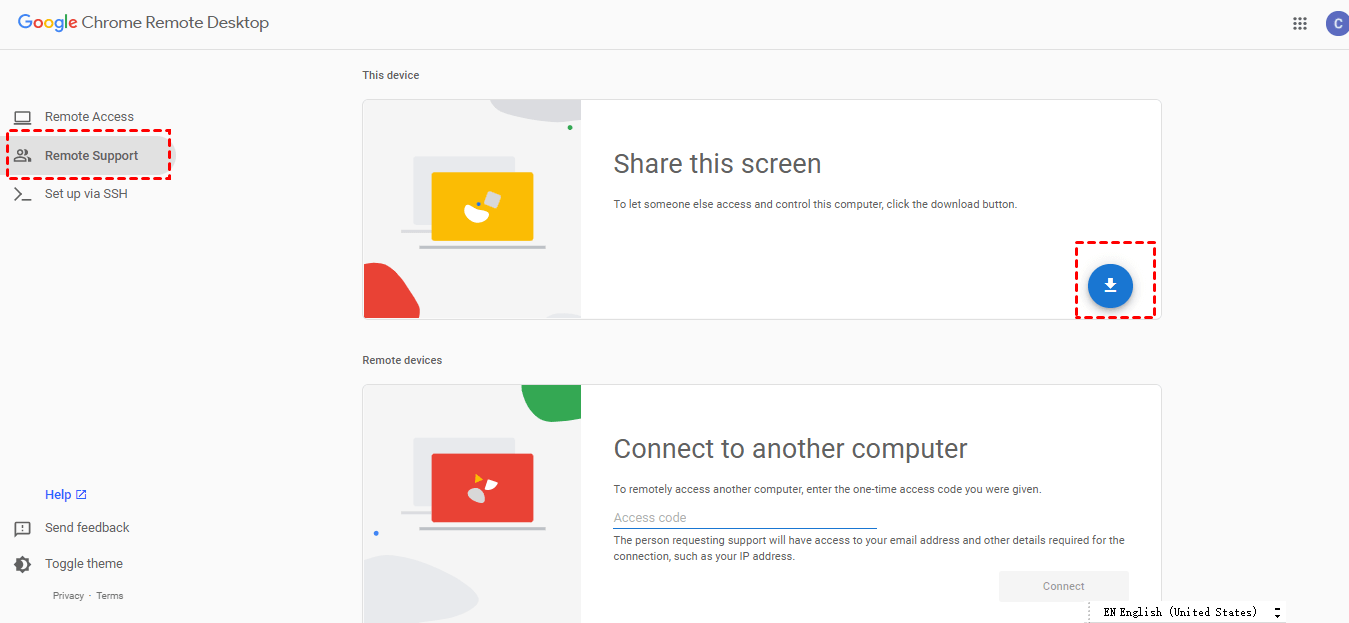
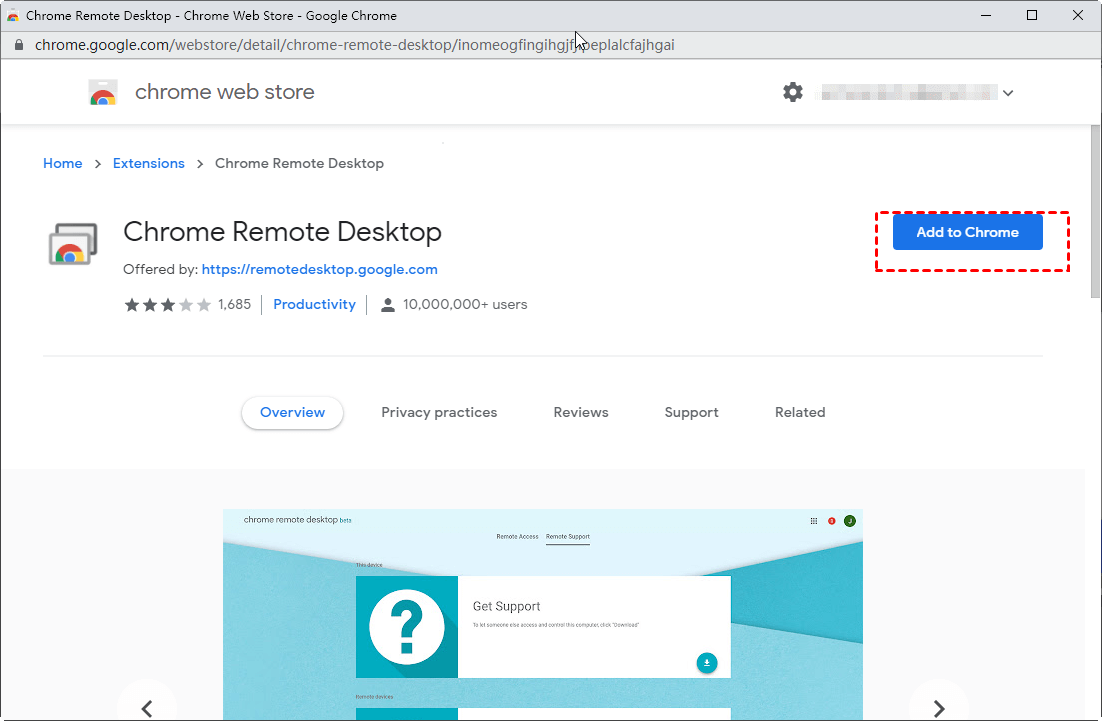
Step 1. Open the Chrome Remote Desktop download page. Click Remote Support on the left pane and then click the blue download button.
Step 2. Click Add to Chrome to add Chrome Remote Desktop in your Chrome browser.
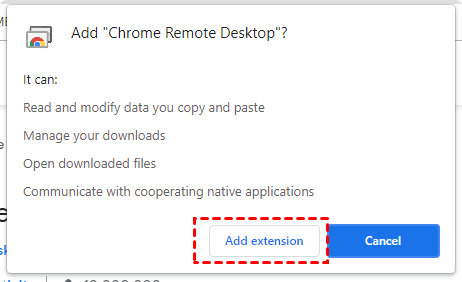
Step 3. Click Add extension in the pop-up window.
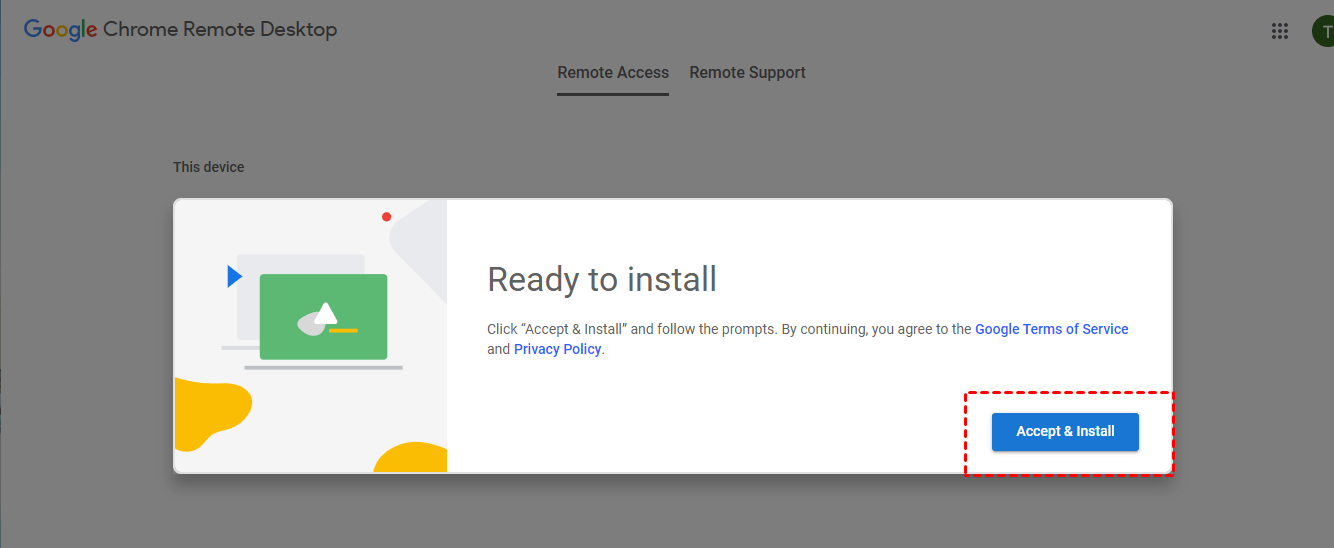
Step 4. Click Accept & Install to achieve installation.
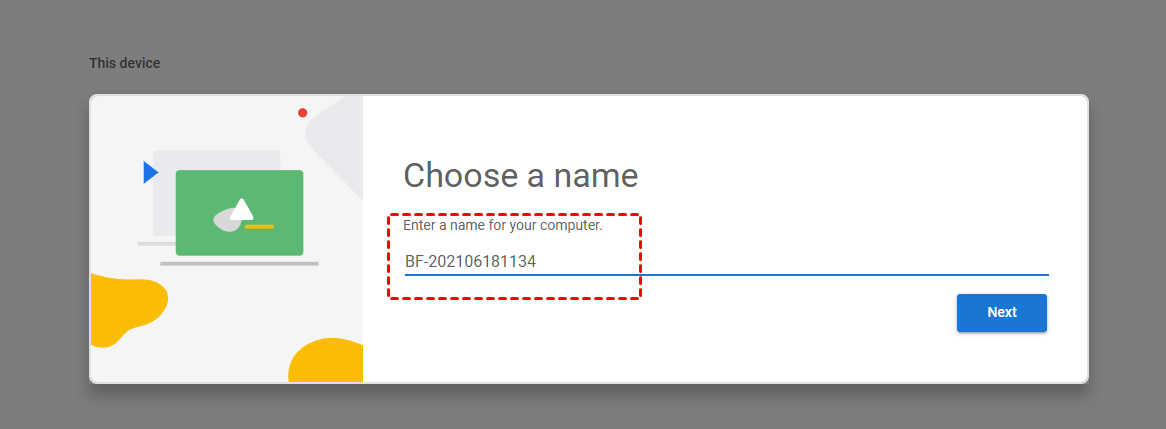
Step 5. Enter a name for your computer and then click Next.
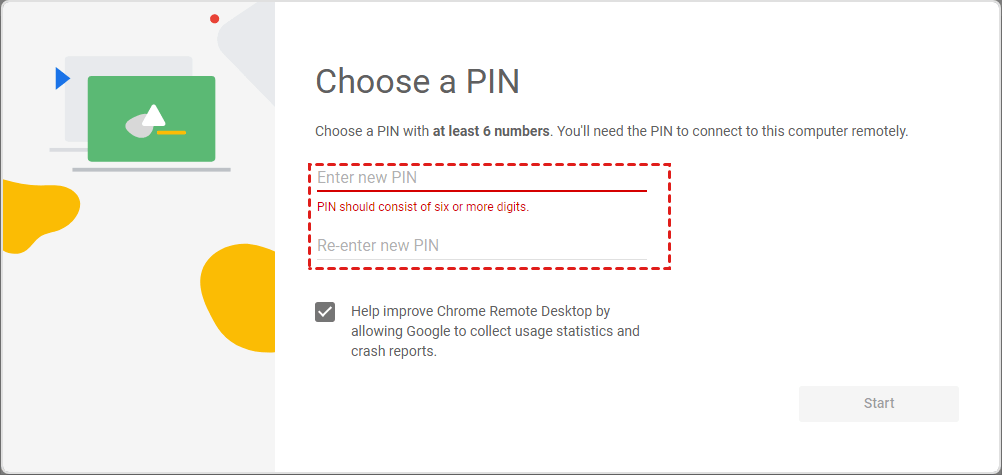
Step 6. Enter and re-enter a new PIN with at least 6 numbers, then click Start.
Transfer files via Chrome Remote Desktop
Step 1. On the client computer, open the Chrome browser to log in to the same Google account of the host PC. And open the extension to see the remote devices.
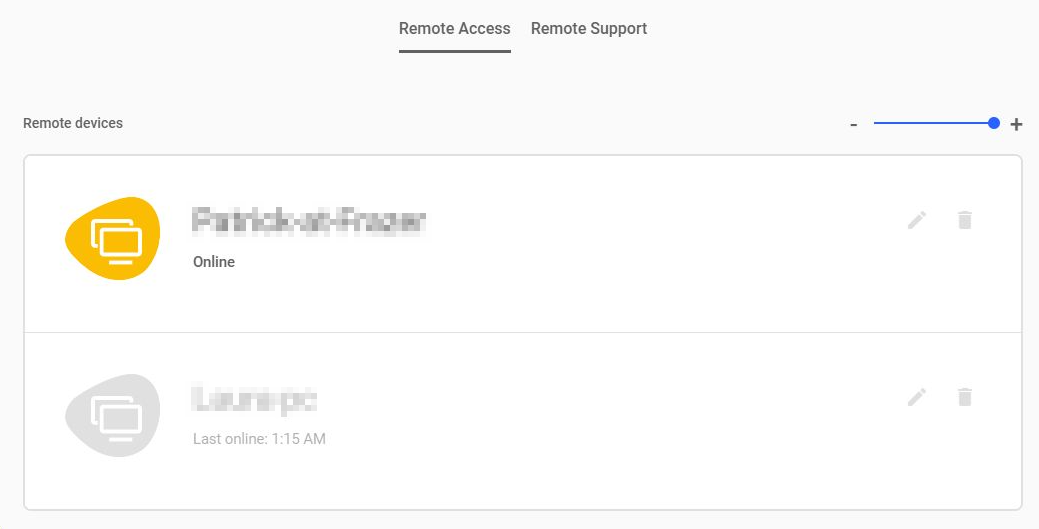
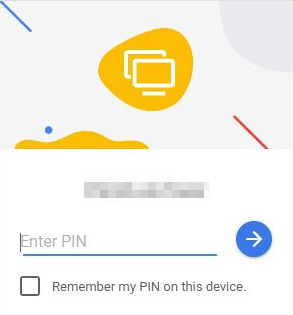
Step 2. Select the device you want to connect to, and enter its PIN to establish a remote connection.
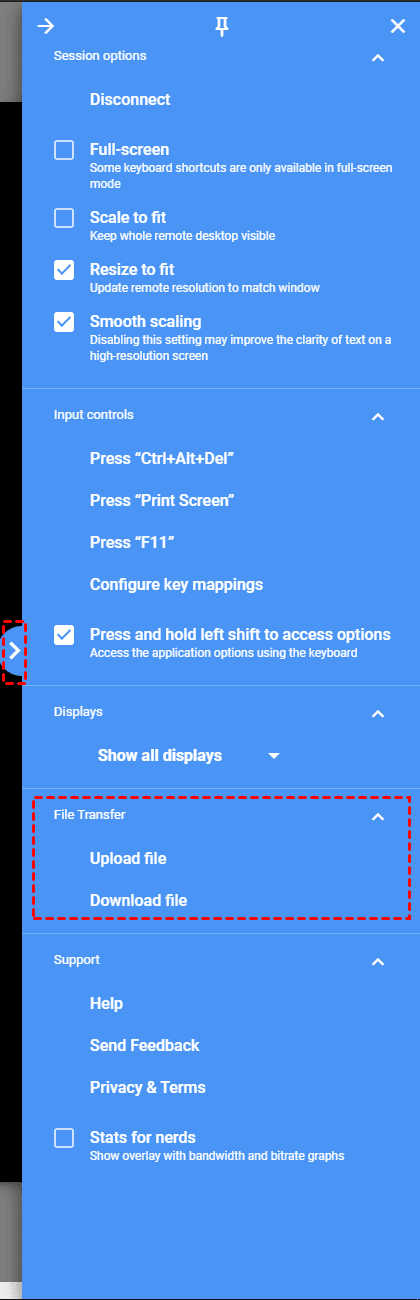
Step 3. After successfully connecting, click the right arrow to expand the sidebar. In the File Transfer column, you can Upload file or Download file based on your own need.
Conclusion
In this post, we introduce three free remote access software with file transfer: AnyViewer, Microsoft Remote Desktop, and Chrome Remote Desktop. Choose the one that fits you most.
