
How-To: Transfer Files between Two Macs Using Target Disk Mode
This guide shows you how to quickly transfer files between two Mac computers using target disk mode or go wireless with AnyViewer, AirDrop or Migration Assistant.
By Ellie / Updated on April 10, 2025
What is the target disk mode?
Target Disk Mode is a macOS feature that transforms one Mac into an external drive for another. When enabled, the target Mac appears on the host Mac's Finder just like a regular storage device—be it a USB stick, SSD, or hard drive—making file transfers fast and simple.
Originally, this feature relied on FireWire connections, but with FireWire now obsolete, Apple has shifted to USB and Thunderbolt support. Notably, if either Mac is running macOS 11 or newer, a Thunderbolt cable is required for compatibility.
This function works across both Intel-based and Apple silicon Macs. However, on Apple silicon devices, it's referred to as Mac Sharing Mode. If you're connecting an Intel Mac to an Apple silicon Mac, the Apple silicon Mac must act as the target.
Step-by-step guide: How to transfer files between two Mac computers using target disk mode
Here's how to transfer files between two Mac computers using target disk mode with ease:
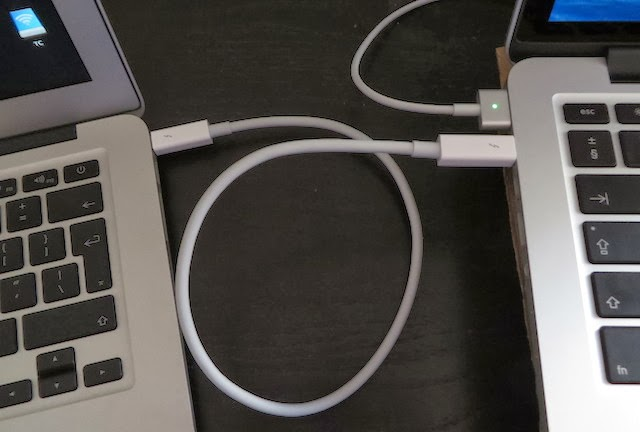
Step 1. Use a USB, USB-C, or Thunderbolt cable to connect the two computers.
Important: If either Mac is running macOS 11 or later, a Thunderbolt cable is required for proper connection.
Step 2. You can boot into Target Disk Mode in two ways:
- If the Intel Mac is powered off, turn it on while holding the T key.
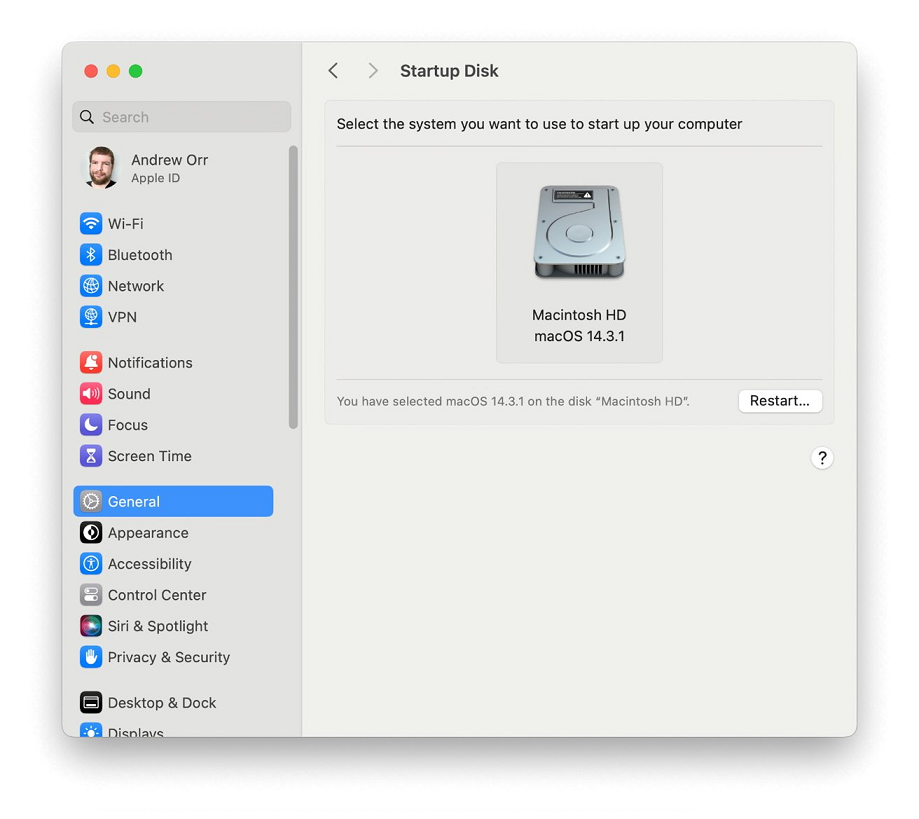
- If it's already on, go to Apple menu > System Settings > General, scroll to Startup Disk, and click Restart in Target Disk Mode.
Once activated, the Intel Mac will appear as a disk icon on the desktop of the other Mac.
Step 3. On the second Mac, open Finder. Locate and double-click the connected Mac under the sidebar to access its files.
Step 4. Simply drag and drop the files you want to copy to or from the mounted disk.
Step 5. When the transfer is complete, Control-click the disk icon in the Finder sidebar and choose Eject [volume name].
Step 6. On the Mac used in Target Disk Mode, press the power button to shut it down. Once powered off, unplug the cable.
Bonus tip: How to transfer files between two Macs wirelessly
While transferring files from Mac to Mac via target disk mode using a cable is a fast and reliable way to transfer large amounts of data, it does have some limitations. You need a compatible cable—like Thunderbolt for newer Macs—and both devices must be physically connected, which isn't always convenient, especially if you're missing the right cable or the Macs are in different rooms.
That's where wireless file transfer comes in. It's cable-free, flexible, and perfect for quick file sharing—no need to worry about ports, adapters, or physical proximity. Whether you're sending a few photos or backing up folders, macOS offers built-in wireless options like AirDrop and File Sharing to make the process smooth and hassle-free. Here's how to use them:
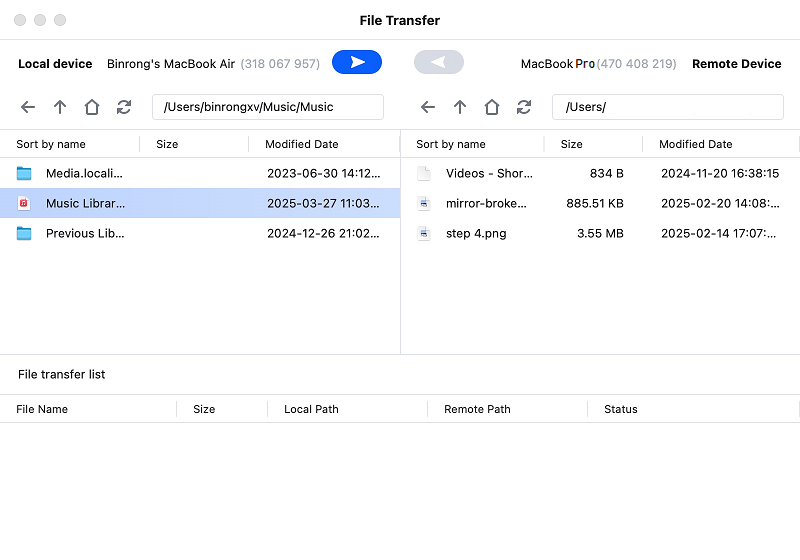
Way 1. Use remote file transfer software - AnyViewer
When your Macs are located in different places, direct cable connections aren't an option. That's where AnyViewer comes in—a secure, fast, and intuitive remote desktop tool that allows you to access and transfer files between devices from virtually anywhere.
AnyViewer makes remote file transfers effortless. Whether you're working from home, helping someone troubleshoot, or moving documents between machines, this tool bridges the distance with ease.
Why Choose AnyViewer?
- Robust Security – End-to-end encryption and two-factor authentication keep your data protected at all times.
- Lightning-Fast Access – Enjoy smooth, real-time control and file transfers, even over slow or long-distance connections.
- Cross-Platform Support – Connect from Mac, Windows, iOS, or Android—AnyViewer adapts to your setup.
- Simple File Transfers – Use drag-and-drop or the integrated file transfer function to send files instantly.
- Multi-User Functionality – Manage multiple users and devices under a single account—ideal for businesses or families.
- Privacy Mode – Black out the remote screen and lock inputs to maintain confidentiality during sessions.
- LAN & WAN Compatible – Works flawlessly whether you're on the same local network or miles apart.
How to Transfer Large Files Between Macs via AnyViewer
Step 1. Download and install AnyViewer on both Macs.
Step 2. Sign up for a free account or use the software without logging in (note: some features will be limited).

Step 3. Log in on one Mac and locate the other device from your device list.
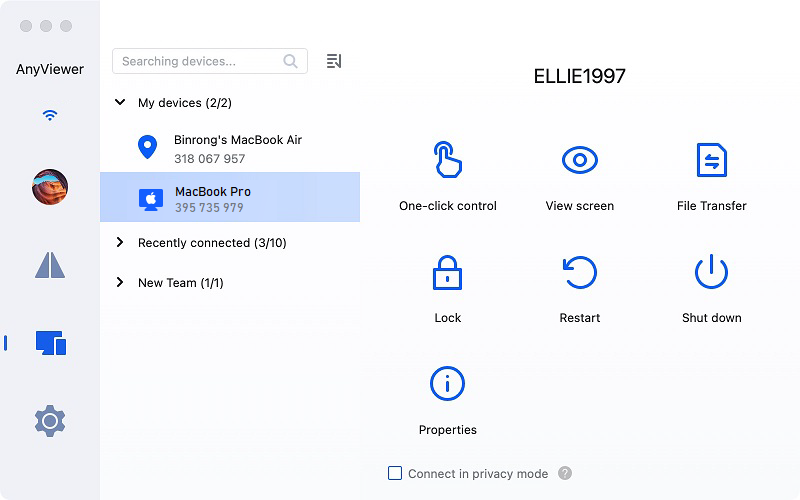
Step 4. Initiate the connection and start transferring files seamlessly between the two computers.
Unlock Premium Performance with Pro or Enterprise Plans
Upgrading to an AnyViewer Professional or Enterprise plan takes your file transfers to the next level:
- Up to 10 MB/s Transfer Speeds – Significantly faster than the free tier.
- Send Multiple Files at Once – Transfer up to five files simultaneously for efficient workflows.
- No Limits – Move unlimited files in one go without restrictions.
- Massive File Support – Easily send files up to 1 TB in size without hiccups.
Whether you're syncing work files or backing up important data, AnyViewer offers a professional-grade remote solution that's both powerful and easy to use.
Way 2. Migrate all files from one Mac to another via Migration Assistant
If you're setting up a new Mac and want to bring over everything from your old one—including apps, files, user accounts, and settings—Migration Assistant is the way to go. It's a built-in tool from Apple that makes the entire transfer process seamless.
Step 1. For the smoothest experience, make sure both your old and new Macs are running the latest version of macOS. This helps avoid compatibility issues during migration.
Step 2. Ensure both devices are on a Wi-Fi network:
- If either Mac is running OS X El Capitan or earlier, they must be connected to the same Wi-Fi network.
- For newer versions, they just need to be connected to Wi-Fi (same or different networks).
Step 3. Turn off any antivirus programs, firewalls, or VPNs on both Macs before you start. These can interfere with the Migration Assistant process. You can re-enable them once the transfer is complete.
Step 4. Launch Migration Assistant on the new Mac:
- Open Finder > Applications > Utilities > Migration Assistant.
- You can also search for it using Spotlight (Cmd + Space).
- Launch the app and click Continue.
- You may need to enter your admin password to proceed.
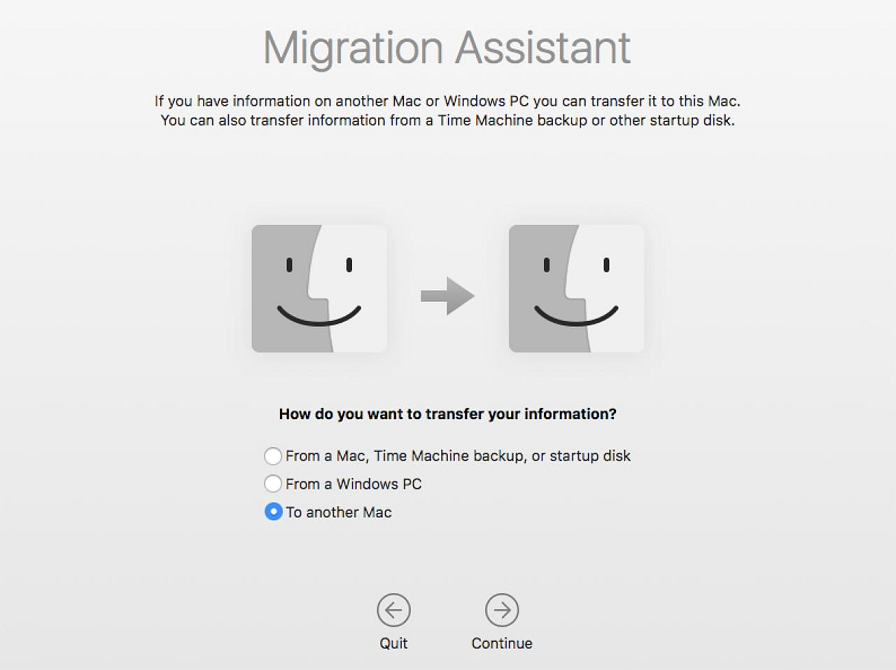
Step 5. When prompted with the question "How do you want to transfer your information?" on the new Mac, choose: "From a Mac, Time Machine backup, or startup disk", then click Continue.

Step 6. Now, on your old Mac, open Migration Assistant in the same way. Click Continue, and grant permission if prompted.
Step 7. When asked how you want to transfer your data, choose "To another Mac" and then click Continue.
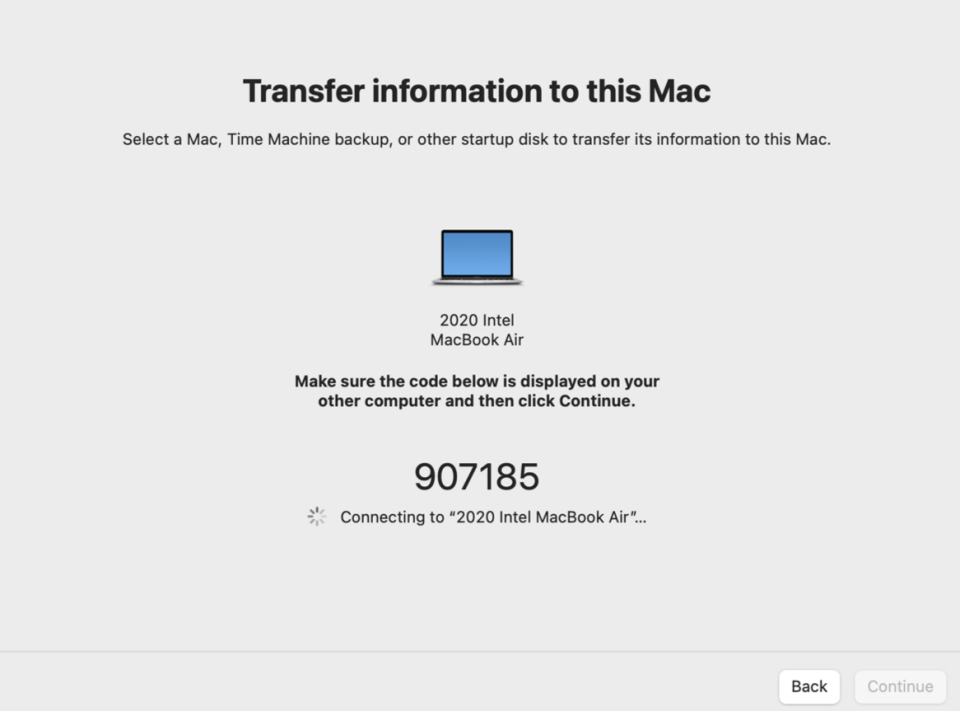
Step 8. Switch back to the new Mac. It should display your old Mac in the Migration Assistant window. Select it and click Continue.
Step 9. A security code will appear on your old Mac's screen. Make sure it matches the one on your new Mac. If they match, click Continue on both devices to proceed.
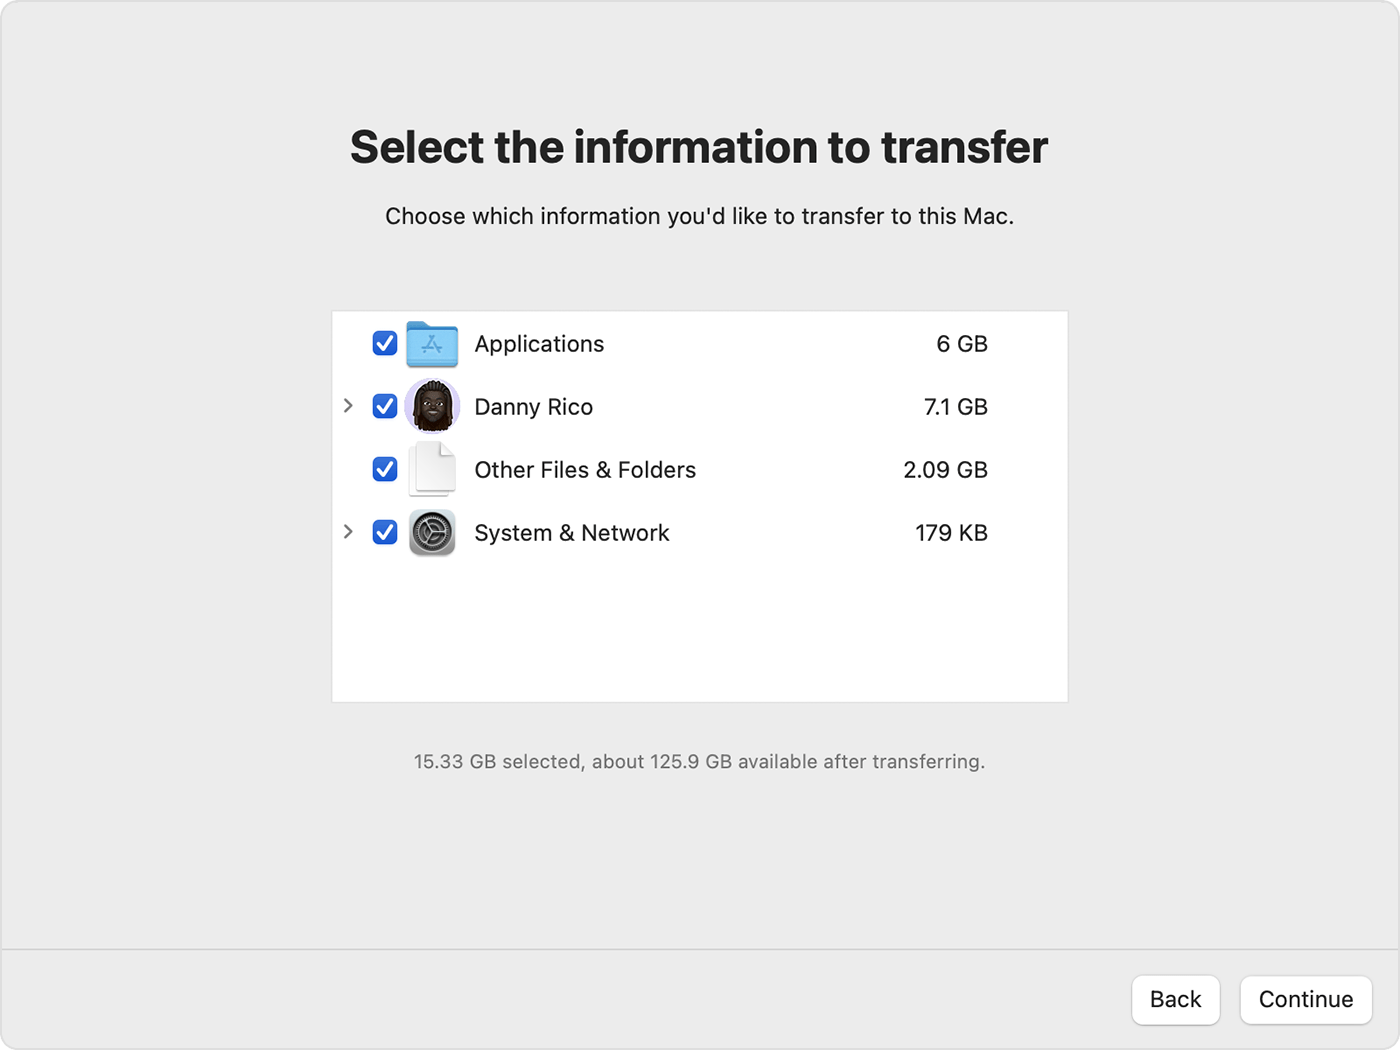
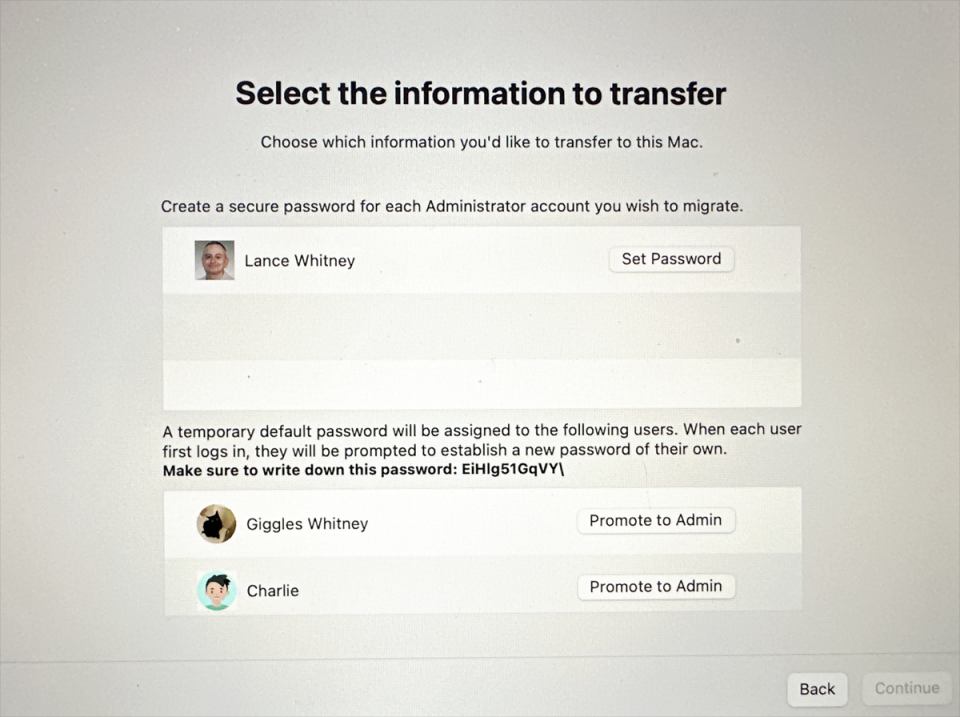
Step 10. On your new Mac, you'll now see a list of items available to transfer:
- Applications
- User accounts
- Files and folders
- System and network settings
Check the boxes for the data you want to move.
Step 11. Click Continue to start the migration. Depending on how much data you're transferring, this could take several hours, so it might be a good idea to let it run overnight.
Way 3. Use AirDrop to transfer a small number of files
AirDrop is a quick and convenient way to wirelessly transfer files between two Macs, especially when you're only moving a few items. It's built into macOS and requires no cables or extra software—just Bluetooth and Wi-Fi.
Step 1. To use AirDrop, both Wi-Fi and Bluetooth must be turned on:
- Wi-Fi: Click the Wi-Fi icon in the top menu bar and make sure it's toggled on. Connect to a network if prompted.
- Bluetooth: Click the Bluetooth icon in the menu bar and ensure it's turned on.
Step 2. Make sure both Macs are:
- Powered on
- Within 30 feet (9 meters) of each other
- In the same room, if possible
Step 3. Click the Finder icon (a blue smiley face) in your Dock to launch a new Finder window.
Step 4. Open Control Center from the top-right of your screen. Click AirDrop. If it's set to No One or Contacts Only, switch it to Everyone to avoid any issues detecting the other Mac.

Step 5. Navigate to the files in Finder. Hold Command and click to select multiple files. Alternatively, use Shift + Click to select a group of files in a row.
Step 6. Control-click one of the selected files. Choose Share > AirDrop from the context menu. You can also click the Share icon at the top of the Finder window and then click AirDrop.

Step 7. The AirDrop window will display nearby devices. Click the name of the other Mac to send the files.
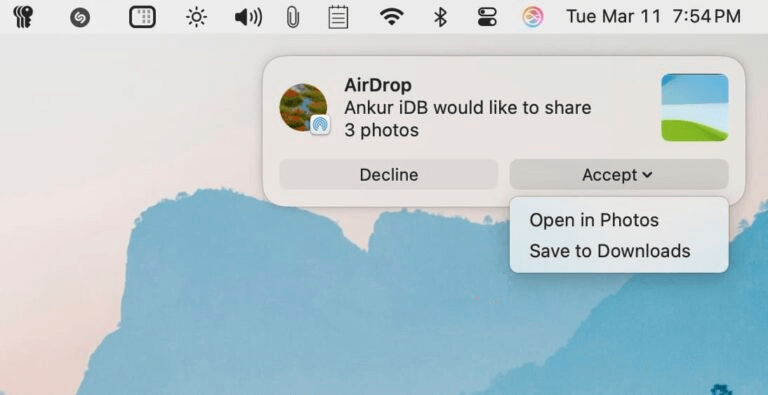
Step 8. A notification will appear on the receiving Mac—click Accept. If both Macs are signed into the same Apple ID, the transfer will begin automatically without needing approval.
Step 9. On the receiving Mac, the files will be saved in the Downloads folder by default.
Step 10. On the sending Mac, click Done to finish and exit the AirDrop sharing interface.
Tip: AirDrop is ideal for quick, local transfers of photos, documents, or small videos—but for larger files or long-distance transfers, tools like AnyViewer are better suited.
Conclusion
In conclusion, Target Disk Mode offers a fast and reliable method for transferring files between Macs using a direct cable connection. However, when physical connection isn’t feasible, wireless options like AirDrop and Migration Assistant provide convenient alternatives. For the most flexible and powerful solution, especially across distances, AnyViewer stands out with its secure, high-speed remote file transfer capabilities. Whether you're moving a few documents or entire system backups, there's a method to suit every situation—making Mac-to-Mac file transfers easier than ever.
