
Solved: Telnet Connection Refused
There are several causes of the error “Telnet connection refused.” In this post, we explain the reasons for this problem and how to fix it in different cases.
By AnyViewer / Updated on December 13, 2024
How do I fix Telnet connection refused?
Hi everybody. When using Telnet with an IPv6 address, I experience an issue. I receive the message 'Connection refused,' but I have no idea why. How do I fix Telnet connection refused? Does it require any file modifications in order for it to accept IPv6 addresses?”
- Question from a user

How to fix Telnet connection refused [4 cases]
Telnet (TELetype NETwork) is one of the remote login protocols on the internet. Through Telnet, you can easily access another user’s computer remotely. However, when users try to access another computer using Telnet, they may receive the “Telnet connection refused” message. There are several causes of this error. In this part, we will explain the reasons and offer the appropriate solutions. Or you can switch to a reliable remote access app, AnyViewer.
Case 1. Telnet service not running
When the Telnet unable to connect to remote host, one of the most likely causes is that the user is attempting to connect to a computer that doesn't have the telnet service installed. You can follow the next steps to enable Telnet Executable on devices.
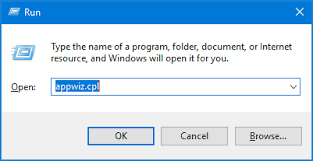
Step 1. Press Win + R to evoke Run dialog box and enter “appwiz.cpl”.
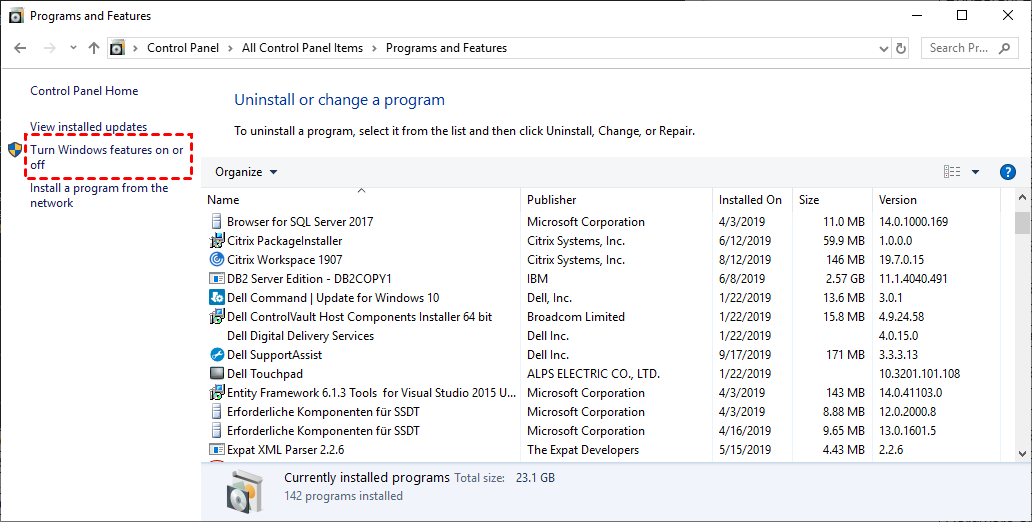
Step 2. On the left panel, click Turn Windows feature on or off.
Step 3. Scroll down to tick Telnet Client in the list, and click OK.
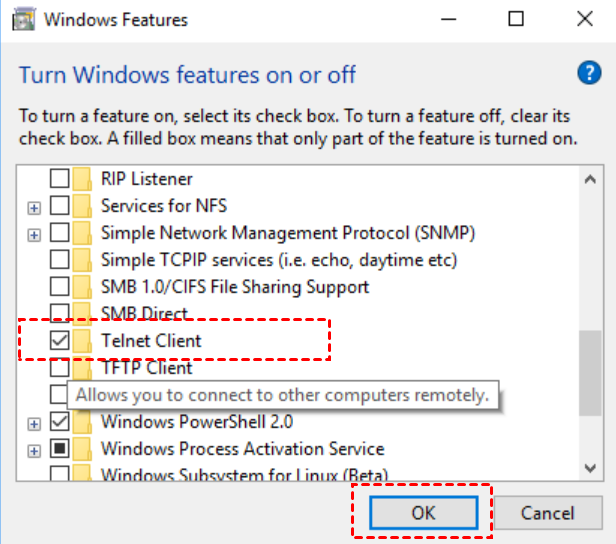
Now you can try to perform Telnet again to the remote device.
Case 2. Telnet disabled in configuration file
Another common possibility for the error “Telnet localhost connection refused” is the Telnet services disabled in the configuration file. You can find the file and modify the setting to solve the problem, and we suggest making a backup of the original file beforehand.
Telnet configuration file is located at /etc/xinetd.d/telnet. By altering the disable=no parameter, the Telnet service is made available on the destination device.
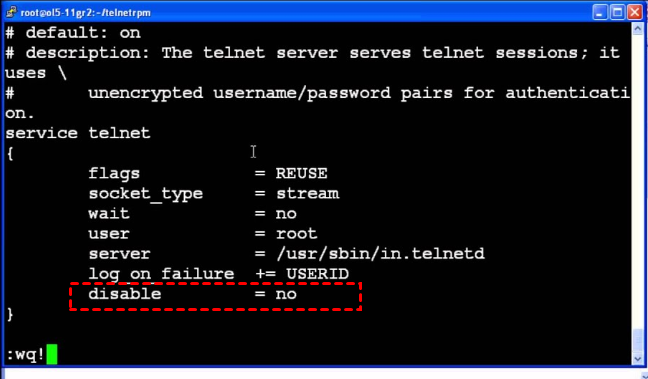
Don’t forget to restart your device to apply the setting.
Case 3. Firewall restrictions
The "Telnet connection refused" error may appear if the firewall between the two hosts is preventing access to the designated port on the remote host. In this situation, the firewall needs to have a port opened for the remote device.
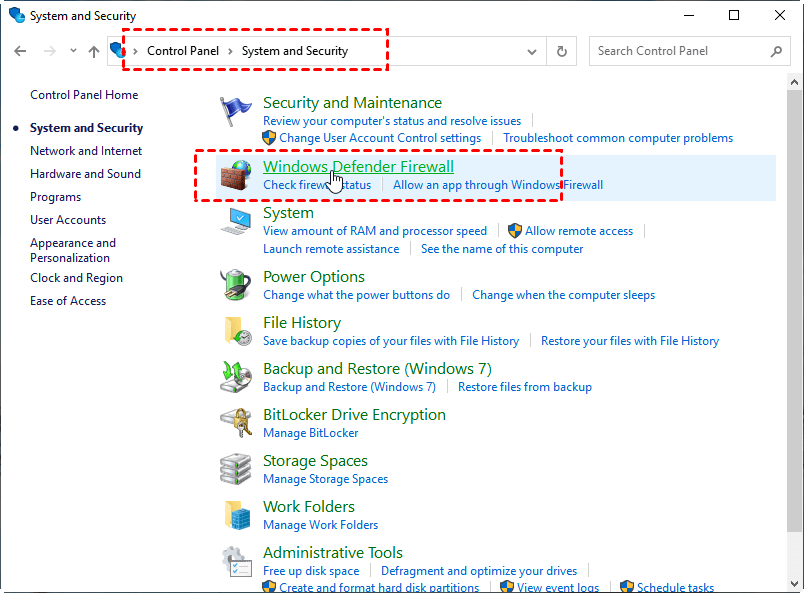
Step 1. On the Control Panel, click System and Security > Windows Defender Firewall.
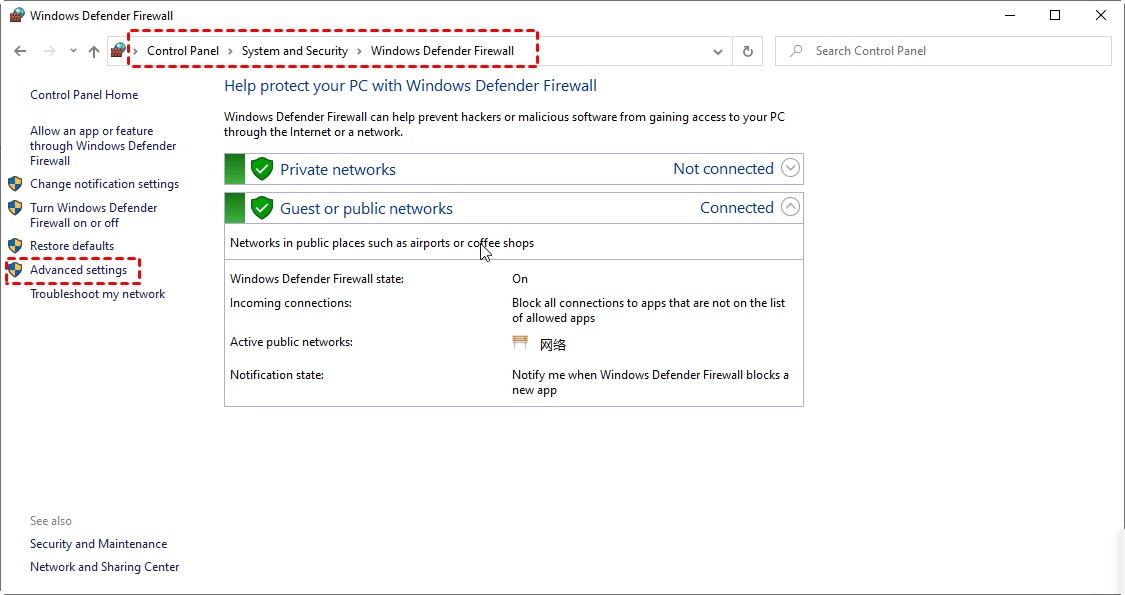
Step 2. Click Advanced settings on the left panel.
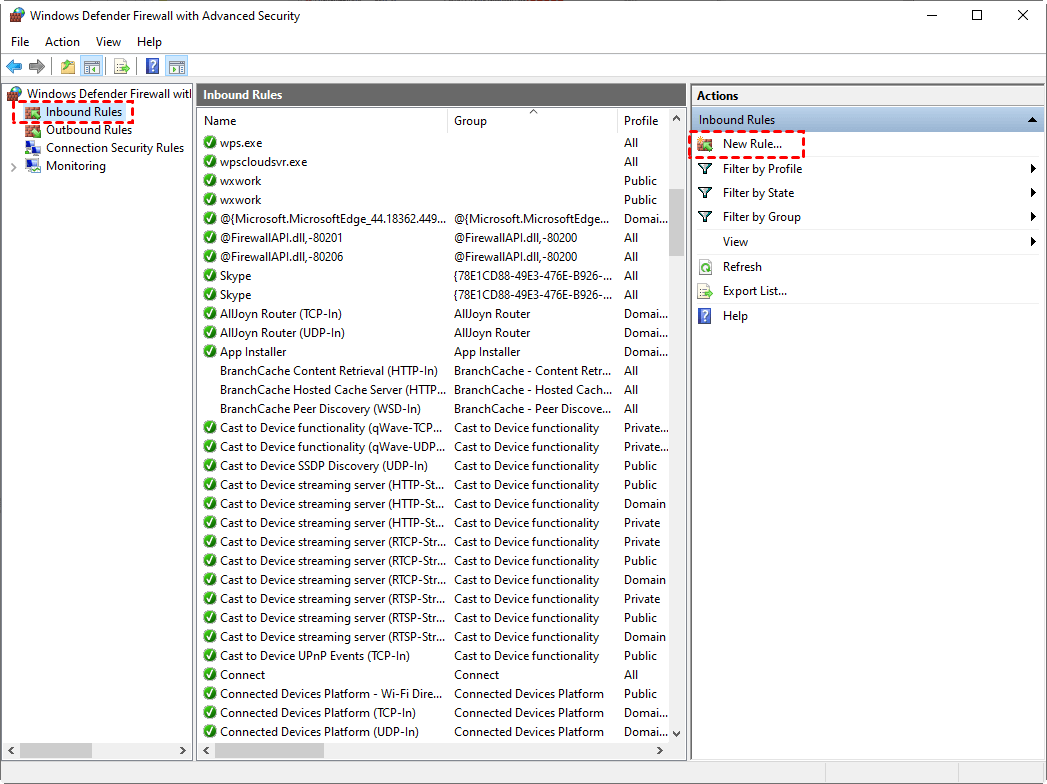
Step 3. Click Inbound Rules > New Rule.
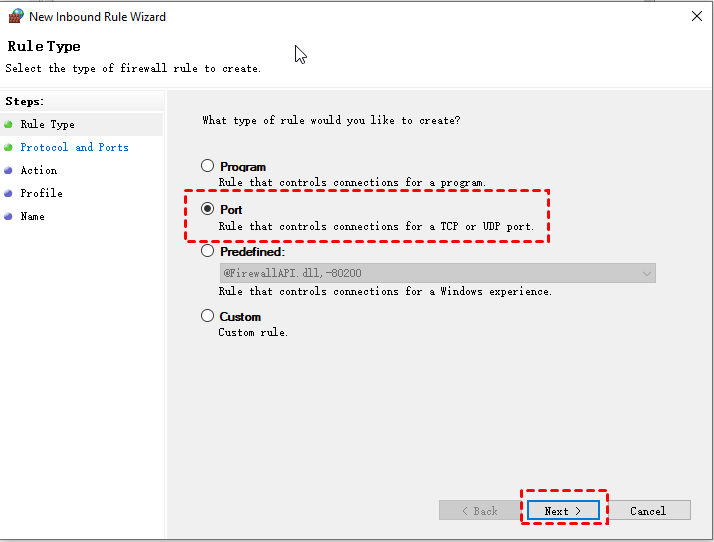
Step 4. Tick the rule type Port and click Next.
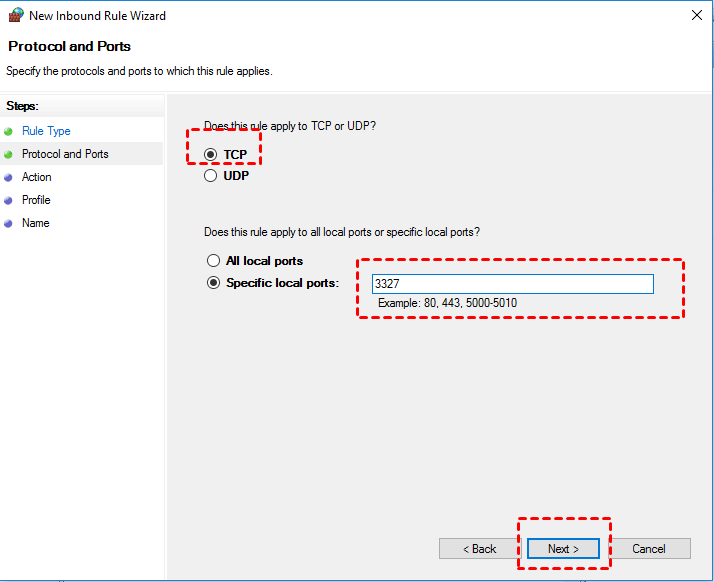
Step 5. Click TCP first, then tick Specific local ports and enter the port number (take port 3327 as an example). Click Next after that.
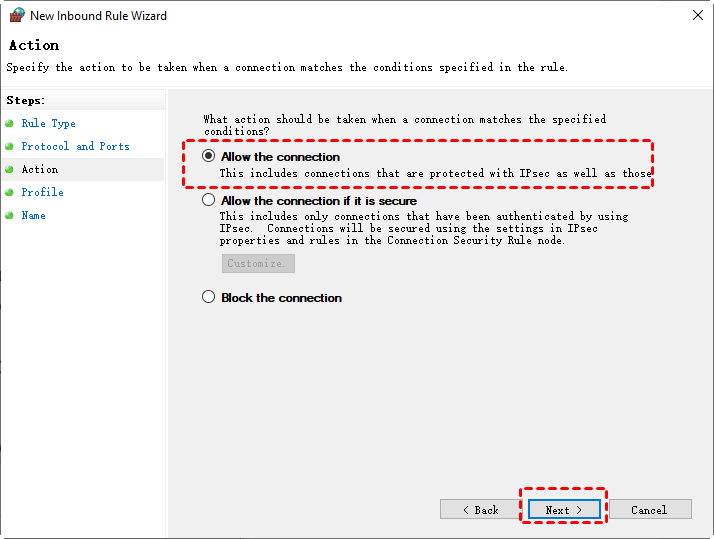
Step 6. In the Action interface, tick Allow the connection and click Next.
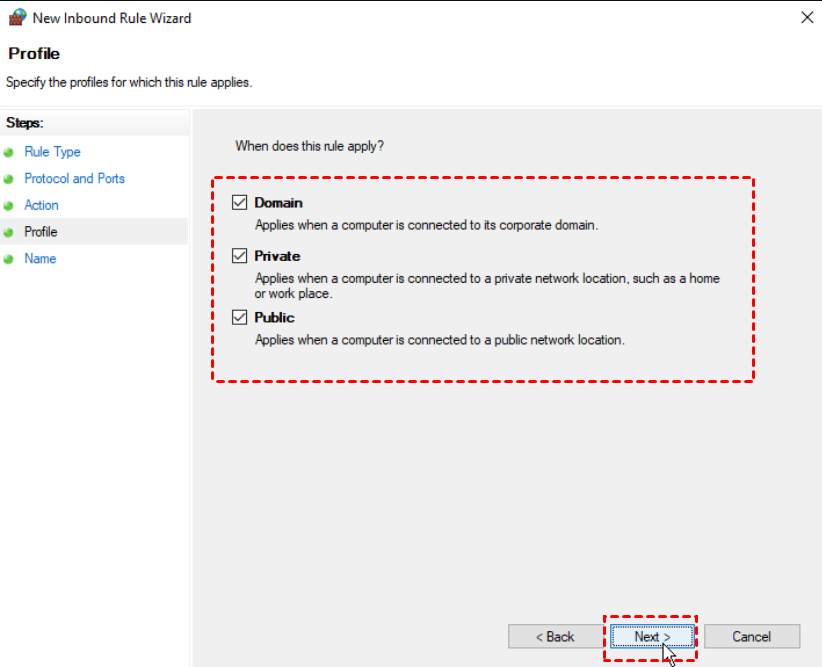
Step 7. Check the network types that you want to allow the connection over and click Next.
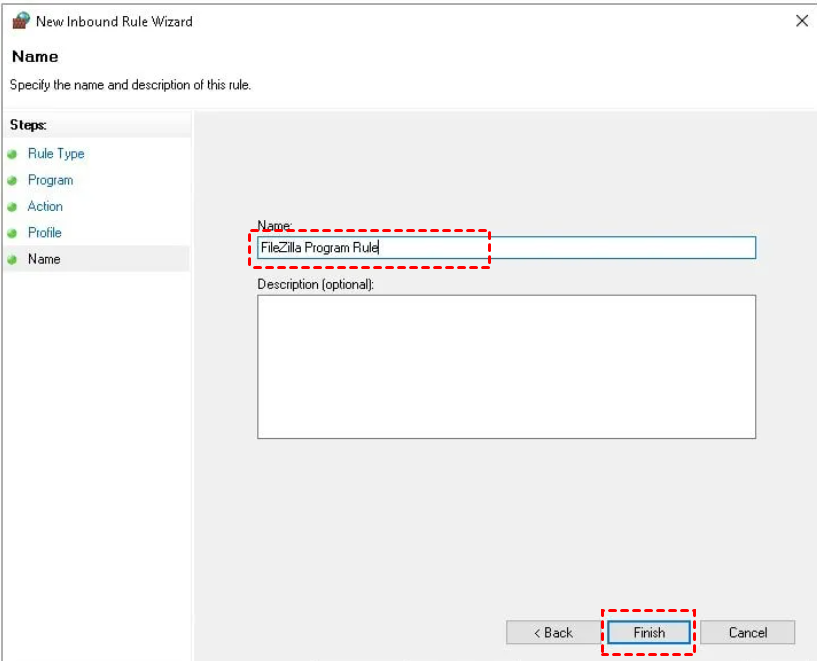
Step 8. Enter the new rule name and click Finish.
Case 4. Service not running
The absence of service on the associated port is another reason why this error could be occurring. You can use Command Prompt to check whether the remote device connection is listening.
Step 1. Press Win+R to invoke the Run dialog box.Type in “cmd” and press OK.

Step 2. Enter the command netstat -a to see the active connections.
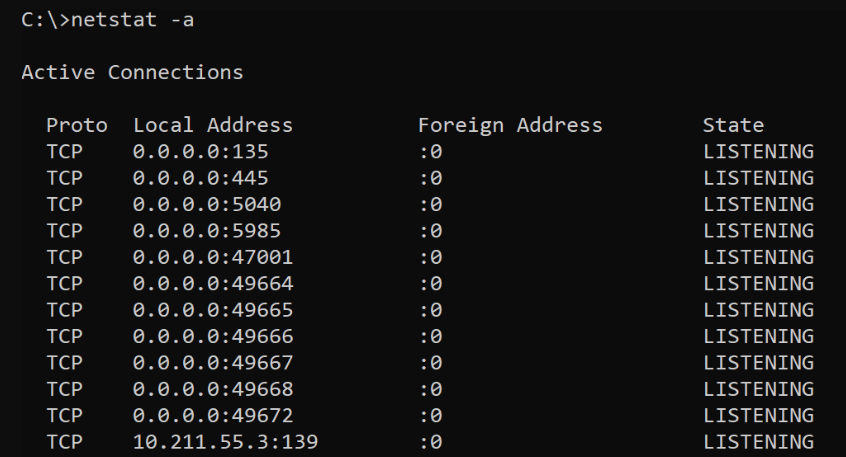
If you don’t see the target connection, you may use the wrong IP address for this task. Follow the next steps to check the IP address.
Open Command Prompt and enter “ipconfig.” Now you can see a list of IP addresses, note down the IPv4 Address.

Bonus tip: Professional remote access software without error
It is quite complicated to perform a Telnet connection between computers and you may always get the error message without knowing what went wrong. In this case, we advise using the free remote desktop software for Windows AnyViewer to get remote access to another computer without any errors.
This multi-function software also supports remote screen share, file transfer, lock/restart of the remote computer directly, etc. Just install it to enjoy the rights.
Step 1. On the host computer, go to Log in on the left pane, and click Sign up to register a new account (you can log in directly if you have already signed up).

Step 2. Fill in the sign-up information. When successfully logged in to AnyViewer, your devices will automatically be assigned to the account.

Step 3. Log in to the same account on the two devices. On your local device, go to Devce, click One-click control to achieve unattended remote access.

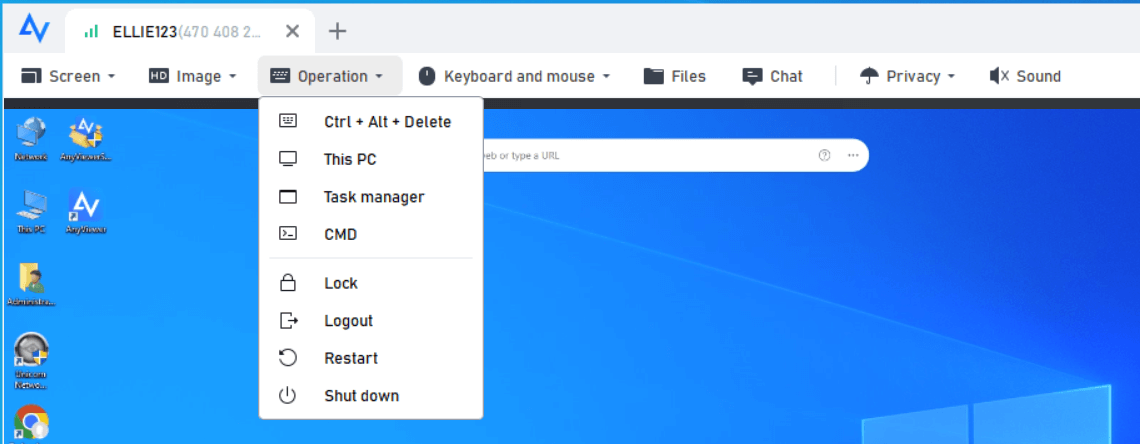
Now you can manage your device remotely like you were sitting in front of it. Besides, there are several functionalities you can choose from the upper toolbar, for example, resize resolution, transfer files, open Task Manager, etc.
- You can also upgrade to a Professional or Enterprise plan then the following rights will thereafter be yours:
- Assign more devices for secure one-click unattended remote access.
- Connect to other devices in privacy mode to protect your data and privacy during the connection.
- Transfer unlimited files at once at a higher speed up to 10 MB/s.
- Enjoy more concurrent connections. Only 2 channels are allowed for free and professional use, therefore, we recommend you upgrade to the enterprise version to enjoy 10 concurrent connections.
- ...
Conclusion
When you encounter the error “Telnet connection refused,” don’t worry, you can follow the steps above to solve your problem. However, the process may be complicated for many people and this error frequently appears according to the feedback of users. Therefore, to remotely connect to other devices effortlessly, try AnyViewer.
