
Remote Desktop Connection Manager Admin
This article provides a tutorial on how to use Remote Desktop Connection Manager admin. We also introduce the easiest way to manage remote desktops. Reading this guide to solve your problem.
By AnyViewer / Updated on December 13, 2024
How to run Remote Desktop Connection as administrator
As remote working has transformed, the role of the administrator has also changed significantly. With teams dispersed across different locations, ensuring seamless access to resources and maintaining robust security measures has become critical. In this digital environment, Remote Desktop Connection Manager (RDCM) becomes an important tool for administrators to provide efficiency, control, and greater productivity.

In this article, we will discuss in depth how to use Remote Desktop Connection Manager admin sessions. we will also recommend one of the easiest ways to manage remote desktop, if you are also interested read on.
How to use Remote Desktop Connection Manager admin
To become remote desktop manager admin easily, follow the steps narrated in this article.
Step 1. Begin by creating a configuration file to store your settings. You can do this by pressing Ctrl + N or navigating to File > New. Ensure the file has the extension *.rdg, as it's essentially a text XML file editable manually.
Step 2. In the configuration file, you can store numerous RDP connections for your remote servers. Use the tool's functionality to organize RDP connections based on your preferred criteria. For example, you can create groups for Hyper-V servers, and AD domain controllers, or categorize them by location, role, or customer.

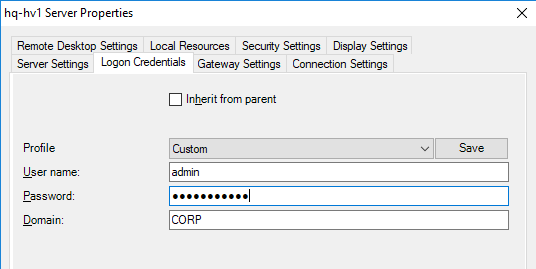
Step 3. You have the choice to save your RDP credentials to simplify connections to servers within each group. Access Group Properties and head to the Logon Credentials tab to input your credentials. These credentials will be inherited by all servers within the group. If different credentials are needed for individual servers, uncheck the "Inherit from parent" option and configure it accordingly.
Step 4. Remember to save the configuration file by clicking the Save button after any modifications or additions. This is essential for preserving your settings for future use and reference.
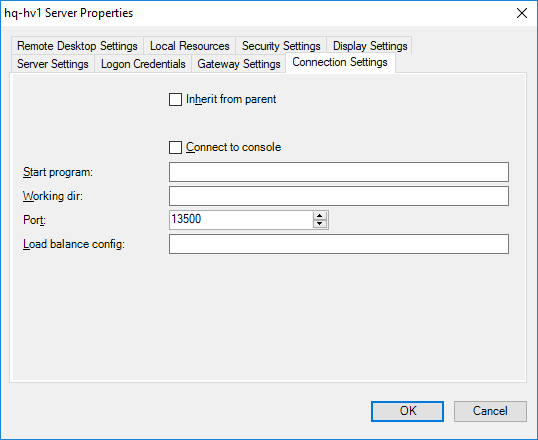
Step 5. Once Remote Desktop Connection Manager is configured, proceed to configure RDP connection settings in RDCMan. Find your way to the RDP connection properties located in the "Connection Settings" section. By default, RDP connections use port 3389. If your RDP server operates on a non-standard port, uncheck the "Inherit from parent" option and adjust the port number accordingly.
Step 6. Opting for the "Connect to console" option links you directly to your server's console. This mode imitates a direct link to your server's local monitor, allowing access to the RDS server without requiring a client CAL license. It's handy when the licensing server is inaccessible or the RDSH licensing mode isn't set up.
Step 7. Adjust the screen resolution for your RDP session in the "Remote Desktop Settings" tab; opting for "Full screen" is advised. Additionally, designate local resources to be forwarded to the RDP session in the appropriate tab. This includes features like clipboard redirection, local printer utilization, and sharing of local drives.
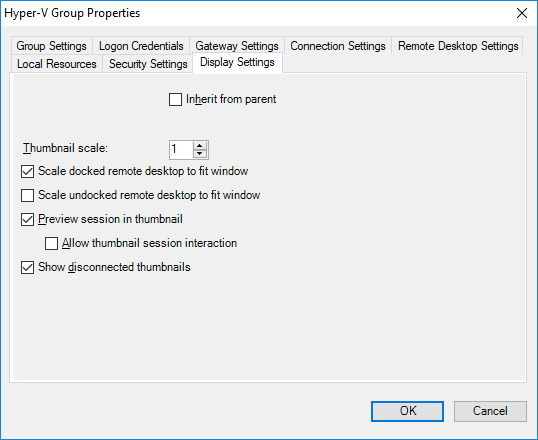
Step 8. To avoid scrolling and ensure that the RDP window fits your screen, select the option "Scale docked remote desktop to fit window".
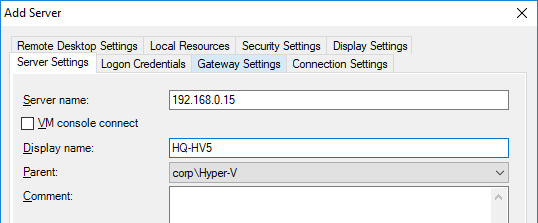
Step 9. Arrange hosts, including servers and workstations, into groups within RDCMan. Then, right-click on the designated group and proceed to add a server.
- Server Name: Enter the hostname or its IP address.
- Display Name: Enter the Display Name to indicate the server name that will appear in the RDCMan console.
Step 10. Once set up, your console will show tiles representing remote servers that are continuously updated in real time. Double-clicking on a server grants access using RDP with the saved credentials.
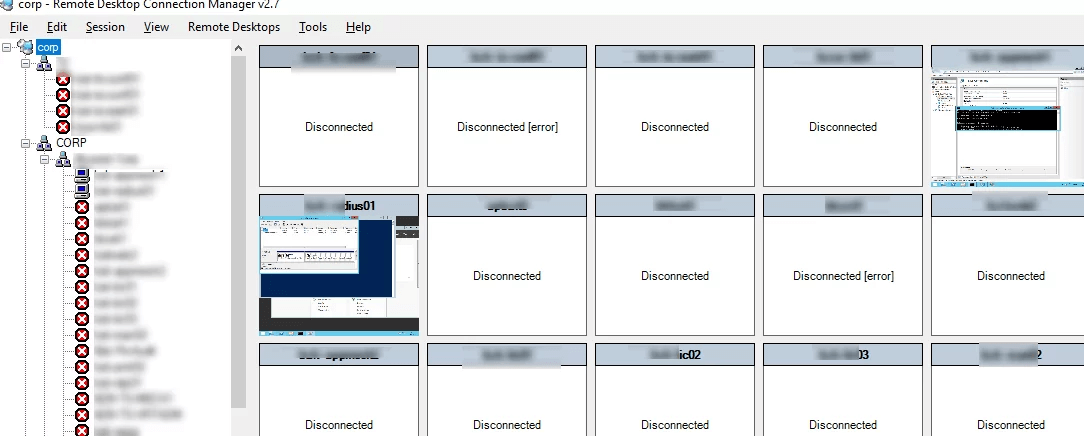
Step 11. Utilize the "Connect Group" feature to open RDP consoles for all hosts within a group at the same time.
AnyViewer: Easiest way to manage remote desktop
While Remote Desktop Connection Manager remains a stalwart in remote desktop management, alternatives like AnyViewer offer compelling features and functionalities. AnyViewer provides seamless remote access, collaboration, and support solutions, making it an excellent choice for businesses seeking an intuitive and versatile remote desktop management tool. With its user-friendly interface and cross-platform compatibility, AnyViewer stands as a formidable alternative to traditional RDCM solutions.
AnyViewer streamlines the organization of users and the delegation of role permissions. Administrators can set up role-based sub-account groups for employees at different levels and allocate precise permissions to each group. This functionality proves invaluable in situations where it's necessary to confine sub-accounts according to various roles, ensuring access and operation are limited to specific functions, thus mitigating the risk of unauthorized access and potential data breaches.
Step 1. Begin by downloading and installing AnyViewer on your primary computer and proceed to register for an account.

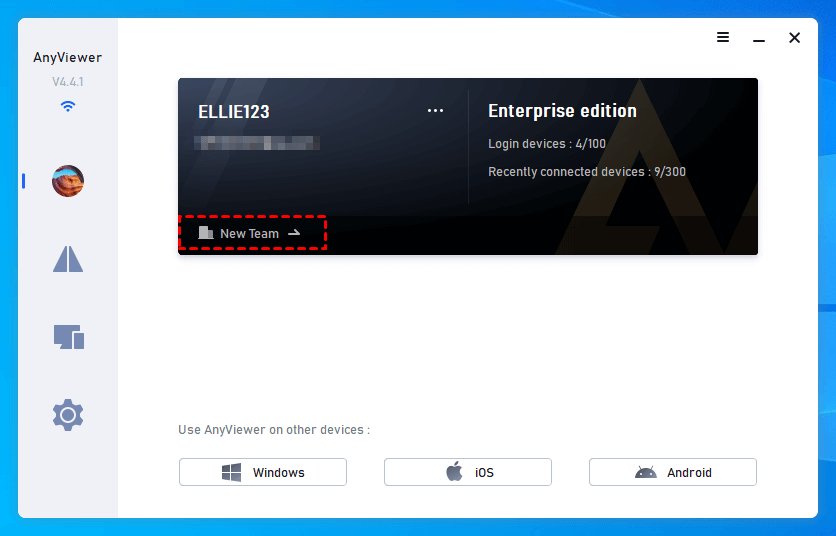
Step 2. On your primary computer, locate and click on "New Team".
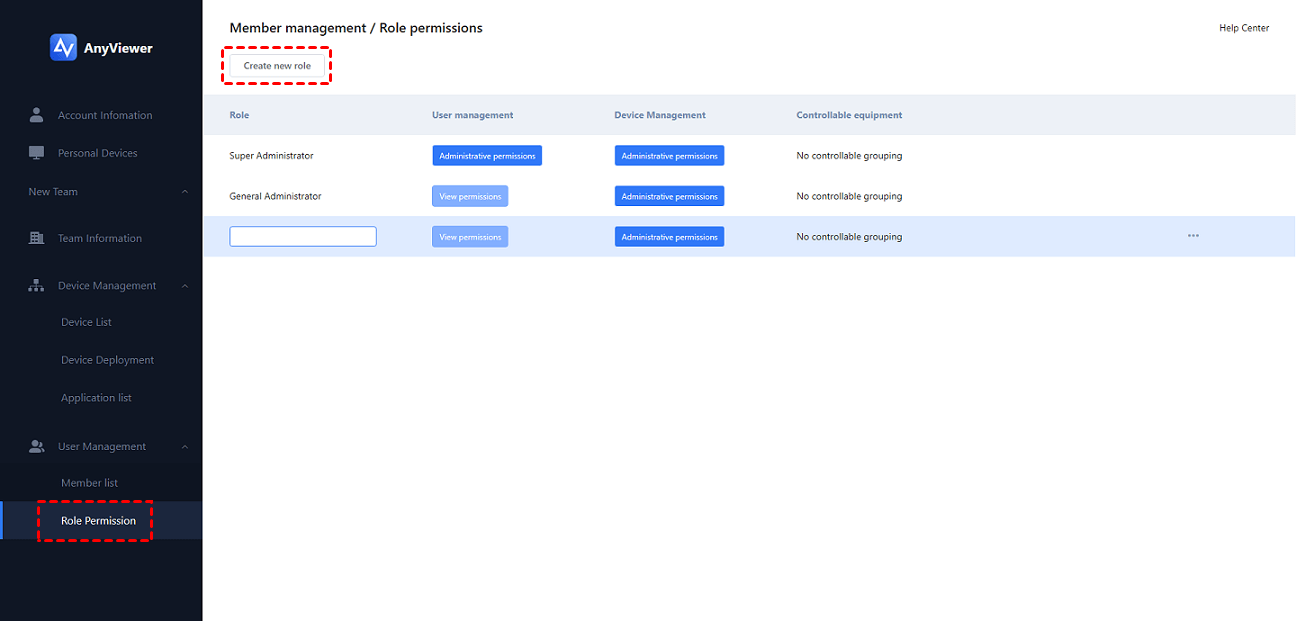
Step 3. Navigate to “Role Permission” > “Create new role”.
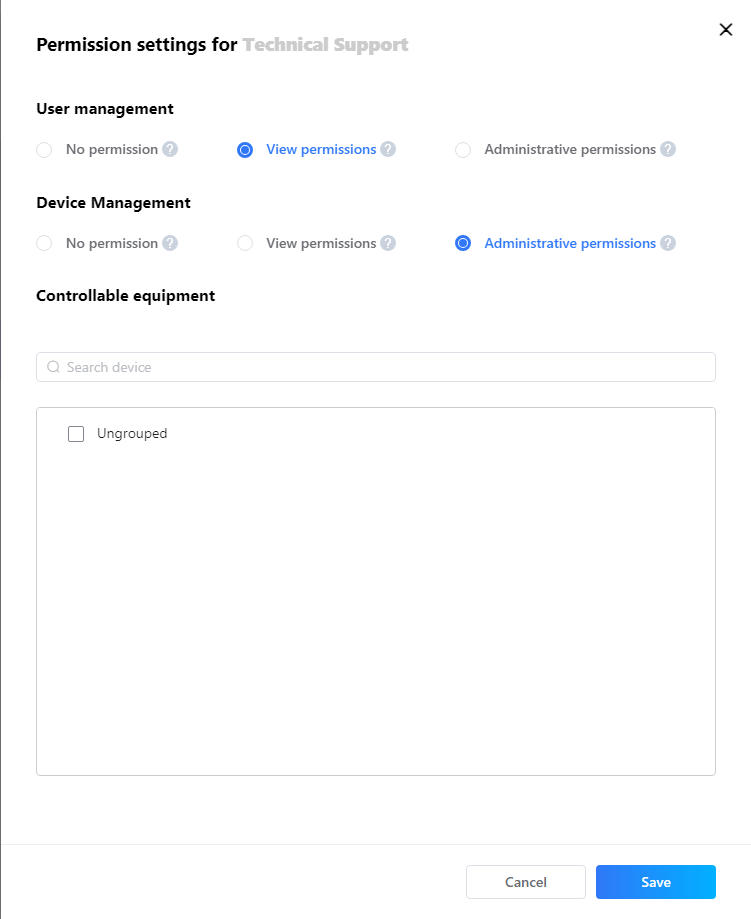
Step 4. Upon creating the new role, select “Edit permission settings”.
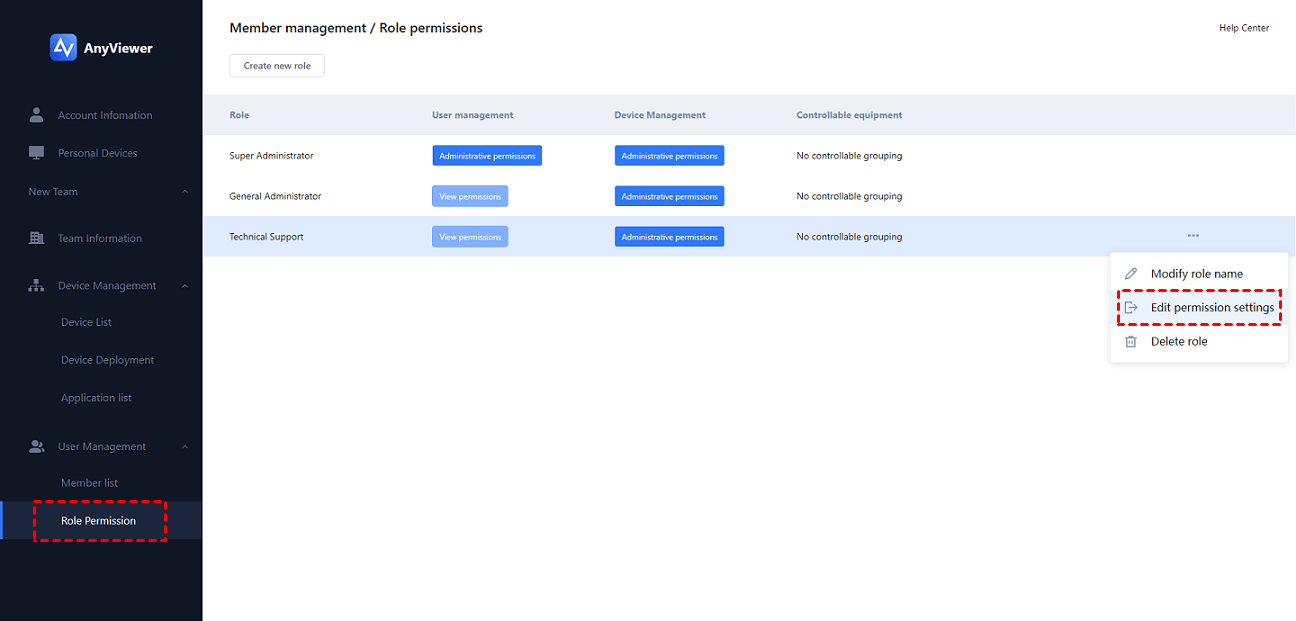
Step 5. You have the option to allocate permissions for the role you've created.
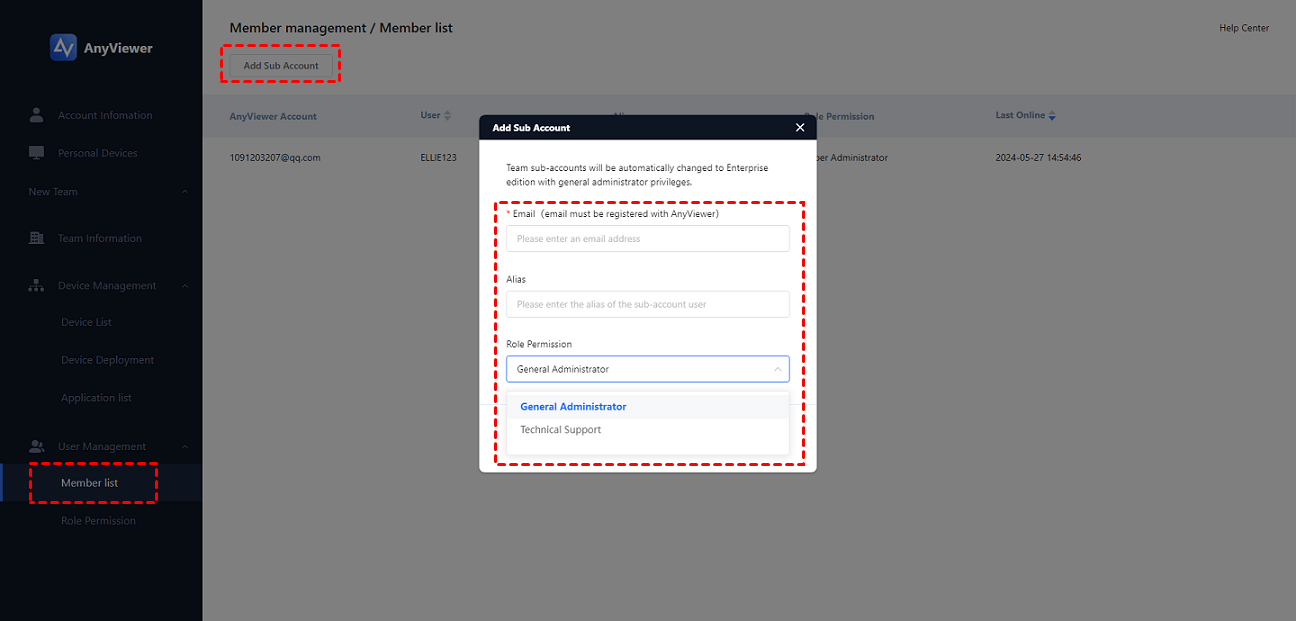
Step 6. Access “Member list” > “Add Sub Account” and input the required information. This is the process for configuring distinct role permissions for sub-accounts.
- ★Tips:
- The AnyViewer Enterprise Edition boasts a plethora of enhanced functionalities such as limitless simultaneous remote sessions, Mass Deployment (MSI) capabilities, the creation of computer groups, and various other offerings.
Conclusion
In conclusion, mastering the art of Remote Desktop Connection Manager admin is pivotal for ensuring seamless remote connectivity and enhanced productivity in today's digital landscape. By following the step-by-step guide provided in this article, you can easily navigate the complexities of managing remote desktop sessions and streamline your administrative tasks.
Additionally, exploring alternatives like AnyViewer opens up new avenues for remote desktop management, offering intuitive features and functionalities to meet the evolving needs of modern businesses. Embrace the power of remote desktop management tools and unlock a world of efficiency and control at your fingertips.
