
Stepwise Tutorial: How to Use Remote Desktop Connection Manager
This post provides a step-by-step tutorial for using RDCMan. If you're interested in learning how to use Remote Desktop Connection Manager, simply follow the steps outlined below.
By Ellie / Updated on December 13, 2024
What is Remote Desktop Connection Manager?
Remote Desktop Connection Manager (RDCMan) is a powerful tool that allows users to manage multiple remote desktop connections efficiently. Whether you're a system administrator overseeing a network of computers or an individual user needing to access remote machines, Remote Desktop Connection Manager can streamline the process and enhance productivity.
In today's interconnected world, remote access to computers and servers is essential for businesses and individuals alike. Remote Desktop Connection Manager simplifies the process of accessing remote machines, saving time and effort for users while improving overall efficiency.
How to use Remote Desktop Connection Manager
The whole tutorial is divided into three parts. Follow the steps in each part to learn how to use Remote Desktop Connection Manager on Windows 10 and 11.
Part 1. Install RDCMan on Windows
To begin using Remote Desktop Connection Manager, you'll first need to download and install the software on your computer. You can find the latest version of Remote Desktop Connection Manager on the Microsoft Download Center or through other reputable sources. Now, let's examine the steps for installing it on your system.
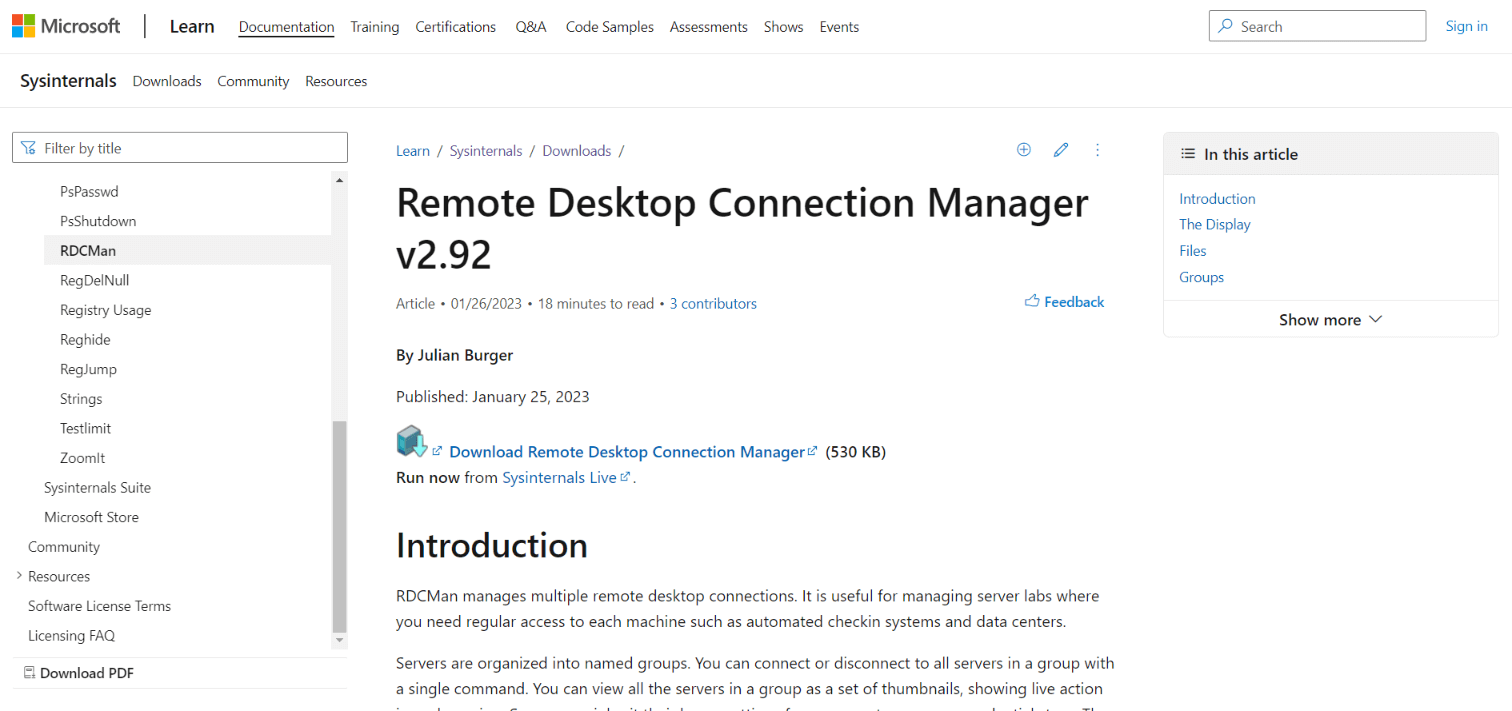
Step 1. Download the latest RDCMan version (v2.92) from the Microsoft website. It's part of Sysinternals.
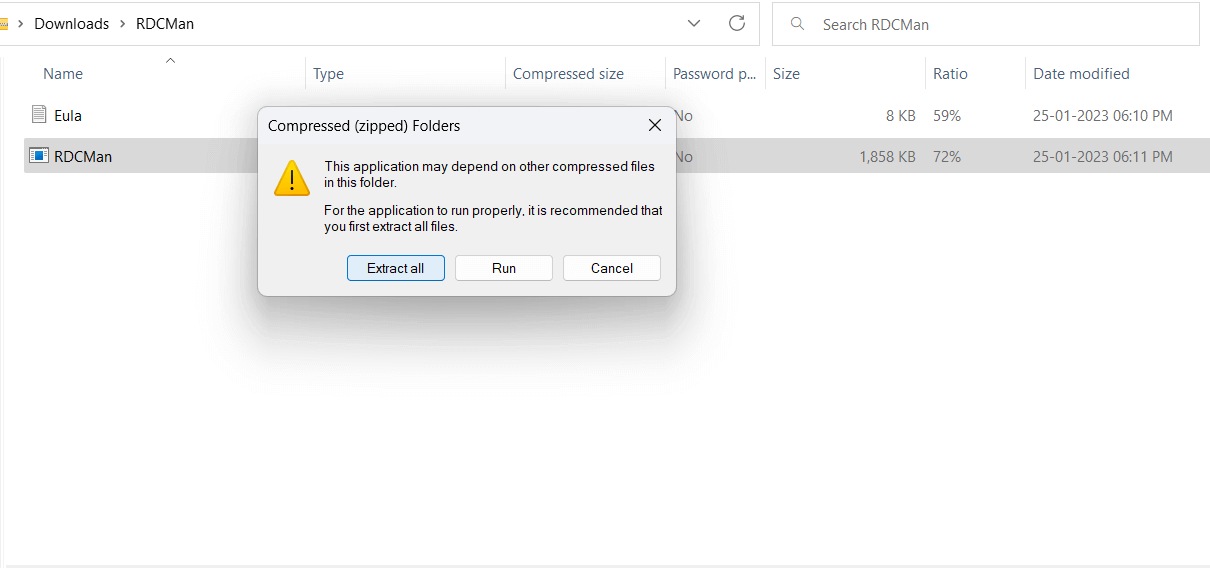
Step 2. Once downloaded, unzip the RDCMan file - no installation required.
Step 3. Extract the files from the folder.
Step 4. You're ready to learn how to use Microsoft Remote Desktop Connection Manager after extraction.
Part 2. Configure RDCMan & create RDP Host groups
After launching RDCMan.exe, you'll encounter an empty console. Your next task is to configure RDCMan and establish RDP Host groups.
Step 1. First, create a configuration file to store your settings by either pressing Ctrl + N or navigating to the menu: File > New. The file should have the extension *.rdg, which is essentially a text XML file that you can edit manually.
Step 2. In the configuration file, you can save any number of RDP connections for your remote servers. Utilize the tool's feature to structure RDP connections by any criteria you choose. For instance, you can create groups for Hyper-V servers, AD domain controllers, or based on location, role, or customer.

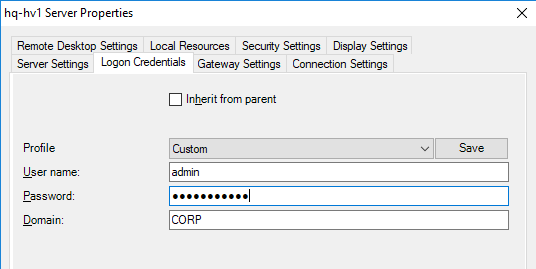
Step 3. You have the option to save your RDP credentials to facilitate connections to the servers in each group. Navigate to the Group Properties and go to the Logon Credentials tab to specify your credentials. All servers within the group will inherit these credentials. If you need to set different credentials for individual servers, uncheck the “Inherit from parent” option and configure the personal settings accordingly.
Step 4. Ensure to save the configuration file by clicking the Save button after making any changes or additions. This step is crucial to retain your settings for future use and reference.
Part 3. Configure RDP connection settings in RDCMan
With Remote Desktop Connection Manager configured, you need to configure RDP connection settings in RDCMan.
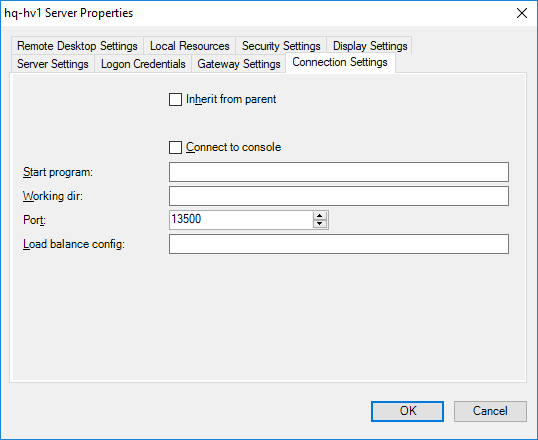
Step 1. Navigate to the RDP connection properties within the "Connection Settings" tab. By default, RDP connections utilize port 3389. If your RDP server operates on a non-standard port, you can modify the port number by unchecking the "Inherit from parent" option and making the necessary adjustments.
Step 2. If you select the "Connect to console" option, you'll be linked to your server's console. This mode replicates a direct connection to the local monitor of your server and is utilized to access the RDS server without requiring a client CAL license, or in scenarios where the licensing server is inaccessible, or the RDSH licensing mode isn't configured.
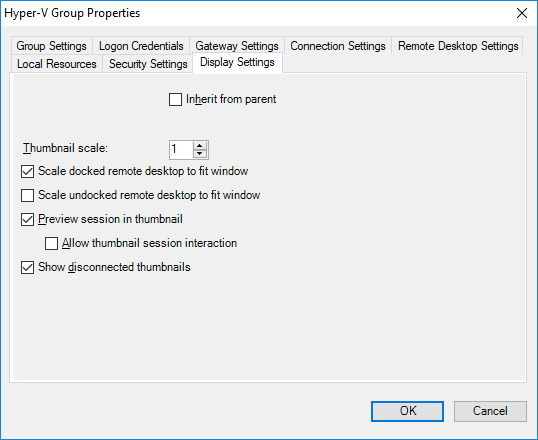
Step 3. Configure the screen resolution for the RDP session within the "Remote Desktop Settings" tab (setting it to "Full screen" is recommended) and specify local resources to be redirected to the RDP session in the corresponding tab (such as clipboard redirection, local printer usage, and local drive sharing).
Step 4. If you prefer not to scroll and the RDP window fits your screen, check the option "Scale docked remote desktop to fit window".
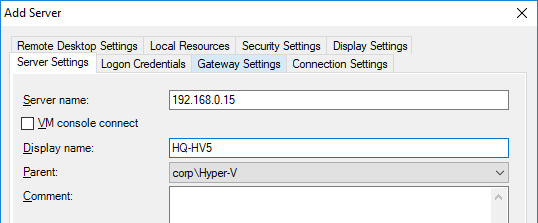
Step 5. Organize hosts (servers and workstations) into RDCMan groups. Right-click the group and add a server:
- Server Name: Input the hostname or its IP address.
- Display Name: Specify the server name displayed in the RDCMan console.
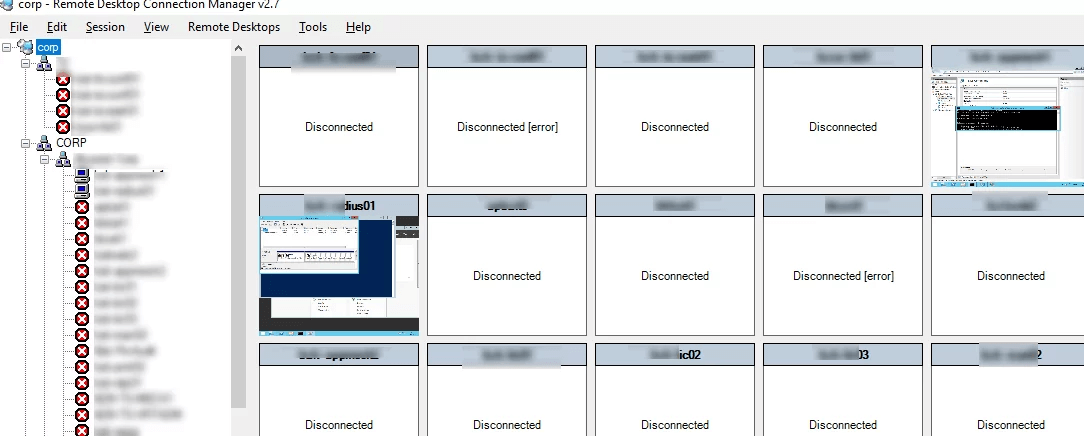
Step 6. Once configured, your console will display remote server tiles updated in real time. Double-clicking a server grants access using RDP with the saved credentials.
Step 7. Utilize the "Connect Group" option to open RDP consoles for all hosts within a group simultaneously.
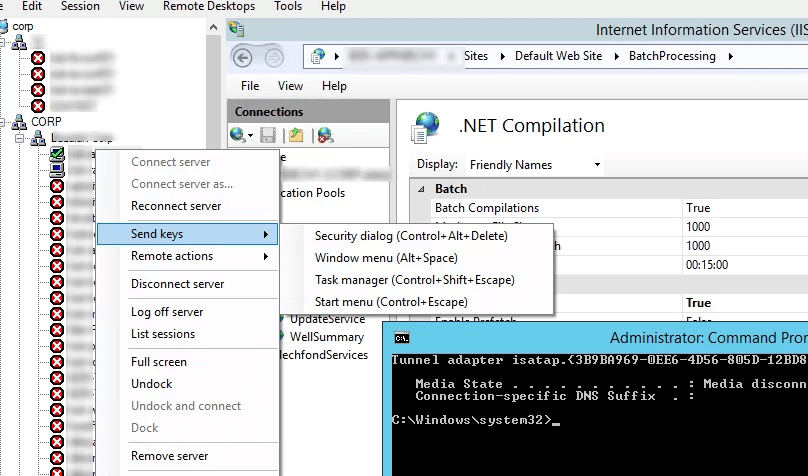
Step 8. Perform standard operations with your server effortlessly:
- Reconnect server: Reconnect if a remote session disconnects.
- Send keys: Transmit standard keyboard shortcuts to a server.
- Disconnect server: Terminate the connection to a server.
- Log off server: Log out from a server.
- List sessions: View active sessions on the server.
- Undock: Separate a server into its own RDP window.
- Dock: Reintegrate a server into the console.
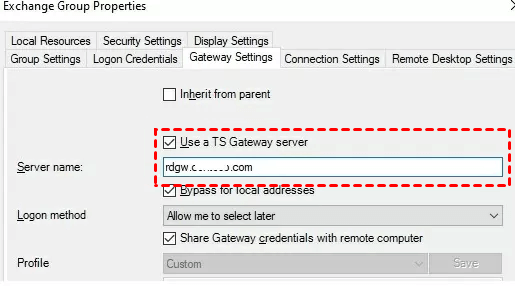
Step 9. If you need to connect to a remote RDSH host via a published server with the RD Gateway role, configure its parameters on the Gateway Settings tab.
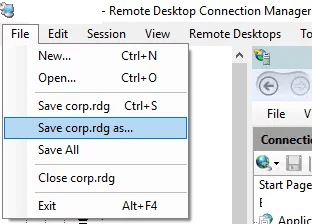
Step 10. Crucially, remember to save the configuration file (File > Save *.rdg) to prevent loss of settings upon exiting.
Step 11. When you relaunch RDCMan, you'll be prompted to select servers or groups you wish to reconnect to.
Bonus tip: Best RDCMan alternative for managing multiple remote sessions
AnyViewer is a remote desktop software solution crafted to handle numerous remote support and access sessions, empowering both small and medium-sized businesses (SMBs) and large enterprises to deliver swift and efficient assistance and maintenance for Windows computers.
This adaptable application allows users to provide support from a range of devices, including mobile devices running on Android and iOS platforms. AnyViewer features a user-friendly interface, ensuring ease and convenience for operators who can seamlessly initiate remote support sessions, even on unattended devices. It serves as an excellent alternative to Remote Desktop Connection Manager.
Here's why it's recommended:
- Easy setup & user-friendly interface: Setting up AnyViewer is straightforward, and its intuitive interface makes it accessible for both novice and experienced users.
- Secure connections: AnyViewer prioritizes security, employing robust encryption protocols and authentication mechanisms to safeguard remote connections and data.
- File transfer & collaboration features: With AnyViewer, you can effortlessly transfer files between connected devices and collaborate in real time with features like screen sharing and text communication.
- Multi-user support: AnyViewer offers multi-user support, allowing multiple users to collaborate and access remote devices simultaneously.
Step 1. Start by downloading and installing AnyViewer on each desktop.
Step 2. Once installed, open AnyViewer on your main computer and log in with your account details.

Step 3. Sign in to the same AnyViewer account on all other desktops you want to manage.

Step 4. On your main computer, go to the "Device" section, find your local device, and select "Screen wall."
![]()
Step 5. Next, choose "Create screen wall."

Step 6. Pick the desktops you want to control simultaneously and click "Add."

Step 7. You're ready to monitor and manage all the added desktops from a single window.
- ★Tips:
- For enhanced device monitoring and management with multiple screen walls, consider upgrading to a Professional or Enterprise plan. Unlock additional benefits by clicking here to explore more.
The bottom line
This post primarily introduces how to use Remote Desktop Connection Manager. In conclusion, mastering Remote Desktop Connection Manager (RDCMan) through the stepwise tutorial outlined in this post opens up a world of efficient remote desktop management. From installation to configuration and utilization, each step is meticulously detailed to ensure seamless operation. RDCMan simplifies the complexities of remote access, making it accessible for both individual users and system administrators.
Additionally, for those seeking alternatives, AnyViewer emerges as a robust option, offering ease of setup, secure connections, collaborative features, and multi-user support. Whether using RDCMan or exploring alternatives like AnyViewer, efficient remote desktop management is within reach for all users.
