
RDP Windows 7 Not Working: Four Possible Causes and Solutions.
This post briefly introduces four possible causes of and solutions to RDP in Windows 7 not working issues. Hope it will be helpful for you to troubleshoot your Remote Desktop Connection problems.
By Ellie / Updated on December 26, 2025
RDP Windows 7 not working issue
RDP (Remote Desktop Protocol) is a popular protocol developed by Microsoft for remote access to Windows, which makes it convenient for people who work from home or are on a business trip and need to reach and transfer important files on their office computer.

Although RDP has greatly convenient for our work life, many users face problems when remotely connecting to another computer via RDP on Windows 7 or any other versions. Problems include RDP sessions keeping disconnected, the client fails to establish a connection to the remote computer, remote access to the server not being enabled, and the remote computer not being available on the network, etc. Put simply, this means that Windows 7 Remote Desktop stopped working and you cannot successfully connect to another computer through RDP.
Therefore, when you are facing the problems mentioned above, you need to change some settings on both computers to allow Remote Desktop Connection on Windows.
How to solve RDP Windows 7 not working issue
Then what should you do when the remote desktop connection not working on Windows 7 after an update or for any other reasons? Here in this part, the causes of the RDP connection not working on Windows 7 issue and the solutions to this issue are discussed. If you are the one who is facing the issue of Remote Desktop Connection not working on Windows 7, just try out the below-given solutions one after another.
Solution 1. Allow Remote Desktop Connection
When the RDP not working, the first thing you need to do is to check whether the computer you want to access is allowing Remote Desktop Connection. You can follow the instructional steps listed below to allow Remote Desktop Connection.
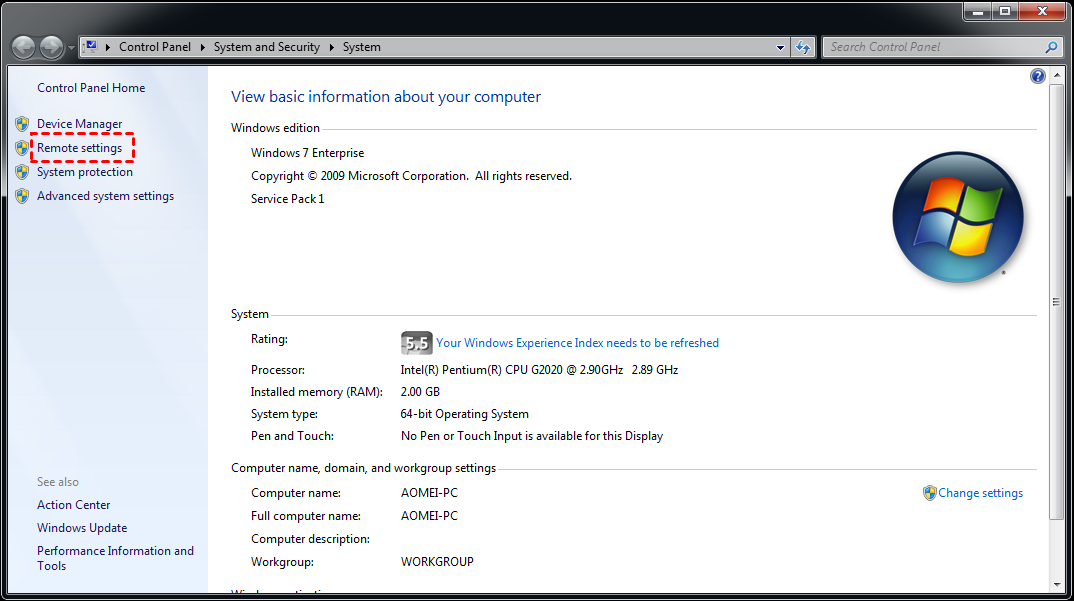
Step 1. Press Windows key + R to invoke the Run dialog box. Then type in “sysdm.cpl” and hit OK to open System Properties.

You could also open System Properties by navigating here: Control Panel > System and Security > System > Remote Setting.
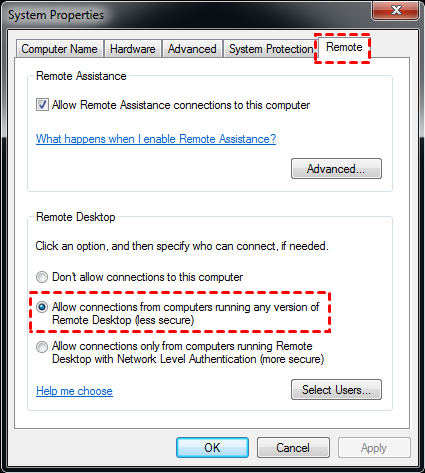
Step 2. Locate and click “Allow connections from computers running any version of Remote Desktop (less secure)” and hit OK.
Solution 2. Change Registry settings
RDP Windows 7 not working may also be caused by Registry settings. You can follow the listed steps to change Registry settings and then achieve remote control.
Step 1. Invoke the Run dialog box. Type in “regedit” and hit OK to open Registry Editor.
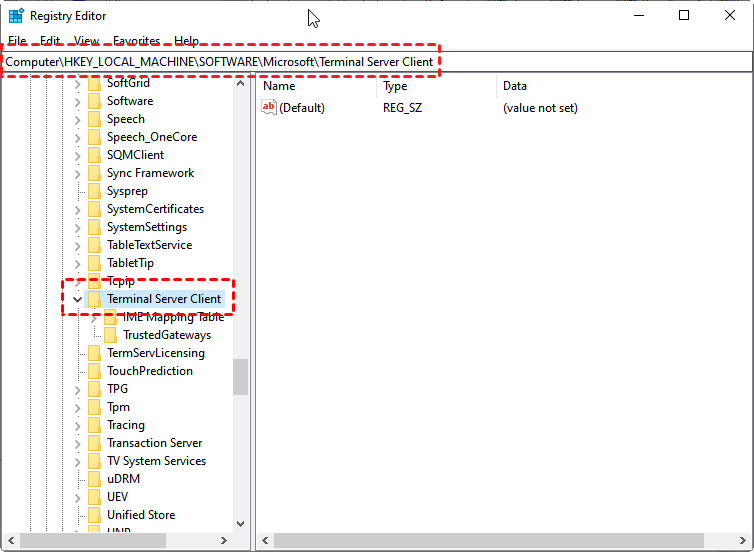
Step 2. Navigate here: Computer > HKEY_LOCAL_MACHINE > Software > Microsoft > Terminal Server Client.
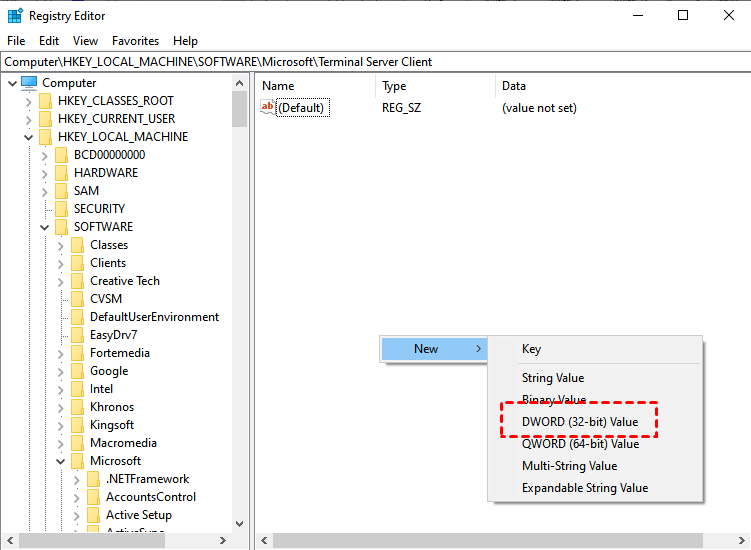
Step 3. In the right pane, right-click the blank space and choose New and then select DWORD (32-bit) Value.
Step 4. Rename the newly created DWORD Value as RDGClientTransport. Then double-click on it to open its properties.
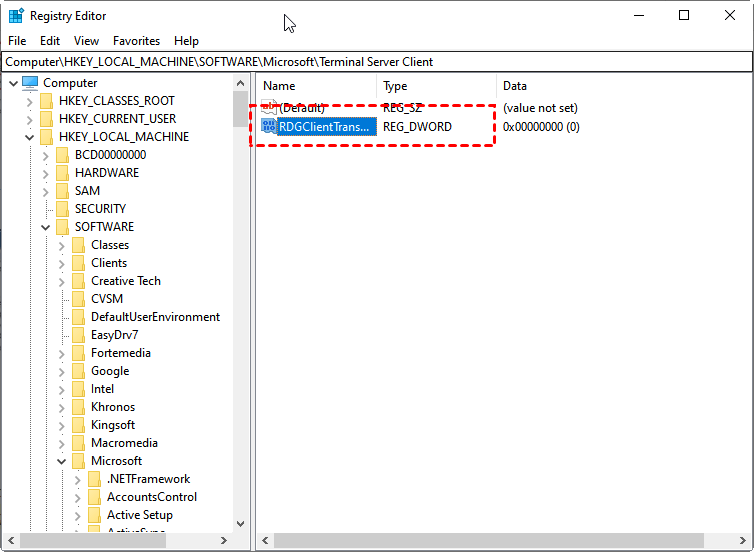
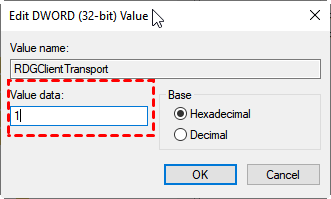
Step 5. In the properties window, input 0 in the Value data field.
Solution 3. Check the firewall setting
Sometimes the Windows Defender Firewall may block the RDP port. Thus, you could change your firewall settings and see if you can connect to the remote computer now.
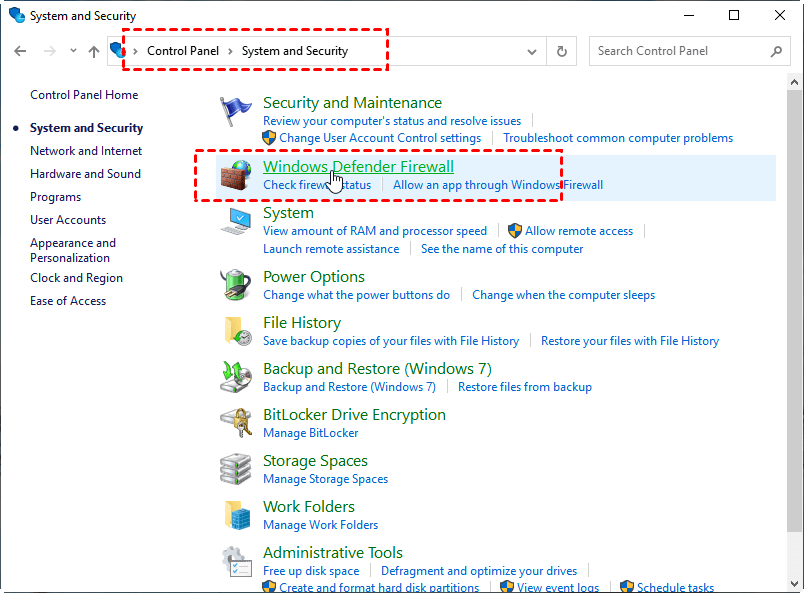
Step 1. Navigate here: Control Panel > System and Security > Windows Defender Firewall.
Step 2. Click on “Allow an App or Feature Through Windows Defender Firewall”.
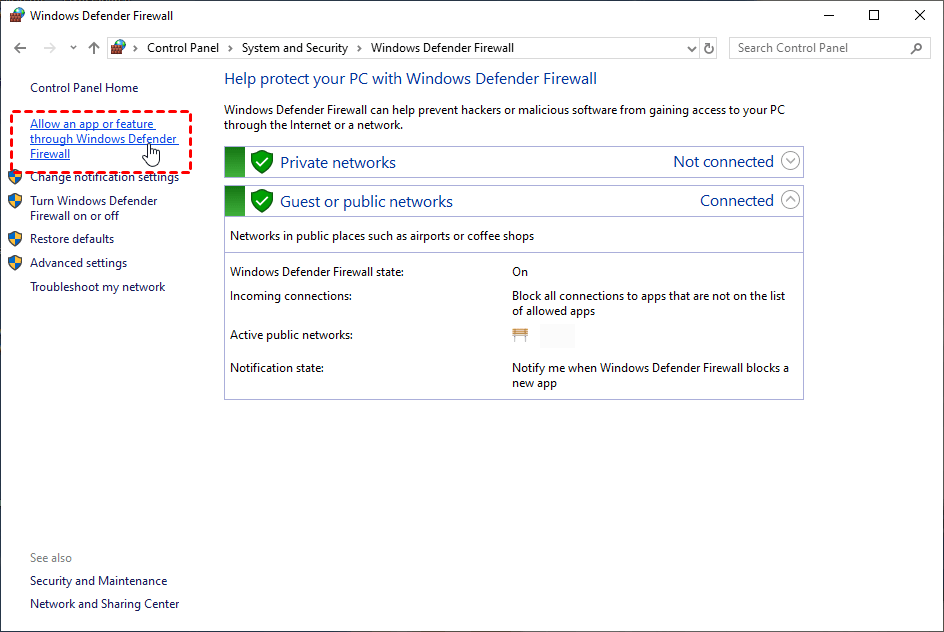
Step 3. Then select “Remote Desktop” and hit OK.

Solution 4. Check Dependency Services
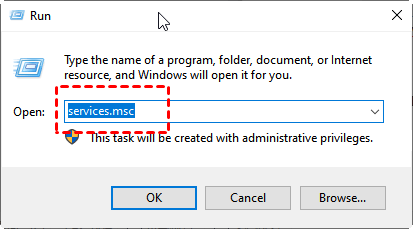
Step 1. Press Windows key + R to invoke the Run dialog box. Type in “services.msc” and hit OK.>
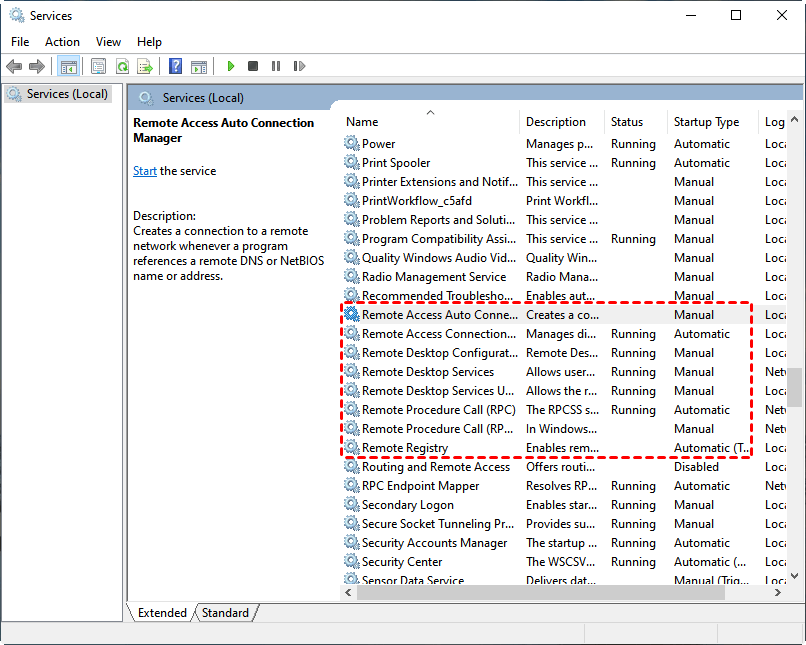
Step 2. In the Services window, check the status of all the service that contains “remote” term in their name. Make sure all of these services must be set either to Manual or Automatic. None of them should be set to Disabled status.
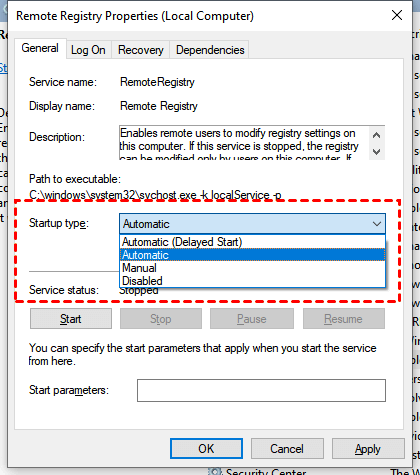
If one of them is set to Disabled, you can right-click on it to open the Remote Registry Properties. Change the Startup type to either Automatic or Manual. Then click OK.
Get an alternative when RDP in Windows 7 not working
An alternative remote access tool to RDP can be the ultimate option if you still can’t connect to a remote PC on Windows 7 computer. Here we recommend you an easy-to-operate remote control software, AnyViewer, which is a free, safe, and fast remote access software for Windows 11/10/8.1/8/7 and Windows Server 2022/2019/2016/2012 R2. It allows you to remotely access and transfer your important files and folders on your computer.
Why we say AnyViewer is the best RDP alternative:
- Remote Desktop requires an IP address or computer name to achieve remote connection, while AnyViewer doesn’t.
- Remote Desktop requires the two devices to be under the same network, while AnyViewer doesn’t.
- Remote Desktop can’t be used to connect to Windows 10 Home edition (some other editions as well), while AnyViewer supports any devices running iOS 10.0 or later and multiple Windows versions on PCs.
You don’t need to change any settings on your computer. Just follow the steps listed below, and you can start your remote control right away.
Step 1. Download, install and launch AnyViewer on both computers.
Step 2. Go to Log in, and then click Sign up. (If you already have signed up on its official website, you can log in directly.)

Step 3. Fill in the signup information.

Step 4. Then you can see you successfully logged in to AnyViewer. Your device will automatically be assigned to the account you've logged in to.

Step 5. Log in to the same AnyViewer account on the two devices, then you can achieve a direct connection by clicking One-click control.

✍Note: You can also upgrade your account to a Professional or Enterprise plan to assign more devices and to connect to another computer in privacy mode.
Conclusion
In conclusion, this post has offered you four solutions to fix RDP Windows 7 not working issue. If you're facing this problem right now, please don't hesitate to try the solutions listed here.
To help you have a better remote control experience, we also introduced an RDP alternative to you. AnyViewer has several advantages over RDP, as we have mentioned in this post. If you are looking for an easier way to achieve remote connection, try it right away.
