
How to Manage User Profiles for Remote Desktop Services
This post offers a detailed tutorial to manage user profiles for Remote Desktop Services. Follow the steps below, you can create a more secure, efficient, and user-friendly remote working environment.
By Ellie / Updated on December 13, 2024
What are user profiles in Remote Desktop Services?
User profiles in Remote Desktop Services (RDS) are collections of settings and configurations that define the environment for individual users. These profiles store user-specific data, application settings, and desktop configurations, ensuring a personalized experience each time a user logs into a remote session.
User profiles serve to create a consistent and personalized experience for users across different sessions and devices. They ensure that a user's desktop, application settings, and personal files are the same no matter where or how they access the remote desktop.
Managing user profiles for Remote Desktop Services (RDS) is crucial for ensuring a secure, efficient, and user-friendly remote working environment. With the rise of remote work, understanding how to effectively manage these profiles has never been more important. This article will guide you through the essentials of user profile management in RDS, offering practical tips and best practices to optimize your setup.
2 ways to manage user profiles for Remote Desktop Services
There are two ways to manage user profiles for Remote Desktop Services on Windows 10 and 11, using the Active Directory Users and Computers (ADUC) console or using Group Policy.
Way 1. Using the Active Directory Users and Computers
To manage user profiles for Remote Desktop Services using Active Directory Users and Computers (ADUC) console:
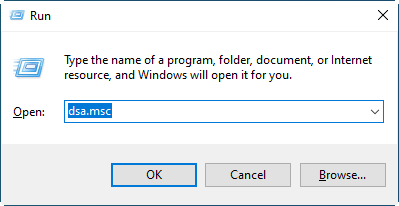
Step 1. First, access the domain controller and open the Active Directory Users and Computers (ADUC) console. Press the "Windows" key and "R" together, then enter "dsa.msc" into the Run dialog box.
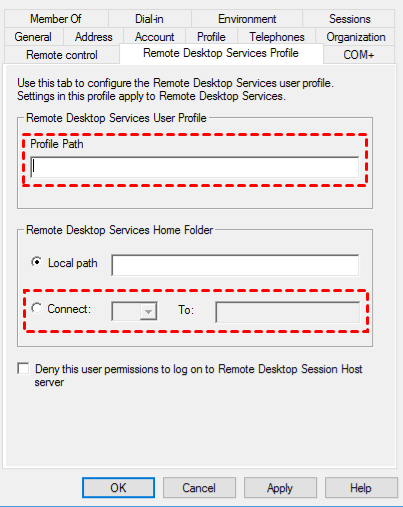
Step 2. Navigate to the "Users" section, right-click on the specific user, and select "Properties".
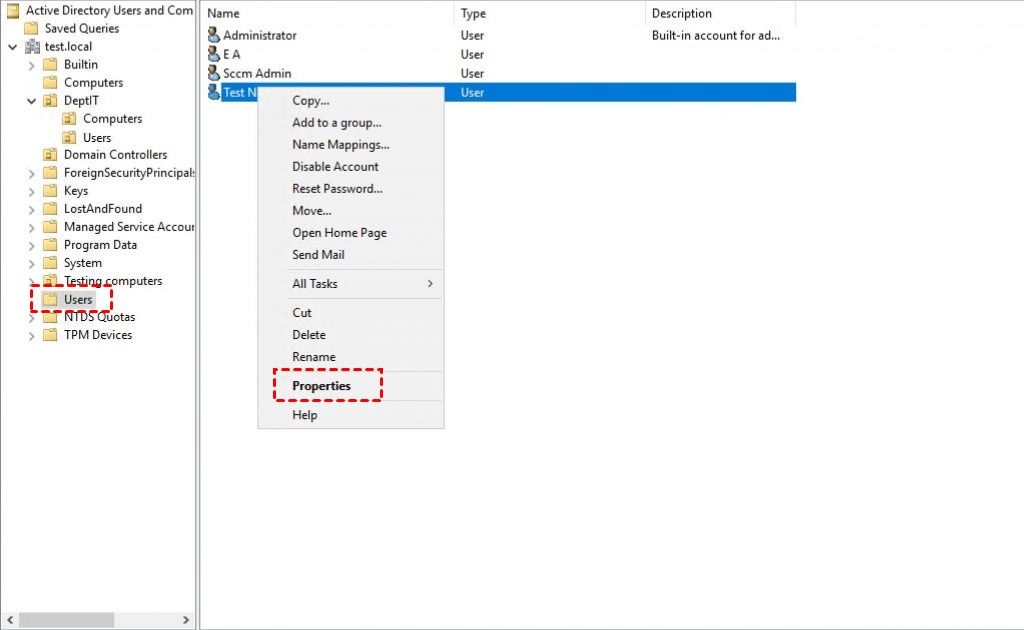
Step 3. This will allow you to configure the settings for the selected user.
Way 2. Using Group Policy
To manage user profiles for Remote Desktop Services using GPO:
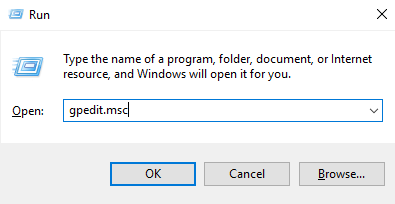
Step 1. Start by accessing the Group Policy (GPO) on the domain controller. Press the "Windows" key and "R" together, then type "gpedit.msc" into the Run dialog box.
Step 2. Navigate through the following path in a Group Policy Object: Computer Configuration > Administrative Templates > Windows Components > Remote Desktop Services > Remote Desktop Session Host > Profiles.
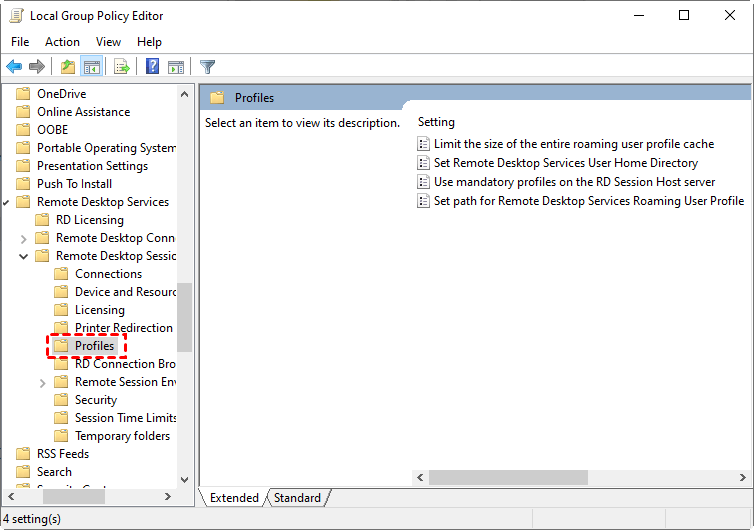
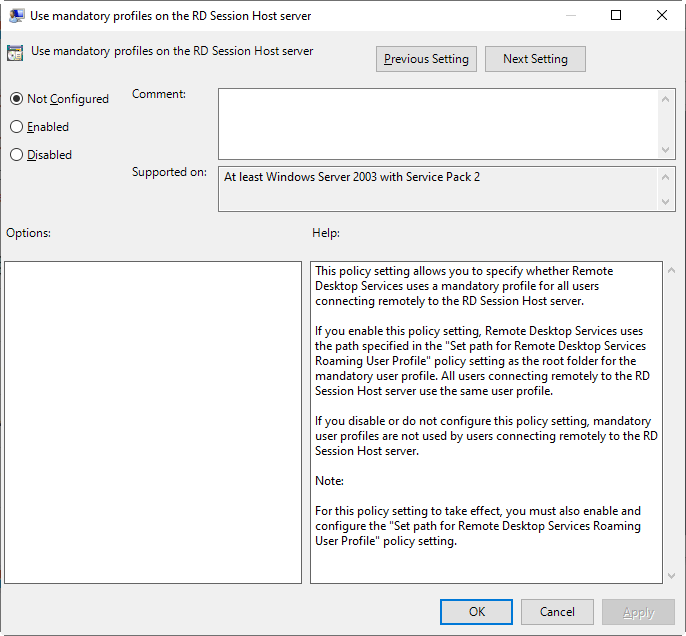
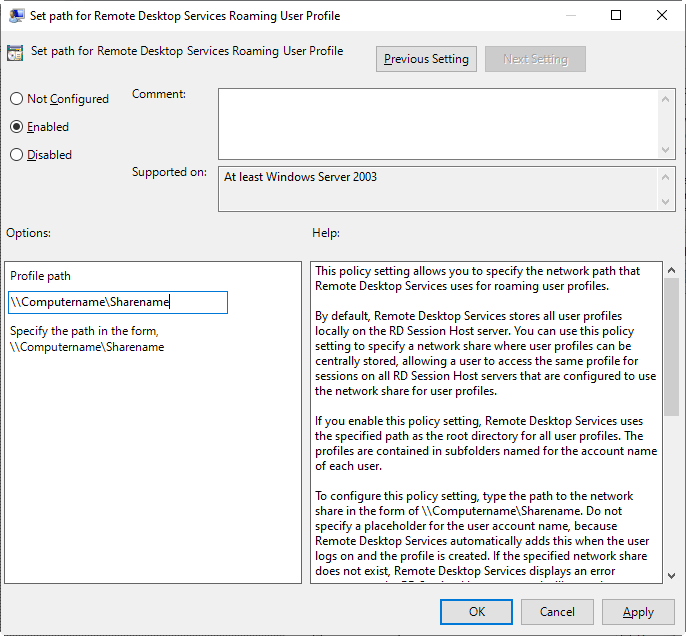
Step 3. You will find four key RDS Profiles group policy settings here that manage roaming profiles and home directory settings for Remote Desktop Services sessions:
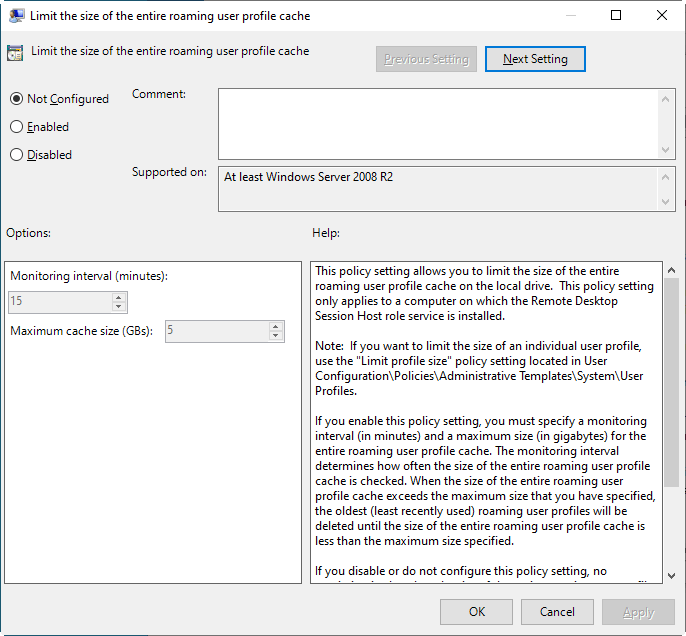
- Settings for roaming user profile cache
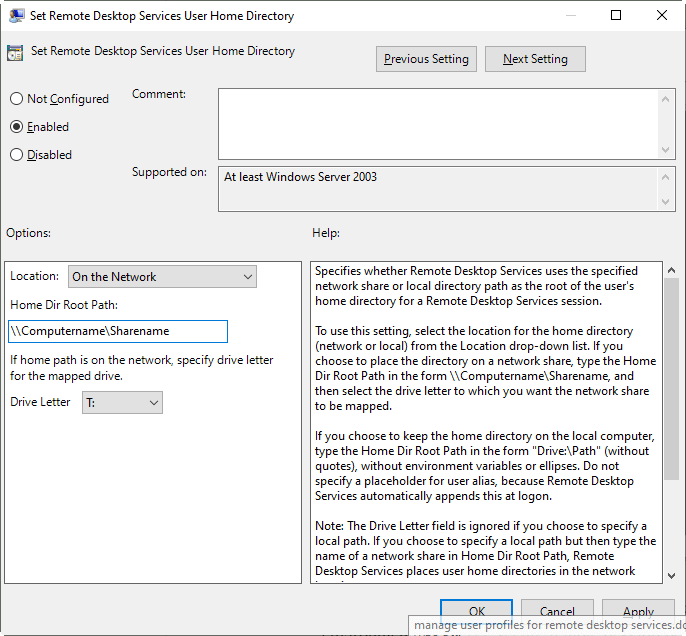
- Settings for User Home Directory
- Settings to specify a mandatory profile
- Settings for Roaming User Profile
The settings outlined in the Group Policy are configured under the Computer Configuration section of a GPO, meaning they apply to computers rather than individual users. Consequently, these settings will override any user-specific configurations set in Active Directory Users and Groups.
AnyViewer: Manage multi-user remote desktop environment with ease
While AnyViewer is primarily a remote access and remote support tool, it also provides features to effectively manage a multi-user remote desktop environment.
Take a look at how it works:
- User accounts management & permissions:
AnyViewer allows administrator accounts to create role groups and add sub-accounts into role groups for users at various levels and assign specific role permissions to each group. This feature is particularly useful in scenarios where you need to restrict sub-accounts under different roles to access and operate only certain functions, thereby preventing unauthorized access and potential data breaches.
- Connection settings:
Administrators can set up and manage permissions, deciding which users can access certain devices and what level of control they have during a remote session.AnyViewer also allows customization of connection settings for each session, such as display resolution and quality, file transfer permissions, and remote printing options.
- Devices & groups lists:
AnyViewer has introduced the Join Team feature. Administrators can customize groups/teams. Devices can join established groups/teams using the deployment code given by the administrators. Administrators can have full control of the joined devices. This enables efficient remote management of multiple devices.
Note: Both Join Team and Role Permissionfeaturesareexclusive to AnyViewer Enterprise Edition, please download AnyViewer by clicking the following button, sign up for an account using your personal email, and then upgrade.
The bottom line
In conclusion, effectively managing user profiles for Remote Desktop Services on Windows 11 and 10 is essential for creating a secure and efficient remote working environment. By utilizing tools like the Active Directory Users and Computers (ADUC) console or Group Policy, administrators can ensure consistent user experiences and maintain control over user settings.
Additionally, leveraging solutions like AnyViewer can further enhance profile management capabilities, providing robust user account management, connection settings, and device group organization. Following these best practices will help optimize remote desktop environments and support seamless remote work operations.
