
How to Connect Windows 7 to Windows 10
This post introduces two methods on how to connect Windows 7 to Windows 10. Users can choose according to their own preferences.
By Ellie / Updated on December 13, 2024
How to connect Windows 7 to Windows 10
“I have two PCs at home, a Windows 10 and a Windows 7. Networking them together has failed miserably. What is the simplest way to connect the two computers together so I can view files stored on Windows 10 from Windows 7?”
Two ways to connect Windows 7 to Windows 10
In this post, we provide you with two options to connect Windows 7 to Windows 10.
Option 1. Connect Windows 7 to Windows 10 via LAN cable
How to connect Windows 7 to Windows 10 via LAN cable? There are three things you need to prepare: a Windows 7 PC/Laptop, a Windows 10 PC/Laptop, and an Ethernet cable. Please note that the configuration steps on Windows 7 and Windows 10 computers are pretty much the same. So here, we’ll take Windows 10 as an example. You just need to follow the same steps to configure our Windows 7 PC.
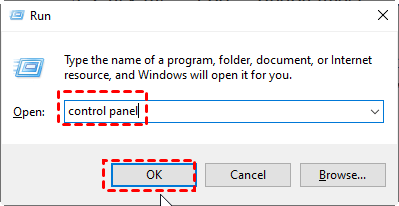
Step 1. Press WIN + R, enter “control panel” and then click OK to open Control Panel.
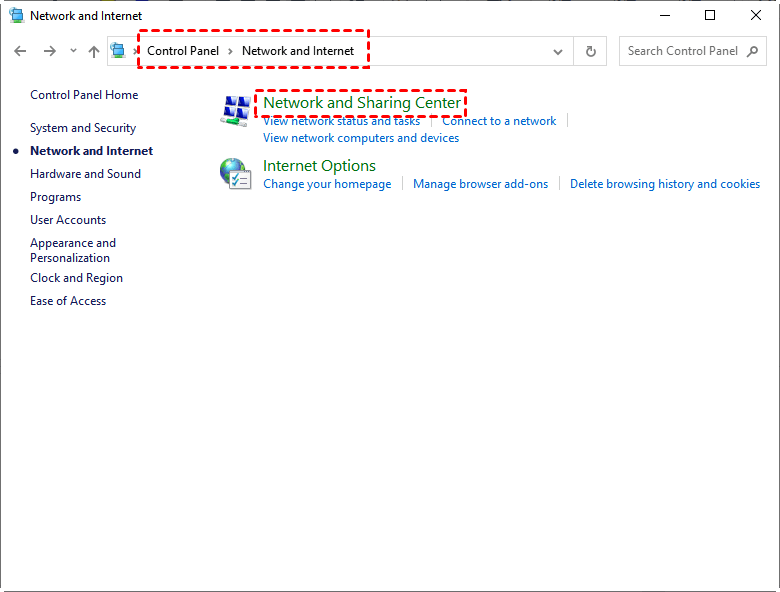
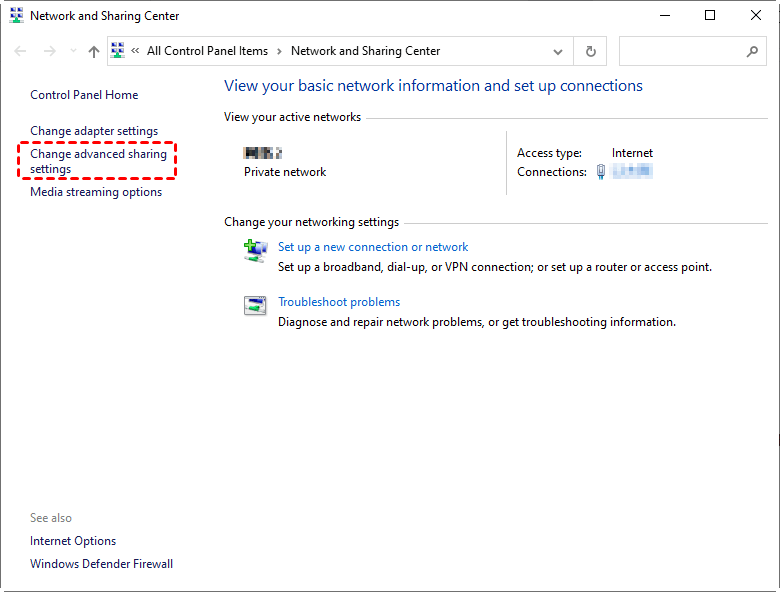
Step 2. Navigate here: Network and Internet > Network and Sharing Center.
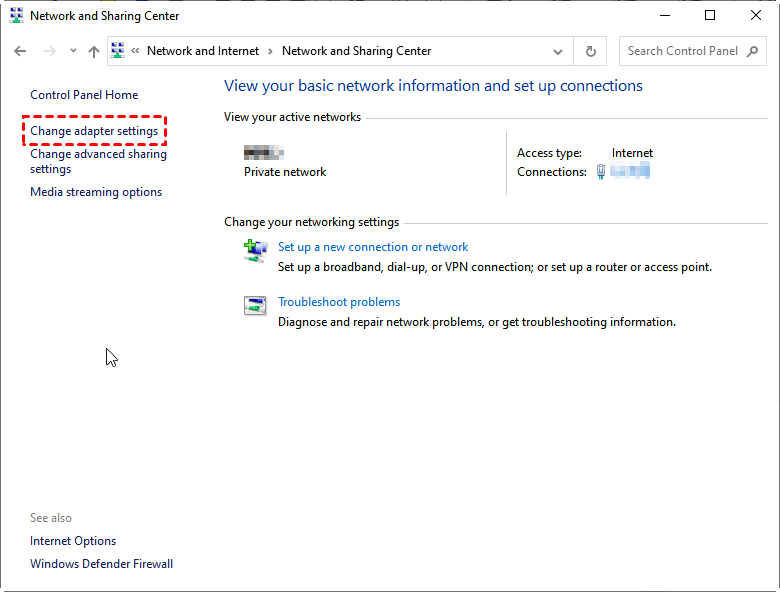
Step 3. Click Change adapter settings.
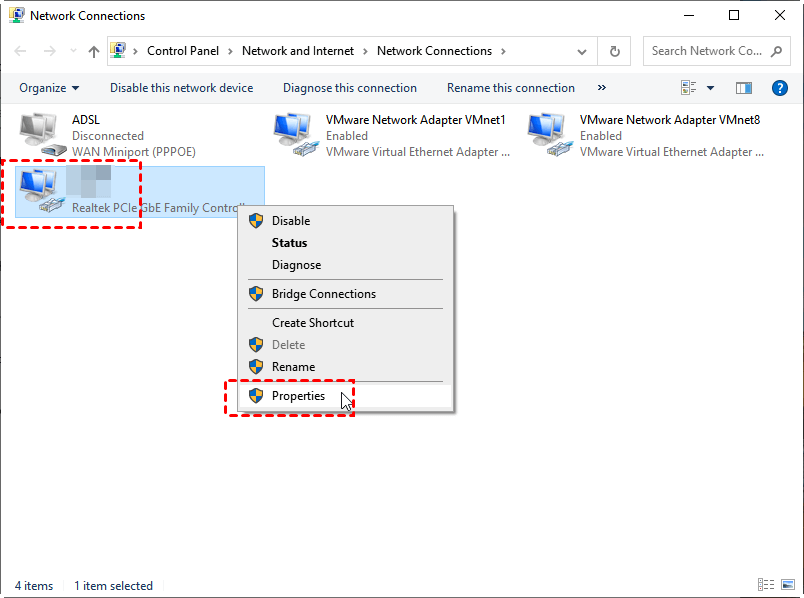
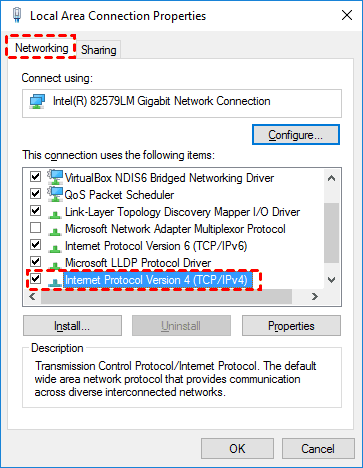
Step 4. In the automatically pop-up Network Connections window, find your network. Usually, but not necessarily, the connection will be called Ethernet. Right-click it and then click Properties.
Step 5. Tick Internet Protocol Version 4 (TCP/IPv4), and then click Properties.
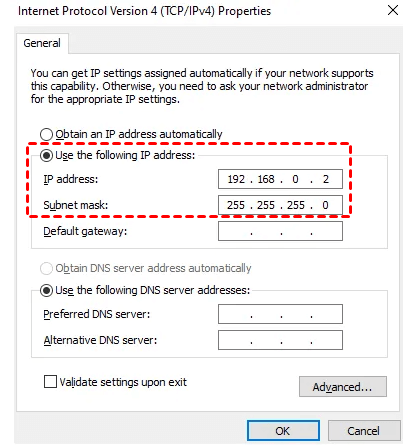
Step 6. Turn on Use the following IP address in the General tab, change the IP address, and set the Subnet mask to the following.
-
Note: On your Windows 7 computer, set the IP address and the Subnet mask to the following:
IP address: 192.168.0.1
Subnet mask: 225.225.225.0
Step 7. Then back to the interface in Step 3, click Change advanced sharing settings.
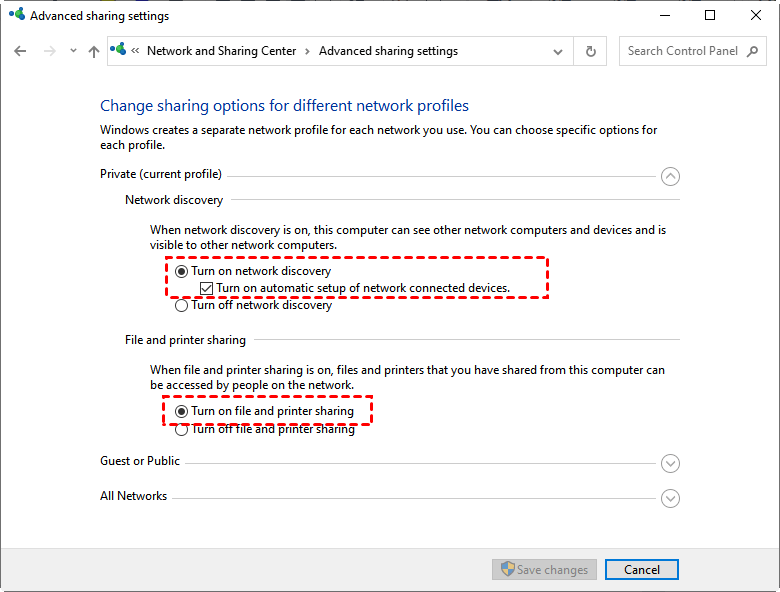
Step 8. Enable the Turn on network discovery, Turn on automatic setup of network-connected devices, and Turn on file and printer sharing options.
Step 9. Click This PC, right-click on the drive you want to share, for example, Win 10 (D:), and then choose Properties. Switch to Sharing tab and click Advanced Sharing.
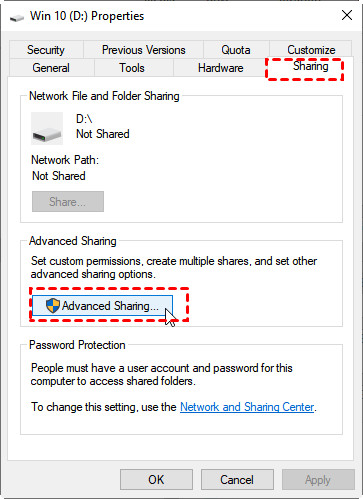
Step 10. Tick Share this folder and then click Apply.

Until now, you’ve already set up your Windows 10 well. You just need to follow the same steps to set up your Windows 7. But please pay more attention to Step 6, the IP address used for Windows 7 is not the same as Windows 10.
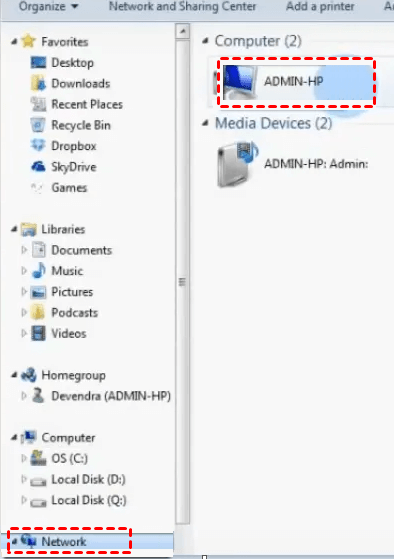
After you’ve set up your Windows 7, you can visit the Network window from File Explorer, and the connection with Windows 10 should appear there. Double click it, and all the files and folders on Windows 10 that you have shared will be at your disposal.
Option 2. Connect Windows 7 to Windows 10 using remote desktop software
The above-mentioned method is specialized for two computers that are under the LAN. But what if you want to connect a Windows 7 to a Windows 10 that is under a different network? For example, a Windows 7 at the office and a Windows 10 at home. Here we provide you with the second option. You can use PC to PC remote desktop software, which allows you to remotely connect two or more computers located at different places and under different networks.
For example, the Windows built-in RDP. But if you want to use RDP to remotely access another computer under different networks, you need to forward the port, which is quite complicated. But you have other options, for example, AnyViewer, which allows you to easily connect a Windows 7 to a Windows 10 under different networks without a complicated configuration process.
Step 1. Download, install and launch AnyViewer on both computers. Go to Log in, and then click Sign up. (If you already have signed up on its official website, you can log in directly.)

Step 2. Fill in the signup information.

Step 3. Then you can see you successfully logged in to AnyViewer. Your device will automatically be assigned to the account you've logged in.

Step 4. Log in to the same AnyViewer account on the two devices, then you can achieve a direct connection by clicking One-click control.

- Notes:✎...
- You can upgrade your account to a Professional or Enterprise plan. Then you'll have the following rights:
- Assign more devices to achieve unattended remote access to more devices.
- Connect to another computer in privacy mode, which means you can black the screen and block the mouse and keyboard of the remote computer.
- Transfer files at a faster speed. Transfer speed for a free account is 500 KB/s, and for a paid account is up to 10 MB/s.
Step 5. Then you can fully access and control Windows 10 from Windows 7 just like you’re sitting in front of Windows 10.
Conclusion
How to connect Windows 7 to Windows 10? You have two options under different circumstances. If your Windows 7 and Windows 10 are under the same network, then you can connect them either via LAN cable or remote desktop software. If the two computers are under different networks, then you can connect them using the remote desktop software. Choose according to your own situation!
