
2026 Solved: File Transfer Not Working Windows 10 & 11
This guide outlines common causes of file transfer not working Windows 10 and 11, along with troubleshooting steps and preventive measures to ensure smooth file transfers.
By AnyViewer / Updated on December 26, 2025
Why is my file transfer not working?
File transfer not working Windows 10 due to network problems, antivirus software blocking transfers, outdated drivers, corrupted files, or restrictions on file sizes. Permissions, third-party software, and network settings could also be causing issues. By troubleshooting these potential causes, you can fix the problem and resume file transfers smoothly. Having the ability to easily transfer files between computers will make working remotely much more efficient and simple. And encountering problems with file transfers that don't work is annoying for all users.

Don’t worry, all these problems will be solved in this article. We have found three solutions for you to help you solve Windows 10 file transfer not working problem. Read on to troubleshoot your troubles.
How to fix file transfer not working Windows 10
Having problems with file sharing not working Windows 10? Don't worry, this article will bring you 3 effective solutions and introduce you to the best Windows file transfer tools, read on if interested.
Solution 1. Update all Drivers
Outdated or faulty device drivers can also cause file transfer issues on Windows 10. Ensure that all your device drivers, especially network adapters and storage controllers, are up to date. You can update drivers manually through the Device Manager or use third-party driver update software for convenience.
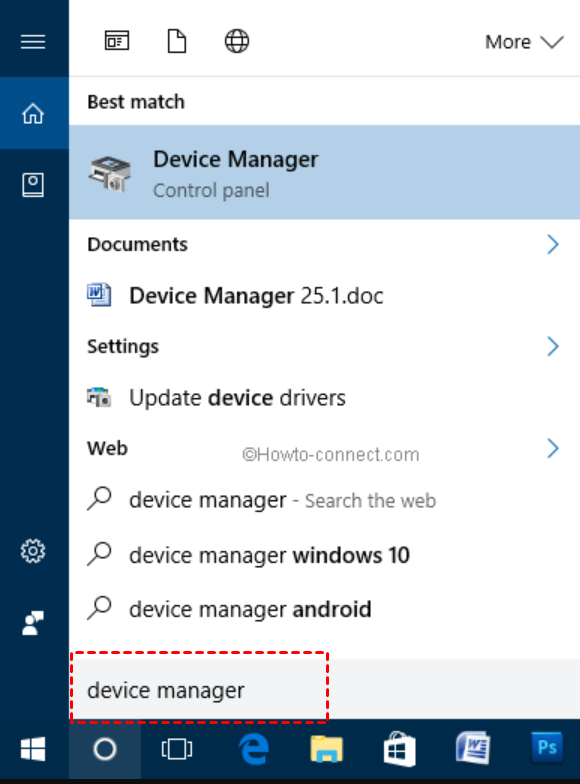
Step 1. Begin by accessing the "Device Manager" via the Windows menu. Simply type "Device Manager" in the search bar and select its icon from the results.
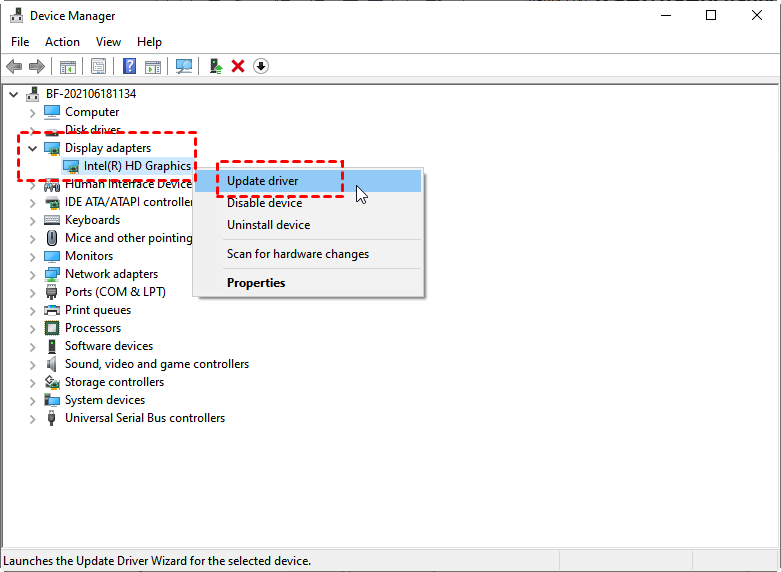
Step 2. Next, right-click on the device you wish to update and choose the "Update Driver Software" option from the menu.
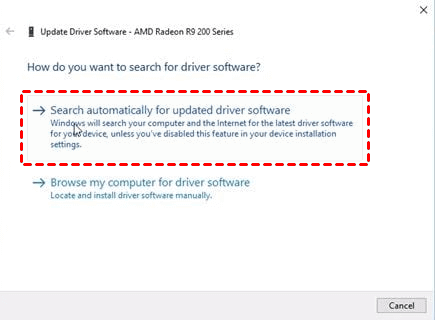
Step 3. Choose the "Search automatically for updated driver software" feature. Ensure you're connected to the internet as this process will scour for the latest compatible drivers online.
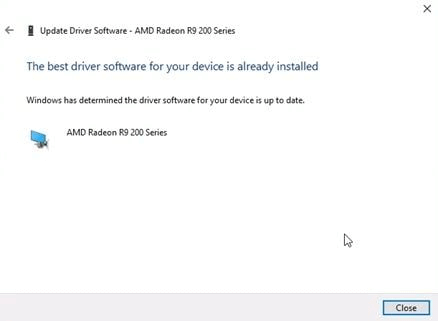
Step 4. Patiently wait for the process to conclude. Once it's finished, review the outcome and click on "Close" to exit the tool.
Solution 2. Disabling Antivirus and Windows Defender
Antivirus or firewall software installed on your Windows 10 system may sometimes interfere with file transfer processes. Temporarily disable any third-party antivirus or firewall software and try transferring the files again. If the file transfer works after disabling the software, consider adding exceptions or adjusting the settings to allow file transfers.
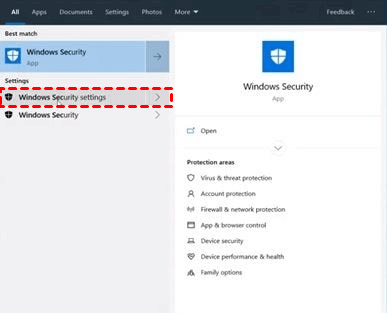
Step 1. Start by accessing the "Windows Security settings". Navigate to the Windows menu and type "Windows Security" to locate the option. Then, proceed to click on "Windows Security Settings".
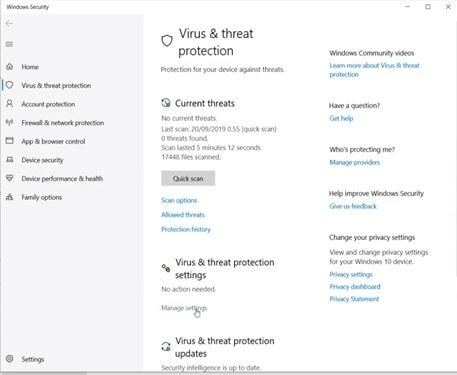
Step 2. Move on to the "Virus & threat protection" section. Within the "Protection areas" segment, locate and click on "Virus & threat protection".
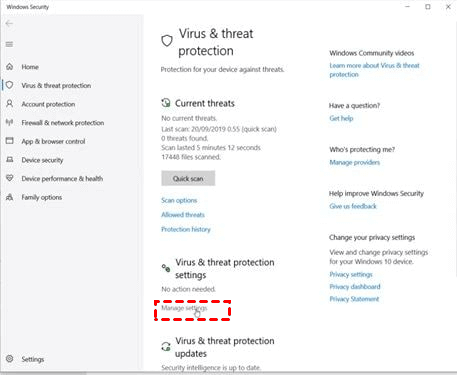
Step 3. Proceed to "Manage Settings". This option can be found below the "Virus & threat protection settings".
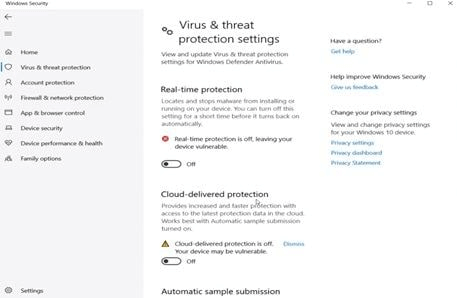
Step 4. Disable all protective measures. Toggle off each protection tool by clicking on the switch icon. Keep in mind that there might be numerous protection options, so ensure to scroll down and disable each one.
Solution 3. Change Services
Another solution is to modify the Services settings. When you are experiencing file transfer not working Windows 10 and 11 issues, you can also resort to modifying the Function Discovery Resource Publication to resolve the issue. Below, you'll find the outlined procedures to accomplish this task.
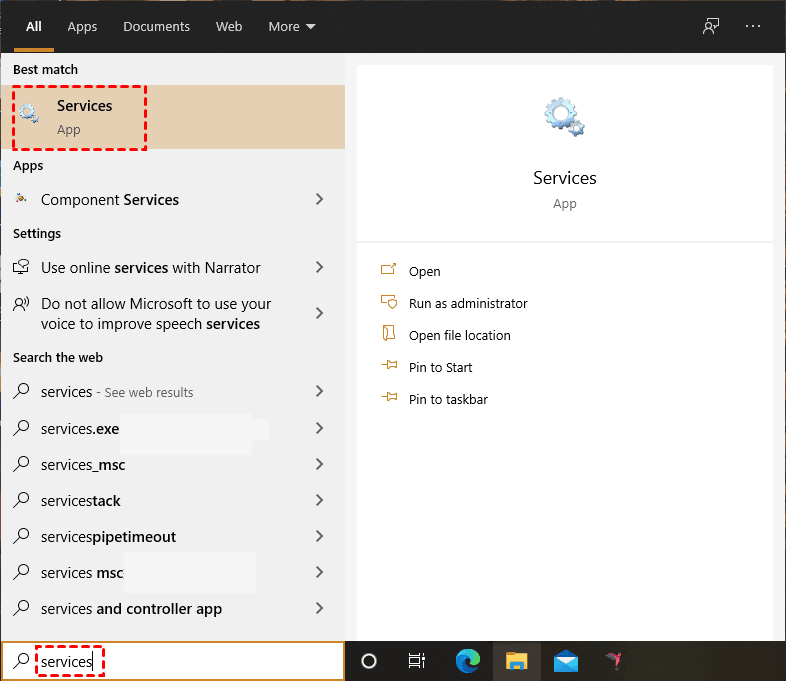
Step 1. Click “Start” and search for “Services”.
Step 2. Once open, find “Function Discovery Resource Publication” and double-click to open it.
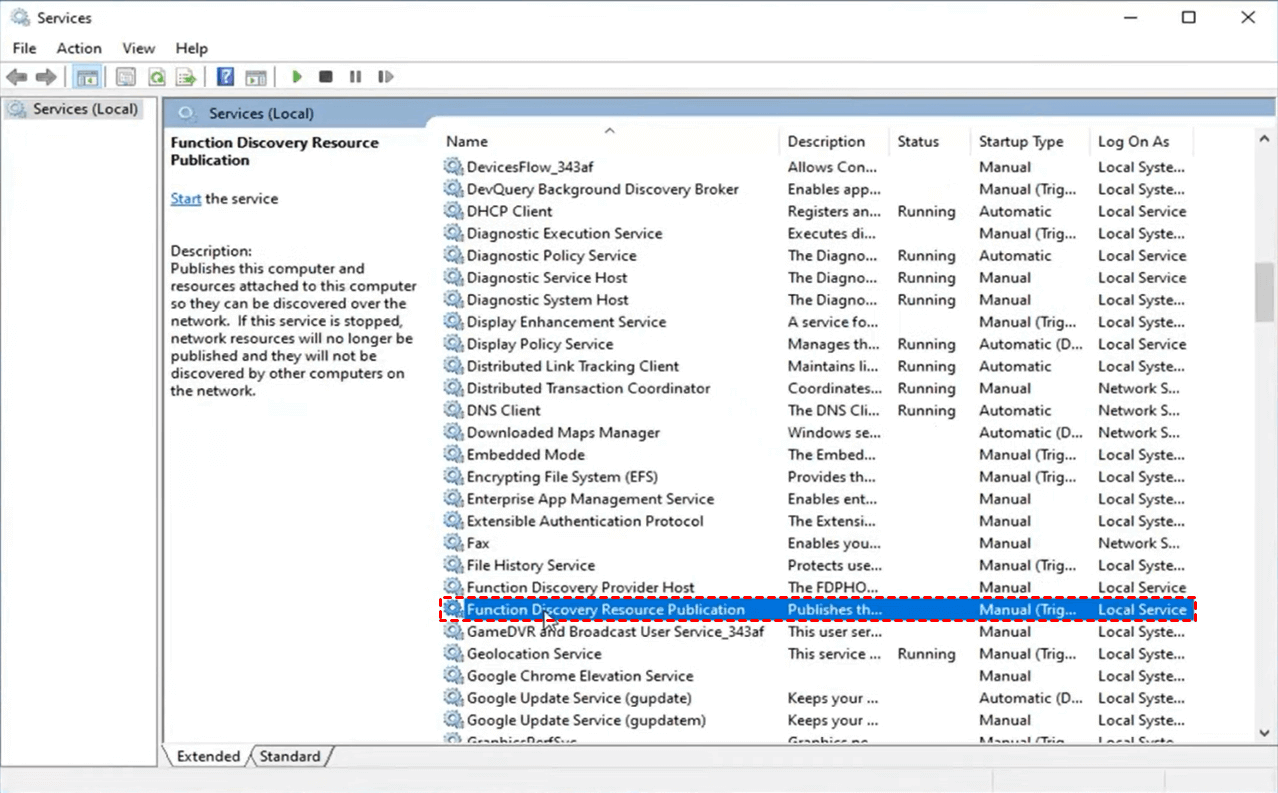
Step 3. Find the startup type and change it to “Automatic”. Then click “Start”, wait for the startup to complete, and click “Apply” and “OK”.
.png)
AnyViewer: Easiest way to transfer files for Windows 10 & 11
The file sharing not working Windows 10 and 11 you were experiencing should now be resolved. If trying the above methods still doesn't work, we recommend that you look for alternatives to Windows file transfer to avoid experiencing these issues altogether.
AnyViewer will be your best choice. It serves as a secure, swift, and complimentary file transfer tool, granting users access to rapid file transfer rates without the need for purchase. AnyViewer provides various convenient methods for file transfer:
- Unattended file transfer: AnyViewer lets you send files without anyone at the other computer. You can share documents anytime.
- In-session file transfer: You can send files while working with someone remotely. This makes it easy to help them quickly.
- Drag and drop file transfer: Just drag files from your computer and drop them into the remote desktop. It’s super easy!
Moreover, AnyViewer employs robust 256-bit Elliptic Curve Cryptography (ECC) encryption and two-factor authentication to ensure end-to-end security during remote desktop connections, mitigating potential security risks effectively. Its versatility and high level of security make it an outstanding tool for working remotely and effectively meeting a wide range of needs.
Step 1. Install and open AnyViewer on both devices. To create a new AnyViewer account, go to "Log in" and then click "Sign up". Ensure to use the same account for logging in on both devices.

Step 2. Log in to the identical account on both devices. Your devices will be instantly linked to the account.

Step 3. On your local device, access "Devices," select the desired remote device, and opt for "File transfer."

Tips: You can also activate unattended remote access by selecting "One-click control" to connect to your other computer. This provides you with full control over it as if you were physically present. Once the connection is successfully established, you can transfer files by clicking the "File" button in the menu bar.

Alternatively, you can drag and drop files from your local computer to a remote computer.
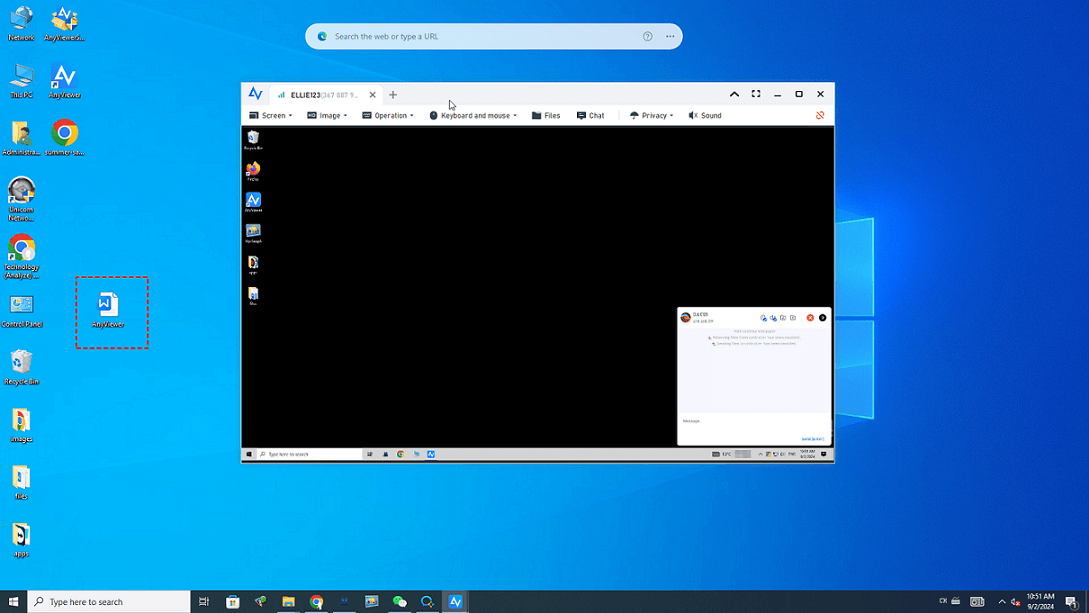
Step 4. You'll now have access to files stored on your local device, displayed on the left side, as well as files located on your remote device, displayed on the right side. Effortlessly move files between both devices.

- ★Tips: For enhanced features, contemplate upgrading to AnyViewer's Professional or Enterprise plan, which includes:
- Large file transfers: Send files up to 1TB in size.
- Speedy transfers: Experience rapid file transfer speeds of up to 10MB/s.
- Efficient multitasking: Manage multiple file transfers simultaneously with multi-threading capabilities.
- No limits: Send as many files as necessary, providing you with maximum flexibility.
Conclusion
In conclusion, this guide offers effective solutions for resolving file transfer not working Windows 10 and 11 systems. By addressing common causes such as outdated drivers, antivirus interference, and service configurations, users can troubleshoot and fix file transfer problems efficiently. Additionally, the recommendation of AnyViewer as an alternative file transfer tool provides users with a secure, versatile, and complimentary solution. With its robust encryption and user-friendly interface, AnyViewer ensures seamless and rapid file transfers and file accessing, making it an ideal choice for users seeking reliable file transfer capabilities on Windows 10 and 11.
