
Top 3 Best Remote Assistance Software for Mac
Check out the top 3 remote assistance software for Mac: AnyViewer for on-demand and unattended remote support, Microsoft Remote Help for cloud-based connections, and Chrome Remote Desktop for a simple, free solution.
By Ellie / Updated on December 26, 2024
What is the best remote assistance software for Mac?
If you're a Mac user, you probably know the importance of maintaining smooth and efficient remote assistance when you're working from home or need quick help. Remote assistance software allows you to troubleshoot, access files, or collaborate with others from any location without being physically present.
In this guide, we'll explore some of the best remote assistance software for Mac, what features to look for, and how to choose the right one to meet your needs.
Top 3 remote assistance software for Mac
There are several reliable remote support apps for Mac users. Let's take a closer look at the best three options.
Option 1. Provide on-demand & unattended remote assistance with AnyViewer [Recommended]
AnyViewer is an excellent remote desktop software option for providing both on-demand and unattended remote assistance. With its seamless functionality and robust security features, AnyViewer ensures a smooth remote support experience. Whether you need to assist someone in real time or manage their device when they're not around, AnyViewer can handle both scenarios efficiently.
Moreover, AnyViewer enhances your efficiency by allowing you to toggle between multiple remote sessions at once, each in its window. This feature enables you to manage several tasks simultaneously, with support processes running in the background while you focus on other work.
Here's how to provide on-demand & unattended remote assistance with AnyViewer:
Provide on-demand remote assistance
Step 1. The end user opens the AnyViewer app on their device, which automatically generates a unique and secure device ID along with a session code.
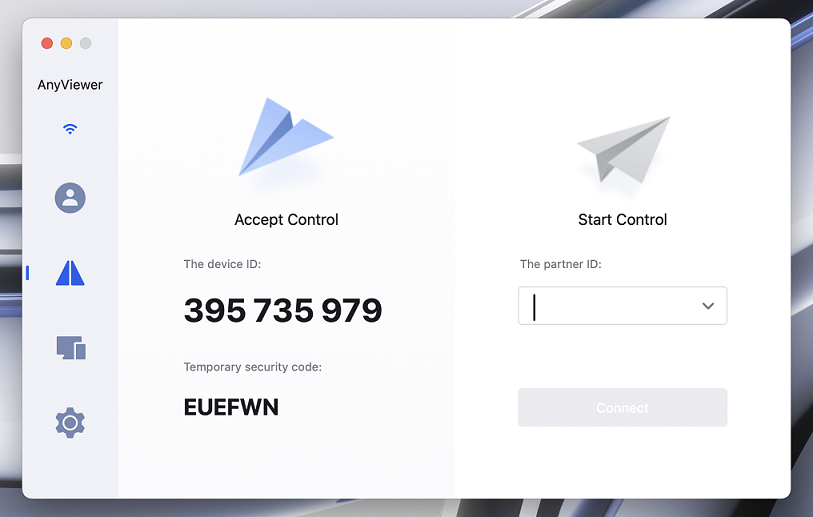
Step 2. The end user shares the device ID and session code with the technician.
Step 3. The technician enters the provided device ID in the "The partner ID" box, clicks Connect, and inputs the session code then to authenticate the session.
Step 4. Once authenticated, the technician can begin assisting the end user.
Provide unattended remote assistance
Step 1. Open the AnyViewer app on both devices. Create an AnyViewer account and log in on both computers.

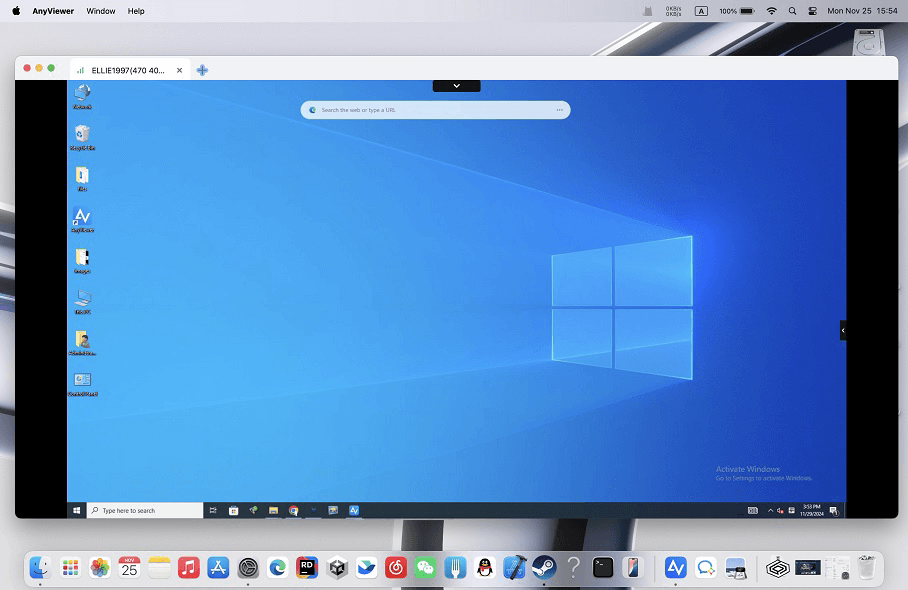
Step 2. On the technician's computer, locate the end user's device and click "One-click control" to start the session.

Step 3. The technician can now take control of the end user's computer, regardless of whether anyone is present at the device.
Option 2. Use Microsoft Remote Help for remote assistance
Remote Help is a cloud-based solution designed for secure help desk connections, featuring role-based access controls. It allows support staff to remotely access a user's device and view their screen. Available for macOS, Remote Help can be used as a native application or as a web app within the browser. The native application is necessary on the helper's machine to enable full control functionality.
To provide remote assistance via Microsoft Remote Help, follow the steps below:
Configure Microsoft Remote Help
This setup only needs to be completed once.
Step 1. Open Microsoft Remote Help from your Applications folder.
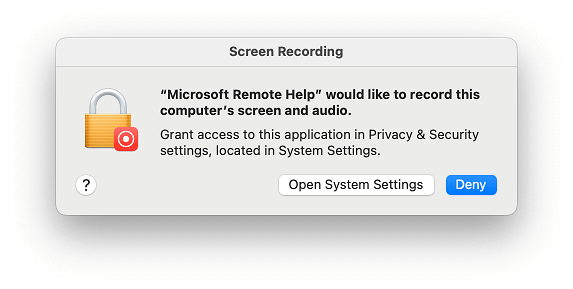
Step 2. Accessibility should already be configured (indicated by a green checkmark). You'll need to enable Screen Recording to proceed.
Step 3. Click Set up.
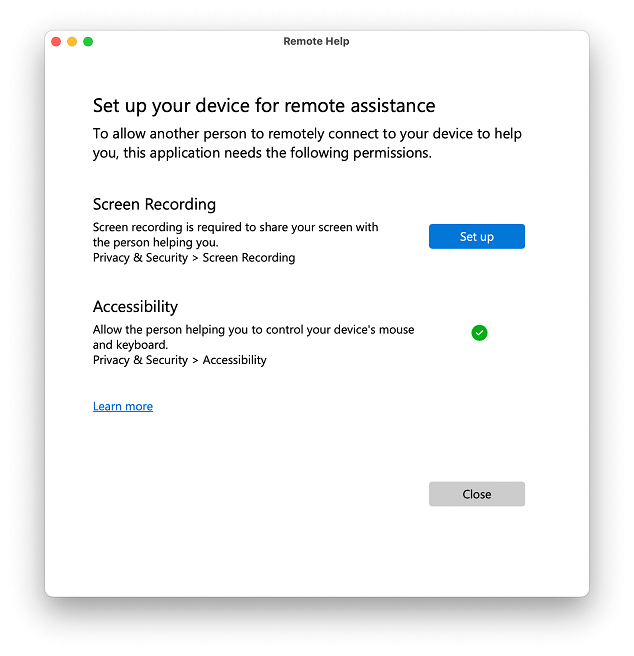
Step 4. Click Open System Settings.
Step 5. In the System Settings window, locate Screen Recording and toggle the switch for Microsoft Remote Help to "on."
Step 6. Click Quit & Reopen.
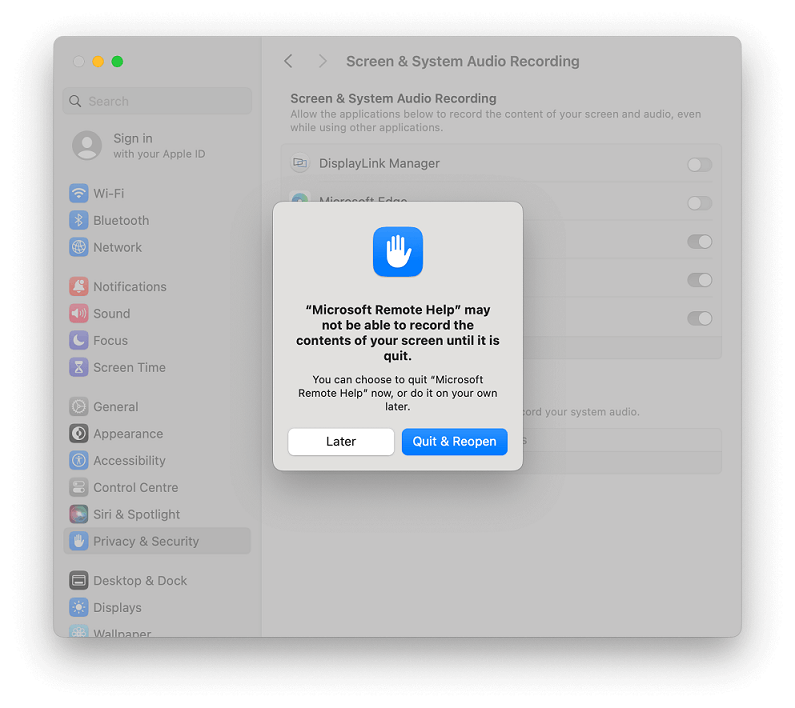
Step 7. Microsoft Remote Help will close and reopen. Afterward, close System Settings.
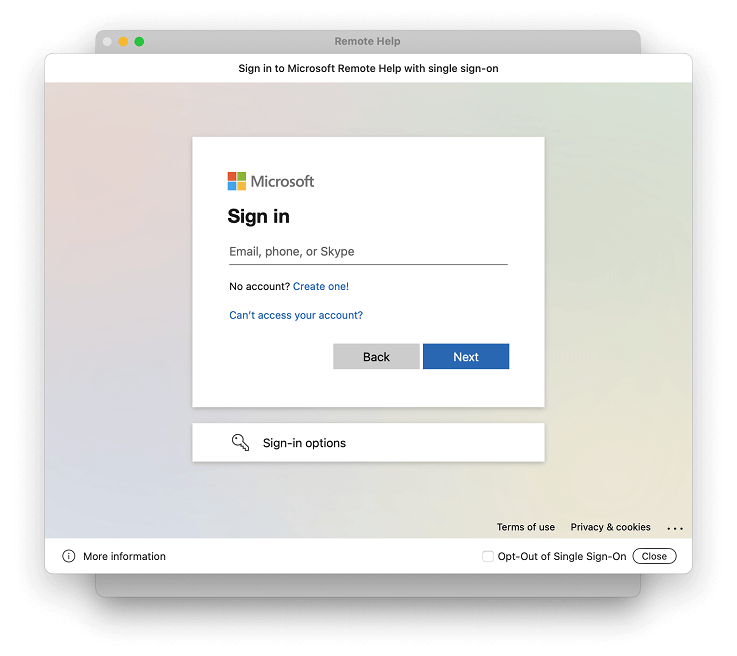
Sign into Microsoft Remote Help
Your credentials will be saved between sessions, so you won't need to log in every time. However, you may need to re-authenticate if you change your password.
Step 1. Open Microsoft Remote Help.
Step 2. Enter your email address and click Next.
Step 3. If prompted with a privacy message, click OK.
Step 4. Microsoft Remote Help will confirm that you are signed in and ready to receive assistance.

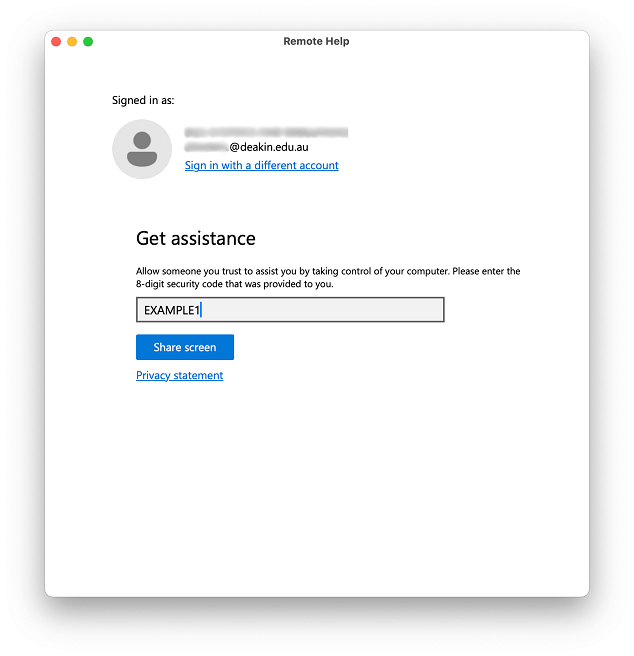
Getting Assistance Using Microsoft Remote Help
If you need support from Digital Services, you may be asked to set up a remote session with a technician.
Step 1. Open Microsoft Remote Help.
Step 2. The technician will provide you with a unique 8-character code. Enter the code carefully.
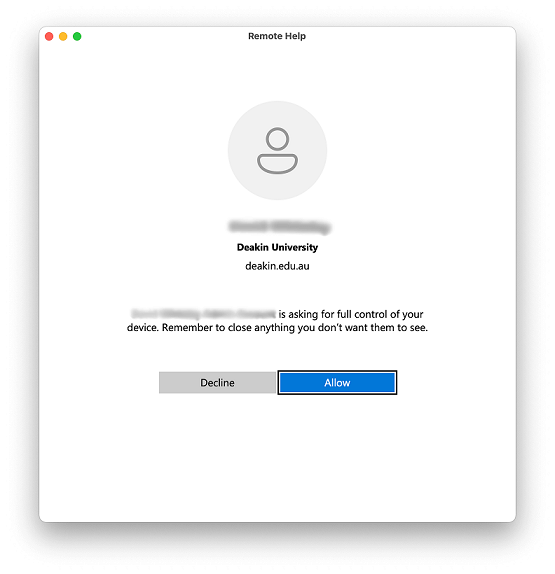
Step 3. The technician's name will appear to confirm they are the correct person connecting. Click Allow.
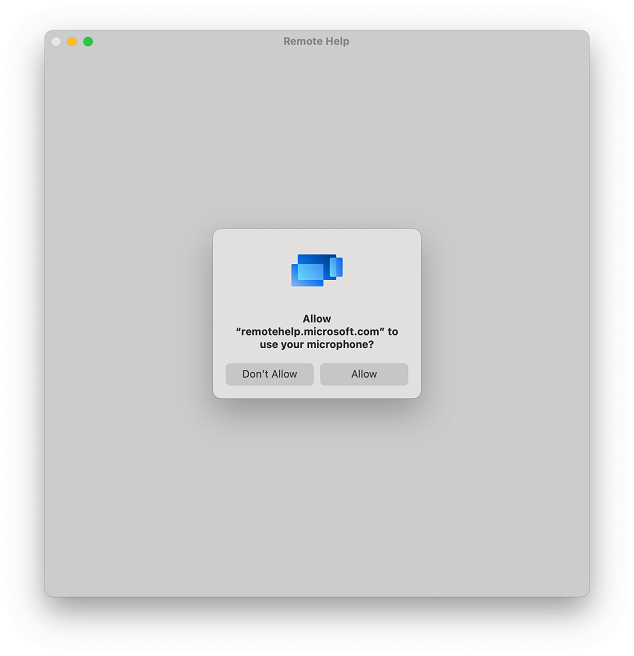
Step 4. If prompted to grant microphone access, click Don't Allow as it's not needed for the session.
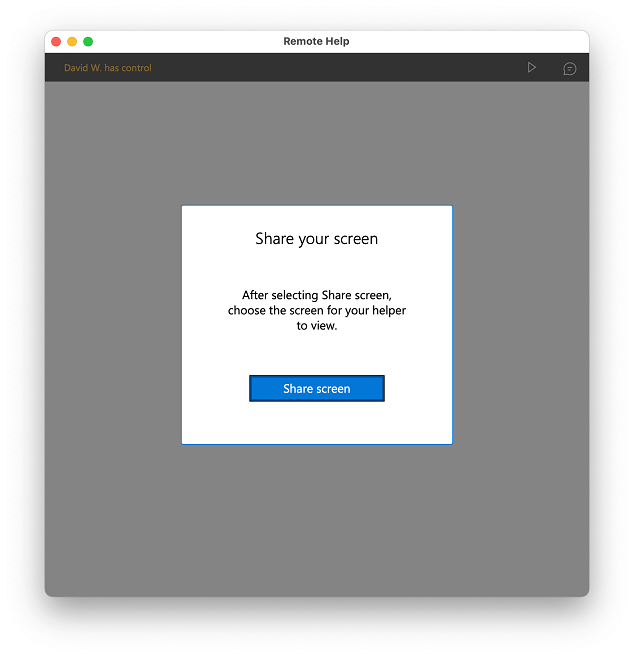
Step 5. Click Share screen, then choose the screen you want to share with the technician.
- For macOS 13.0 and below: Click Allow to Share Screen.
- For macOS 14 and above: Use the Content to Share controls in the menu bar to share the screen.
Step 6. Select the screen to share.

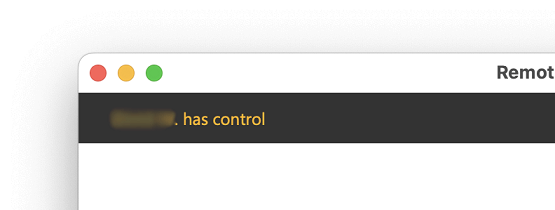
Step 7. Once connected, the technician's name will appear in the Remote Help status bar.
Option 3. Give fast remote assistance with Chrome Remote Desktop
If you're looking for a straightforward solution, Chrome Remote Desktop could be a great option. It's free, cross-platform, and offers basic remote access features. To use it, all you need is Google Chrome and a Google account. You can access another person's PC by entering a one-time access code provided by them.
Follow the steps below to get started with Chrome Remote Desktopon Mac:
Setting Up Chrome Remote Desktop for Remote Support on macOS
Step 1. Ask the person needing help to open Google Chrome and go to https://remotedesktop.google.com/support.
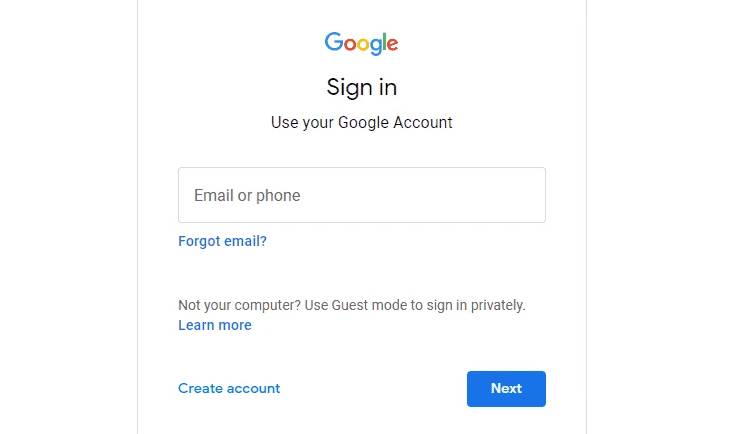
Step 2. They may need to sign in with their Google Account.
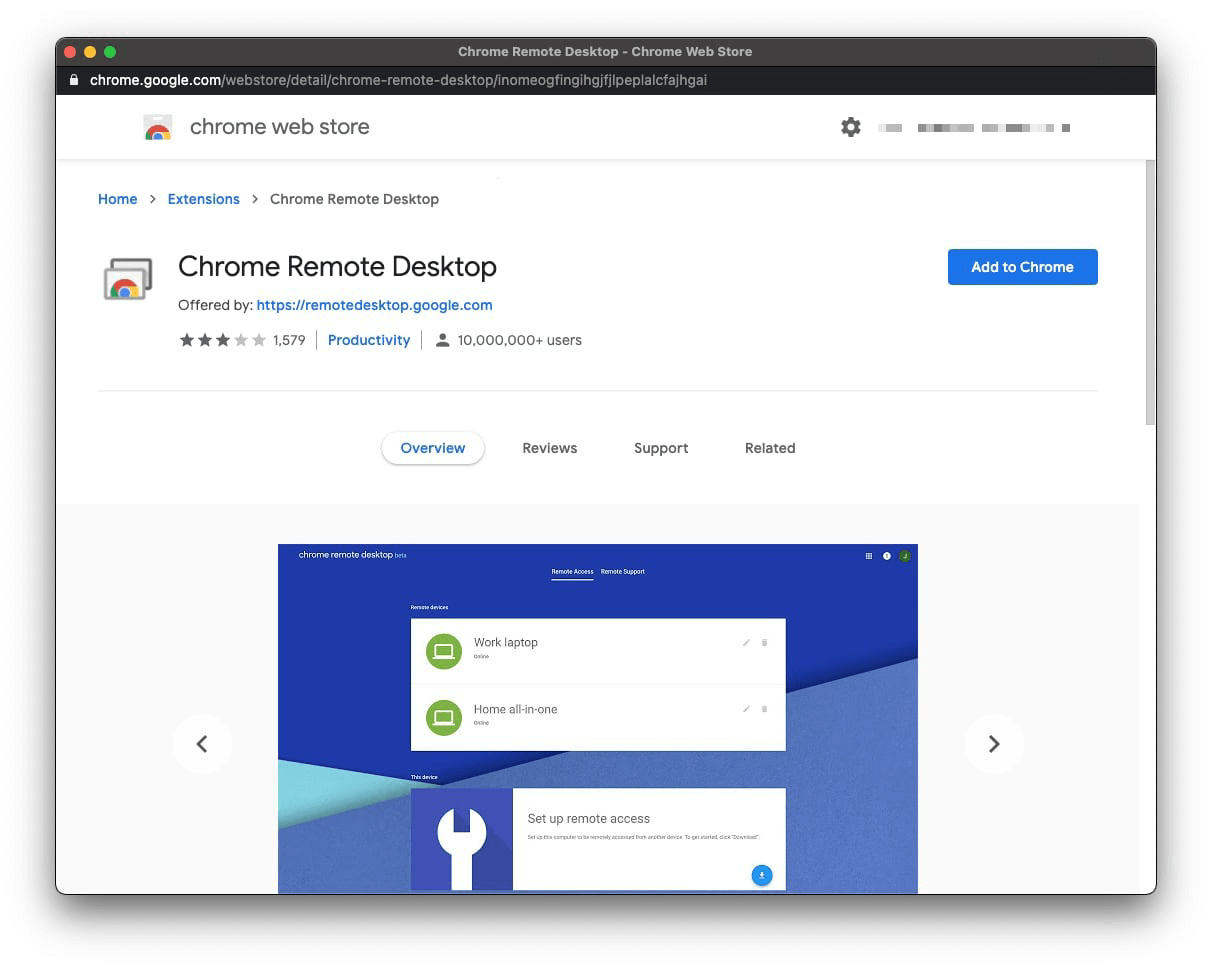
Step 3. Click Remote Support at the top, then click the download arrow next to Get Support. This will open the Chrome Web Store. Click Add to Chrome, then confirm by clicking Add Extension.
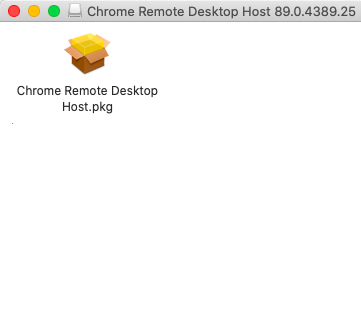
Step 4. Choose a location to save the installer and click Save. When ready, click Accept & Install, then open the downloaded file. In the Finder window, click Chrome Remote Desktop Host.
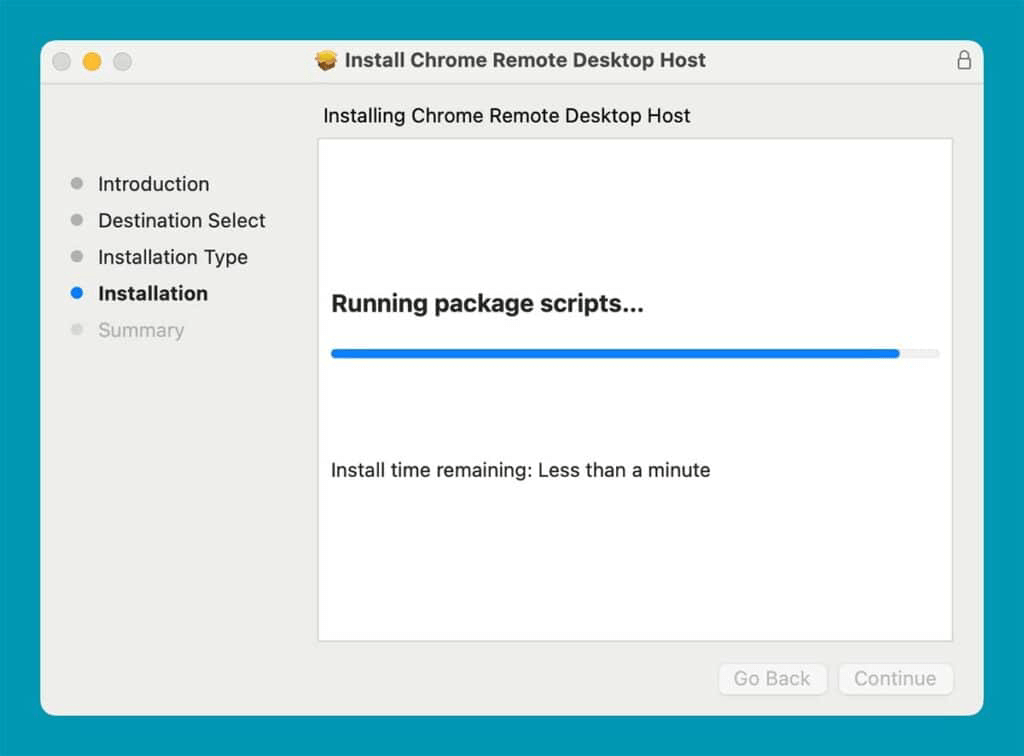
Step 5. Follow the prompts to install the software. Click Continue and then Install. Enter the Mac password and click Install Software. When done, click Close.
Generate a Remote Support Code
Step 1. Launch Chrome and visit remotedesktop.google.com/support. Click on Remote Support.
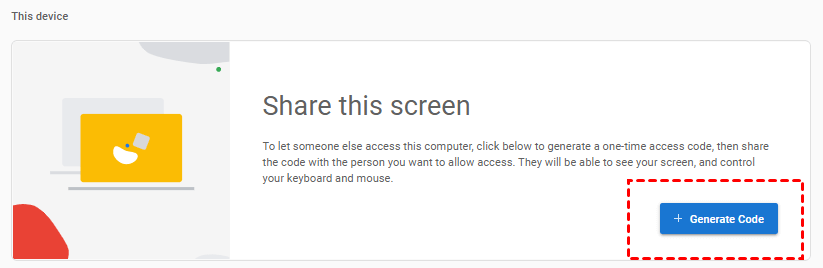
Step 2. In the Get Support section, click Generate Code.
Step 3. If this is your first time using Chrome Remote Desktop, you'll need to grant the necessary permissions. Click Open Accessibility Preferences.
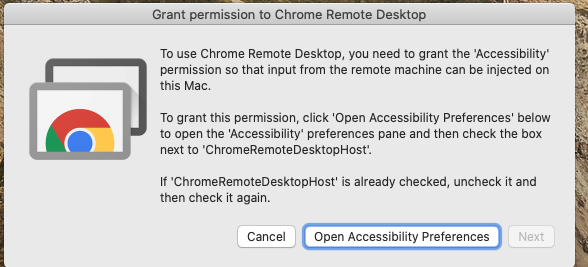
Step 4. Click the padlock icon and authenticate your Mac.
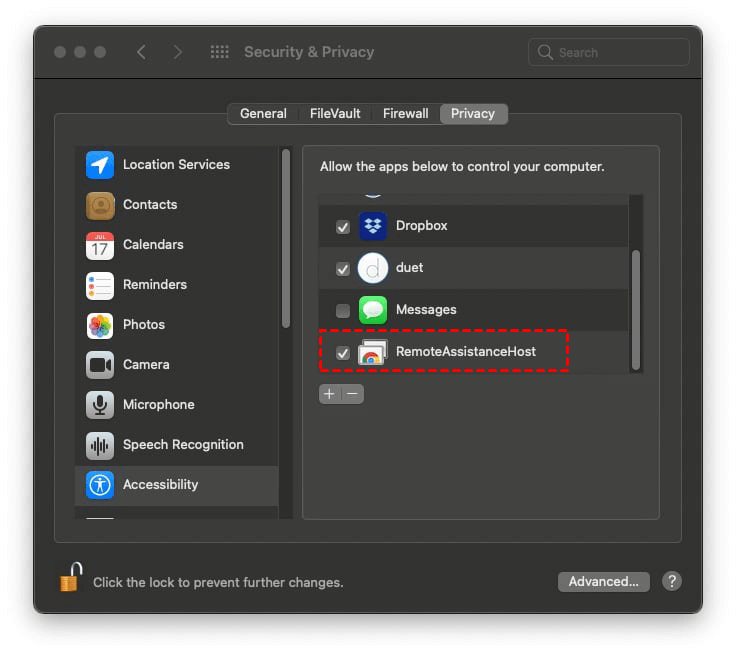
Step 5. In the list of apps on the right, check the box next to RemoteAssistanceHost.
Step 6. Click Next in the permission window.
Step 7. A Screen Recording prompt will appear. Click Open Screen Recording Preferences.
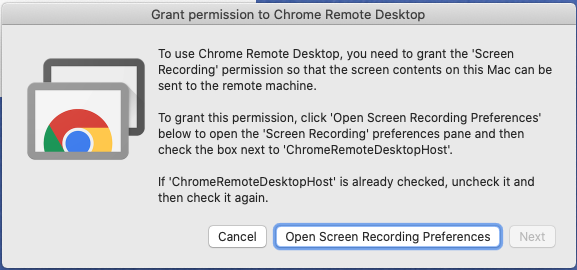
Step 8. If prompted, click the padlock again and authenticate.
Step 9. In the list, check the box next to ChromeRemoteDesktopHost, then click the padlock to lock the settings.
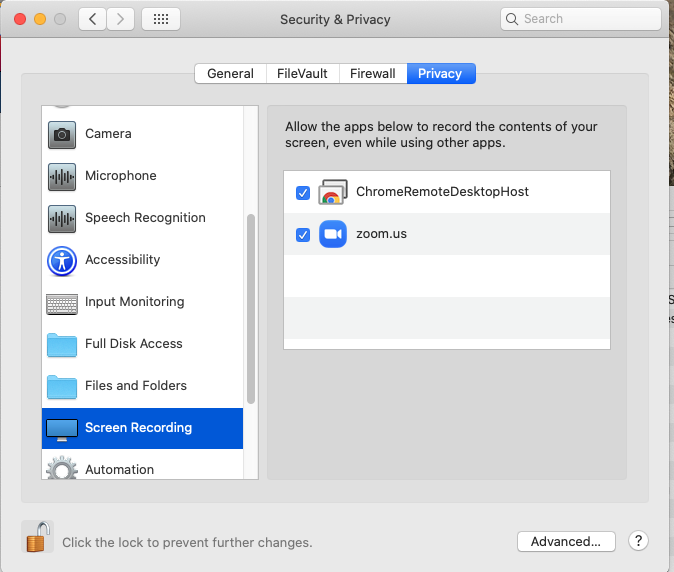
Step 10. Click OK in the pop-up window.
Step 11. Finally, in Chrome, click Generate Code.
Use the Generated Code to Provide Support
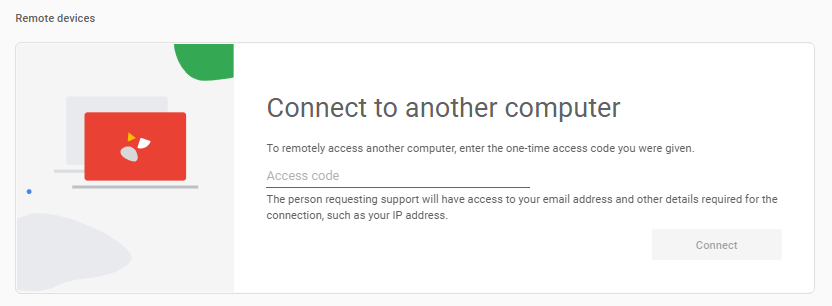
Step 1. Open Chrome and go to remotedesktop.google.com/support. Click on Remote Support.
Step 2. In the Give Support section at the bottom, click the Access Code box and enter the code you received. Then click Connect.
Step 3. The person receiving support must check their Mac for a dialog box showing your email address. They need to confirm that you're the correct person by clicking Share.
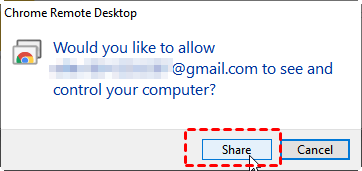
Step 4. Once they click Share, you will be connected and have control of their Mac.
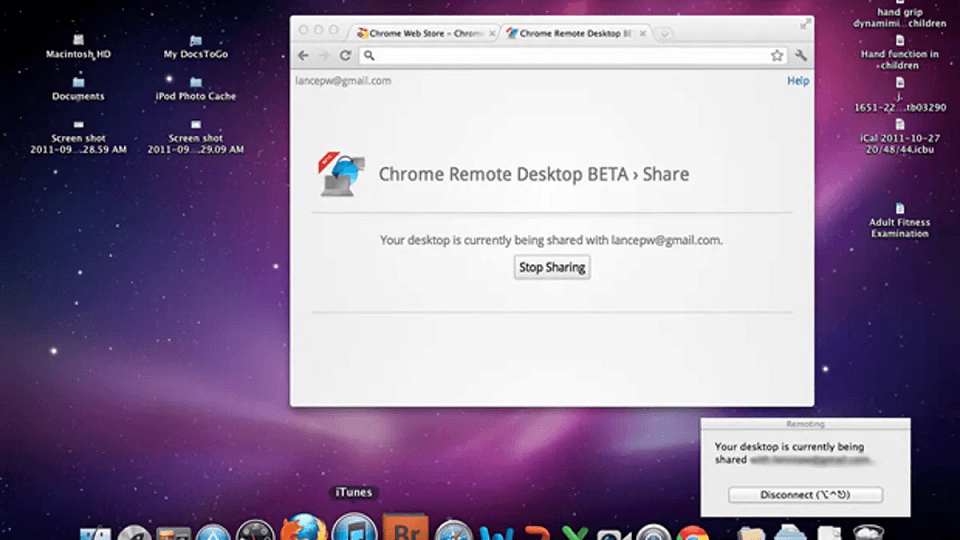
Step 5. After completing the task, click Stop Sharing to end the session.
Conclusion
In conclusion, when it comes to remote assistance software for Mac users, AnyViewer stands out as the top choice, offering both on-demand and unattended remote support with robust security and ease of use. While Microsoft Remote Help and Chrome Remote Desktop are also viable options, AnyViewer's seamless functionality and multi-session support make it the most efficient tool for remote troubleshooting and collaboration. Whether you're helping someone in real-time or managing devices remotely, AnyViewer ensures a smooth, secure experience for both technicians and end users.
