
Easy Remote Access with 3D Mouse: 3 Simple Methods
Using a 3D mouse for remote access can be hard because many remote desktop tools don't fully support it. This guide shows three easy ways to make it work: AnyViewer, RemoteFX, and USB Network Gate. With the right setup, you can control 3D design software from anywhere.
By Ellie / Updated on June 4, 2025
Can I use a 3D mouse for remote access?
As more professionals transition to hybrid and remote work environments, there's growing interest in using specialized input devices—like 3D mice—remotely. No matter if you're a CAD designer, 3D modeler, or engineer, using a 3D mouse with remote access can greatly boost your efficiency and streamline your workflow. However, native support for USB redirection in many remote desktop solutions is limited, making remote access with a 3D mouse a bit more complex.
In this guide, we'll explore how to use a 3D mouse with remote desktop solutions like AnyViewer, Microsoft RemoteFX, and USB Network Gate. Let’s dive in.
Why remote access with the 3D mouse is challenging
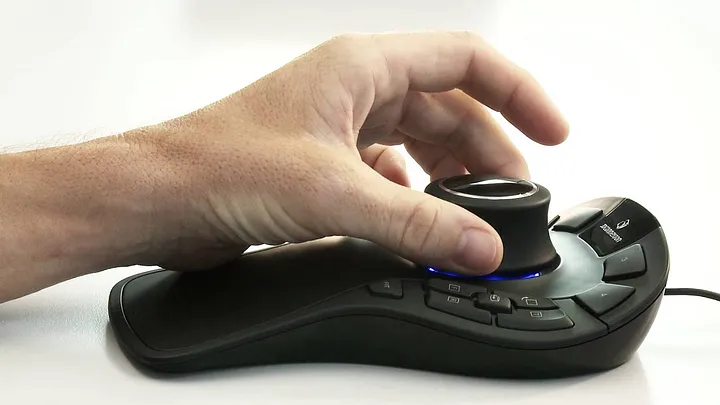
3D mice, like the SpaceMouse or CadMouse, are specialized input devices that offer advanced control features for navigating 3D environments. Unfortunately, these devices are not universally supported in remote desktop 3D mouse sessions because:
- Standard RDP doesn't support USB redirection
- Wireless 3D mice cannot be redirected unless connected via cable
- 3D drivers are often not recognized on virtual machines
- Devices like CadMouse act like 2D mice without proper driver support
But with the right setup, you can overcome these limitations and successfully achieve remote access with a 3D mouse.
3 ways to remote access with 3D mouse
Looking to use your 3D mouse remotely? Here are three practical methods to help you access and control design software with precision from anywhere. These options will show you exactly how to use a 3D mouse with remote desktop effectively.
Way 1. Use AnyViewer for 3D mouse remote access
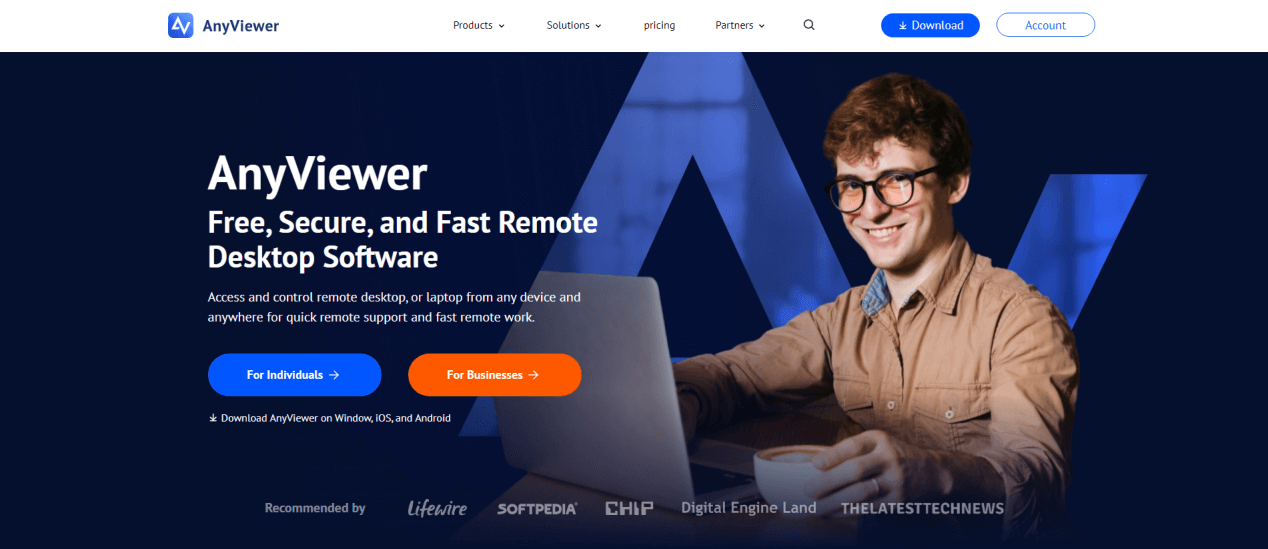
AnyViewer is a high-performance remote desktop solution that is increasingly being used for graphics-intensive and design-oriented applications. Although AnyViewer doesn't natively support USB forwarding, many users report successful usage of 3D mice for navigation and rotation tasks in CAD tools like SolidWorks or Autodesk Inventor.
How It Works:
- AnyViewer captures the entire desktop, including input gestures, and transmits them with low latency.
- While full driver-level support for 3D mice may be limited, basic 3D navigation (zoom, pan, rotate) often works if the 3D mouse is connected to the host machine.
Key Features:
- Fast and Smooth Performance: Control your remote device with minimal lag and up to 60 FPS—perfect for tasks like 3D modeling that need quick, smooth responses.
- High-Quality Visuals: Get clear, vibrant images with true color support, ideal for detailed design work.
- Strong Security: Your data is protected with top-level encryption and multi-layer authentication, keeping your work safe from unauthorized access.
- Works on All Major Devices: Use AnyViewer on Windows, Mac, iPhone, or Android. Easily connect across platforms from anywhere.
- Easy to Use and Set Up: Simple interface and quick installation make it easy for anyone to get started, even without tech skills.
- Affordable for All: Offers powerful features at a great price—perfect for freelancers, small teams, and growing studios.
Setup Guide:
Step 1. Install AnyViewer on both your home and office computers. Register for an account and log in using the same credentials on each device.

Step 2. Plug your 3D mouse into your home computer.
Step 3. Launch AnyViewer on your home PC and connect to your office machine by clicking the "One-click control" button.

Step 4. After establishing the connection, open your design software on the remote desktop and begin working just as you would in the office—seamlessly and without interruption.
Way 2. Use Microsoft RemoteFX to enable 3D mouse access
RemoteFX is a Microsoft technology that allows for USB redirection over RDP. Although not supported in all Windows versions anymore, it can still be useful for legacy setups.
Requirements:
- Windows 7 Pro SP1 or Windows Server 2008 R2
- A wired 3D mouse
- Administrative access to both host and client machines
How to Enable RemoteFX USB Redirection:
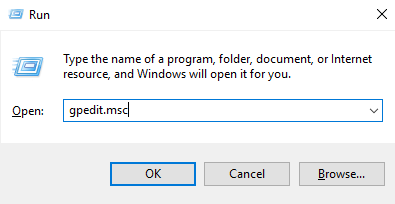
Step 1. Open Group Policy Editor (on both machines): Press WIN + R, type gpedit.msc, and hit Enter.
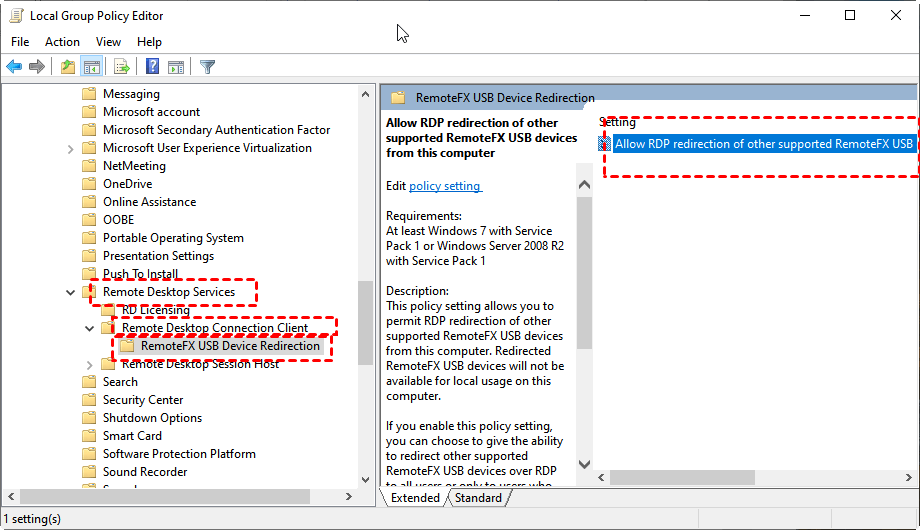
Step 2. Navigate to: Computer Configuration > Administrative Templates > Windows Components > Remote Desktop Services > Remote Desktop Connection Client. Modify the setting: Allow RDP redirection of other supported RemoteFX USB devices > Enable.
Step 3. Navigate to: Computer Configuration > Administrative Templates > Windows Components > Remote Desktop Services > Remote Desktop Session Host > Connections. Modify the setting: Allow users to connect remotely using Remote Desktop Services > Enable.

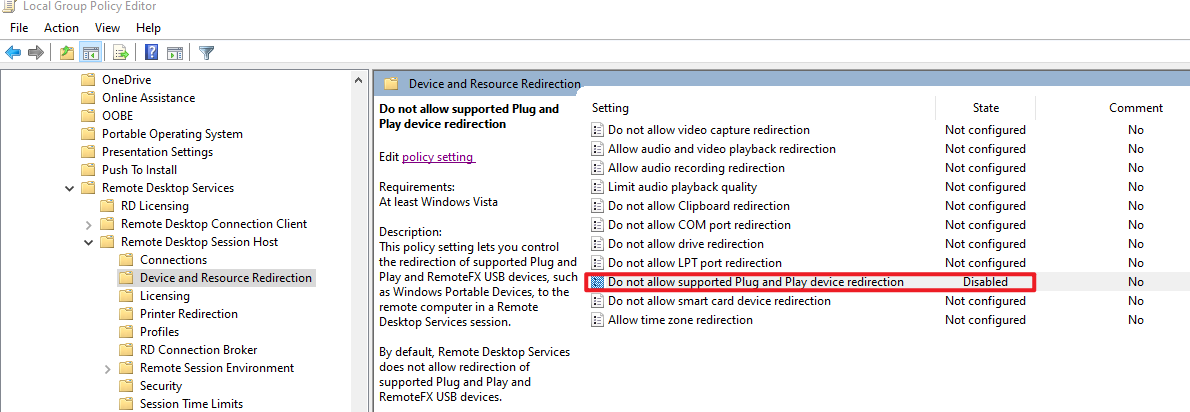
Step 4. Navigate to: Computer Configuration > Administrative Templates > Windows Components > Remote Desktop Services > Remote Desktop Session Host > Device and Resource Redirection. Modify the setting: Do not allow supported Plug and Play device redirection > Disable.
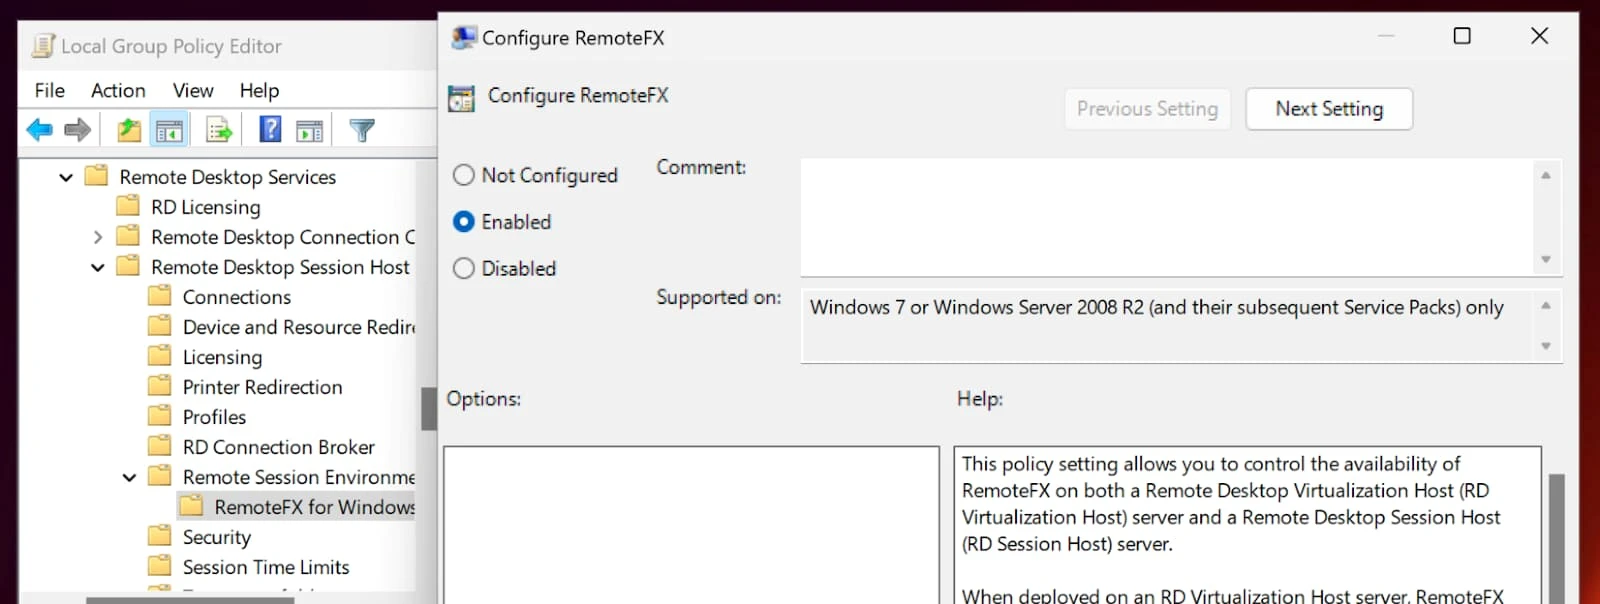
Step 5. Navigate to: Computer Configuration > Administrative Templates > Windows Components > Remote Desktop Services > Remote Desktop Session Host >Remote Session Environment. Modify the setting: Configure RemoteFX > Enable.
Step 4. Open Command Prompt as admin and run: gpupdate /force
Step 5. Restart the machine to apply the policy changes.
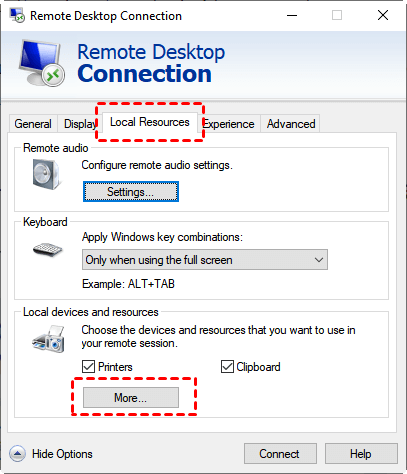
Step 6. Launch the RDP Client, go to the Local Resources tab > and click More.
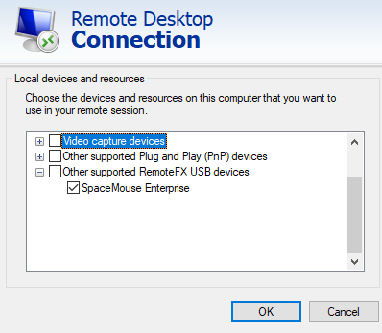
Step 7. Under Other supported RemoteFX USB devices, check the box for your 3D mouse.
Note: RemoteFX does not work with universal wireless receivers, so a USB cable connection is essential.
Way 3. Redirect 3D mouse via USB Network Gate
For a more modern and flexible approach, especially on newer systems, consider using USB Network Gate by Eltima Software.
Benefits of USB Network Gate:
- Supports advanced USB redirection over RDP
- Works on Windows, macOS, and Linux
- Allows device isolation in multi-user environments
- Simple, user-friendly interface
- Reliable for 3D mice, gaming controllers, and even 3D printers
How to Use USB Network Gate for 3D Mouse Redirection:
Step 1. Install USB Network Gate on both the host and remote machines.
Step 2. Connect the 3D mouse via USB to the local (host) machine.
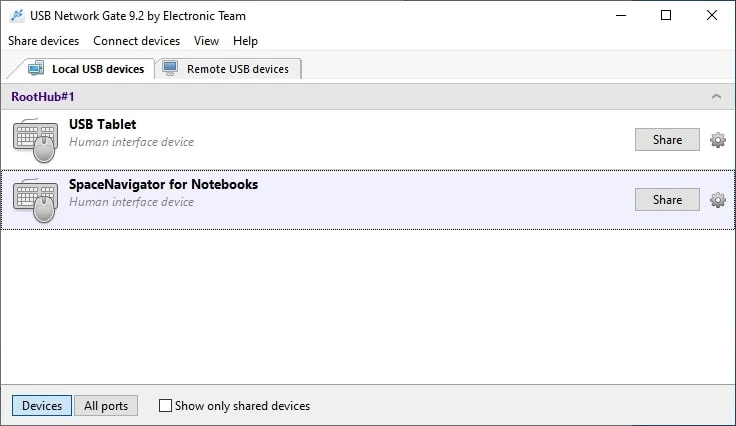
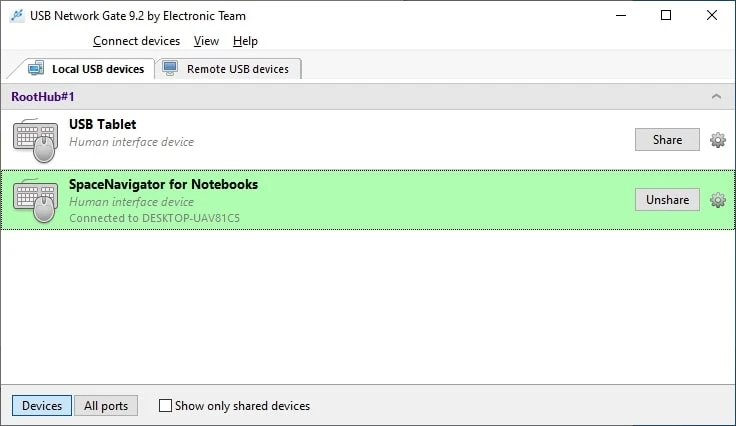
Step 3. On the host, open USB Network Gate > Local USB Devices tab > Click Share on the 3D mouse.
Step 4. Connect to the remote machine via RDP.
Step 5. On the remote machine, open USB Network Gate > Remote USB Devices tab > Click Connect next to the shared 3D mouse.
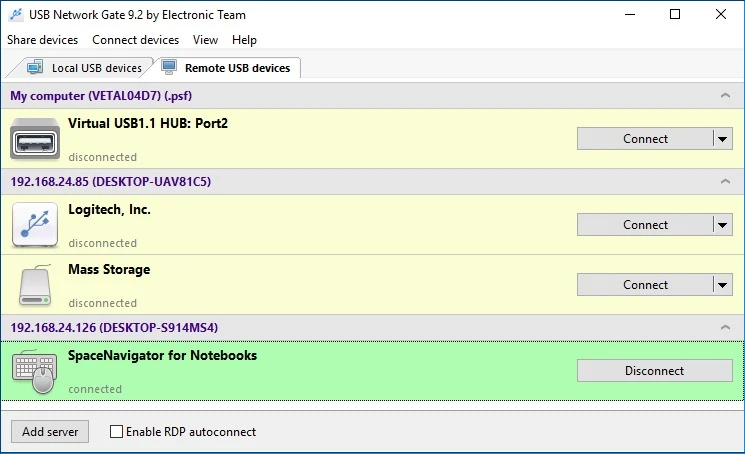
And that's it! Your 3D mouse will now be usable as if it were physically plugged into the remote computer.
Final thoughts
Remote access with a 3D mouse can significantly improve your productivity in CAD and 3D modeling tasks, particularly when you're working remotely or traveling. While native remote desktop tools like RDP have limitations, enabling RemoteFX or using third-party USB forwarding tools like USB Network Gate can bridge the gap. For designers seeking a balance of performance and ease of use, AnyViewer offers a compelling solution with good support for basic 3D navigation. Choose the option that fits your workflow and enjoy seamless 3D input across distances.
