
How to Redirect a 3D Mouse Over RDP: Complete Guide
Not sure how to redirect a 3D mouse over RDP? You're not alone. Most remote desktop apps don't support 3D mice directly. In this guide, you'll learn easy ways to fix that, like using USB redirection or tools like AnyViewer. Follow these simple tips to use your 3D mouse from anywhere.
By Ellie / Updated on June 4, 2025
Introduction
3D mice have become an indispensable tool in the toolkit of professionals working in CAD, architecture, 3D modeling, and even simulation environments. Their ability to allow seamless navigation in a 3D space with precise control makes them vastly superior to traditional input devices in specific contexts. But what happens when you're not sitting at your main workstation and instead working remotely as a software engineer, say, over RDP? That's when the trouble begins.
If you've ever tried using your 3Dconnexion SpaceMouse or similar 3D input device via a remote desktop connection, you've likely discovered that it doesn't work the way you'd expect. No movement. No input detection. Just a $200 paperweight in your hand.
So, how to redirect a 3D mouse over RDP? Why does this happen, and how do you fix it? That's what we'll unpack in this guide. We'll go step-by-step through the technical nuances and show you how to redirect a 3D mouse over RDP connection using reliable, effective methods. Whether you're working from home, managing a virtual desktop infrastructure, or running a complex design team remotely, this guide is for you.
Understanding Remote Desktop Protocol (RDP)
Remote Desktop Protocol (RDP), developed by Microsoft, allows users to connect to and control another computer over a network connection. While it's widely used for remote work and system management, it wasn't originally designed with advanced peripherals in mind, especially not those with specialized HID (Human Interface Device) profiles like a 3D mouse.
At its core, RDP transmits screen data from the host (remote) computer to the client and receives keyboard and mouse inputs in return. Standard keyboards and mice, simple devices using basic input signals, work perfectly. But once you throw in more advanced peripherals that require multi-axis input and real-time signal processing, RDP starts to fall apart.
The problem lies in how RDP interprets input data. RDP is optimized to compress and prioritize performance and latency, which is great for typical office workflows but disastrous for workflows that depend on continuous, high-fidelity peripheral data. That's why even if your 3D mouse is physically connected to your client machine, the host machine over RDP won't recognize it. The data simply never makes the journey.
This is exactly why it's essential to understand how to redirect a 3D mouse over RDP session using proper tools and configurations.
What is a 3D Mouse?
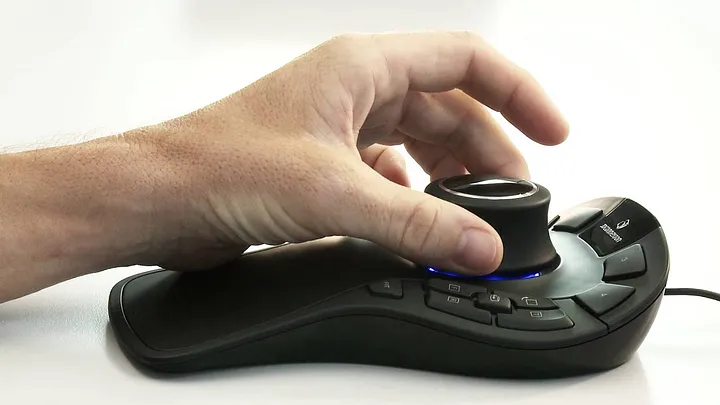
Before we dive into solutions, it helps to understand what makes a 3D mouse different from a regular one. A 3D mouse is not just another pointing device, it's a spatial navigation controller designed to give you fluid, intuitive control over 3D objects and environments. It's essential for professionals working with software like Autodesk Fusion 360, SolidWorks, Blender, Rhino, and more.
These devices usually include:
- A pressure-sensitive cap or puck that can be pushed, pulled, twisted, or tilted to control movement along six degrees of freedom (3D space).
- Additional programmable buttons that can be mapped to specific functions.
- USB or wireless connectivity.
Popular brands and models include:
- 3Dconnexion SpaceMouse Enterprise
- 3Dconnexion SpaceNavigator
- 3Dconnexion SpaceMouse Pro
- 3Dconnexion CadMouse
Because these devices rely on complex driver stacks and high-fidelity communication with the host computer, they're not natively supported in simple remote access protocols. That's why many users find themselves frustrated when trying to work remotely.
Moreover, these devices are highly application-dependent. That means the application must support 3D input, and the system must successfully interpret that input, which is nearly impossible via standard RDP.
Why Native RDP Doesn't Support 3D Mouse Redirection
The crux of the problem lies in how RDP handles hardware. While it does a great job with generic peripherals like keyboards, mice, and printers, it falls short with advanced HID-compliant devices like 3D mice. The protocol doesn't natively forward HID events from these devices.
Why? Because Microsoft RDP prioritizes security, stability, and performance, focusing on peripherals critical to basic remote desktop use. Advanced USB forwarding and HID tunneling aren't built into the protocol by default. Additionally, most 3D mice require dedicated drivers that run on the host operating system. These drivers look for a direct USB connection, not a virtualized one. When they don't find it, they simply don't function.
You might think: "Well, why doesn't Microsoft just add support?" Good question. The answer involves balancing performance with compatibility. Every new feature adds processing overhead and complexity. As such, Microsoft offloads these advanced use cases to third-party vendors and enterprise-grade virtualization tools like VMware Horizon or Citrix, which are designed to handle how to redirect a 3D mouse over RDP connection through advanced USB redirection and specialized HID protocols.
So now that we understand the limitations of native RDP, it's time to explore the solutions.
How to Redirect a 3D Mouse Over RDP
Getting your 3D mouse to work over RDP is not impossible, it just requires the right tools and a bit of configuration. Let's walk through the best solutions out there, starting with the most accessible options and diving into how to redirect a 3D mouse over RDP session successfully.
Method 1: Using USB Redirection with Third-Party Software
One of the most effective answers to how to redirect a 3D mouse over RDP is through USB redirection software. This method creates a virtual bridge between the client machine and the host machine, forwarding USB data streams as though the device were plugged directly into the host.
Recommended Software Tools:
- USB Network Gate by Eltima Software
- FlexiHub
- FabulaTech USB for Remote Desktop
- VirtualHere USB Server
These tools install USB drivers on both the local and remote machines. When the connection is made, your 3D mouse behaves like it's locally plugged into the remote machine.
Setup Overview:
Step 1. Install the software on both machines.
Step 2. Connect your 3D mouse to your local (client) machine.
Step 3. Open the redirection software and "share" the device.
Step 4. On the remote (host) machine, "connect" to the shared device.
Step 5. Ensure your 3D mouse drivers are installed and recognized.
Pros:
- Enables full functionality of the 3D mouse
- Works with most remote desktop software
- Secure, encrypted transmission
Cons:
- May require paid licenses
- Can introduce latency if not configured properly
- Slight learning curve
For many users, this method offers the best balance between reliability and cost, especially if switching to a different remote desktop platform isn't feasible.
Method 2: Using VMware Horizon or Citrix
For businesses and professionals already working within an enterprise environment, solutions like VMware Horizon and Citrix Virtual Apps and Desktops offer a more robust and integrated method for redirecting 3D mice over remote sessions. These platforms were built to handle a wider variety of USB and HID devices, including the highly specific ones used in design and engineering.
Why VMware and Citrix Work Better
Unlike native RDP, both VMware and Citrix support full USB passthrough, which allows the remote system to recognize USB devices as if they were plugged in locally. More importantly, they include protocol optimizations for performance-heavy workflows like 3D rendering, high-resolution video, and CAD environments.
Steps to Redirect a 3D Mouse in VMware Horizon:
Step 1. Install VMware Horizon Client on the local machine.
Step 2. Ensure the VMware USB arbitration service is running.
Step 3. Connect the 3D mouse to the local machine and open VMware Horizon.
Step 4. In the client settings, enable USB device redirection.
Step 5. Log in to the remote session and confirm that the device is recognized.
Step 6. Launch your CAD or 3D modeling software and test the input.
Steps for Citrix Users:
Step 1. Install the Citrix Workspace App.
Step 2. Plug in the 3D mouse to the local device.
Step 3. Modify the Citrix USB policy settings to allow 3D mouse devices.
Step 4. Enable USB redirection in the Citrix Studio or through GPOs.
Step 5. Start the remote session and check for recognition.
Advantages of Using Enterprise Solutions:
- High compatibility with HID and CAD-specific peripherals
- Better performance due to optimized protocols
- Centralized management for IT departments
- Security features built for enterprise-grade operations
Disadvantages:
- Costly licensing and setup for small teams
- Requires IT administration for configuration and support
- May be overkill for solo professionals or freelancers
Still, if your organization already uses VMware or Citrix, this is by far the most seamless and scalable method for integrating 3D mouse functionality into your remote workflows.
Method 3: Remote Access Alternatives (e.g., AnyViewer)
If you're looking for a simpler way to solve the problem of how to redirect a 3D mouse over an RDP session, AnyViewer offers a lightweight yet effective alternative. It's a modern remote desktop tool designed with simplicity and performance in mind, and it performs surprisingly well when it comes to HID (Human Interface Device) support, like 3D mice.
Why Use AnyViewer for 3D Mouse Redirection?
Unlike Microsoft's RDP, AnyViewer does a much better job of capturing and transmitting the complete range of HID signals, which makes it ideal for professionals using CAD tools, simulation software, or 3D modeling applications. It allows seamless control, low-latency interactions, and even supports peripheral passthrough with minimal configuration.
Steps to Use AnyViewer with a 3D Mouse:
Step 1. Download and install AnyViewer on both the local (client) and remote (host) computers.
Step 2. Register for an AnyViewer account and log in on both devices.
Step 3. Connect your 3D mouse to your local machine.
Step 4. Establish a remote session from the client to the host using AnyViewer.
Step 5. Ensure all required 3D mouse drivers and software (e.g., from 3Dconnexion) are installed on the host machine.
Step 6. Test the 3D mouse input by launching a 3D application like Fusion 360 or Blender on the remote desktop.
Advantages of Using AnyViewer:
- Plug-and-play experience with minimal configuration required
- Better HID support compared to traditional RDP
- High-speed performance and smooth cursor control
- Free for basic use, with affordable plans for advanced features
Potential Limitations:
- Peripheral redirection may depend on the version used (free vs. professional)
- Some advanced features require a stable internet connection
- It might not support all functions of high-end 3D mice, depending on the model and driver compatibility
Who Should Use AnyViewer?
- Freelancers and designers who work remotely
- Small businesses looking for a cost-effective alternative to VMware or Citrix
- Users frustrated by RDP's limited HID support
In summary, AnyViewer is an excellent remote desktop option for those who need to use 3D mice without diving into complicated IT infrastructures. It's lightweight, intuitive, and surprisingly capable when it comes to forwarding advanced input devices like 3D controllers.
Best Practices When Using a 3D Mouse Over Remote Desktop
Once you've chosen a method to redirect your 3D mouse, whether via third-party USB redirection, enterprise virtualization platforms, or alternative remote access tools, several best practices can enhance your experience and ensure stable performance.
1. Use Wired Connections Whenever Possible
Although many 3D mice come with wireless options, USB redirection is more stable when using a wired connection. Wireless signals can get disrupted, especially when forwarded through virtual networks.
2. Keep Drivers Updated
Ensure that the latest drivers from manufacturers like 3Dconnexion are installed on both your local and remote machines. Outdated drivers are often the root cause of poor performance or non-functioning devices.
3. Optimize Network Latency
Remote control of peripherals is highly sensitive to network conditions. Use a wired Ethernet connection over Wi-Fi when possible. Check your ping and bandwidth, aim for <30ms ping and at least 10Mbps upload/download for optimal performance.
4. Disable Unnecessary Background Tasks
On both the host and client machines, close any non-essential programs consuming CPU or bandwidth. This allows more resources to be allocated to rendering your 3D environment and processing HID input smoothly.
5. Test on Lightweight Projects First
Before jumping into complex models or production work, test your setup using simpler 3D scenes. This helps you identify and fix any lag or input delay issues early on.
Conclusion
Redirecting a 3D mouse over RDP isn't just a technical puzzle; it's a gateway to remote productivity for CAD designers, engineers, architects, and creatives. While RDP alone may not support these devices, the methods outlined above show you how to redirect a 3D mouse over RDP, whether through third-party USB redirection, enterprise solutions, or user-friendly tools like AnyViewer.
With this guide, you now understand how to redirect a 3D mouse over RDP connection or even an entire RDP session, so you can get back to working smoothly, no matter where you are.
