
[Full Tutorial] How to Allow Multiple Remote Desktop Connections Server 2019, 2022
This post delves into the detailed steps for allowing multiple Remote Desktop Connections in Server 2019 and 2022. Keep reading if you want to know more.
By Ellie / Updated on December 13, 2024
How many users can connect to Windows Server 2019 remote desktop?
Hello. I have purchased one Windows Server 2019 for work use. And my colleagues and I need to use it remotely to handle the teamwork. The question is how do I allow more than 2 RDP sessions to a Windows Server 2019?”
- Question from Quora

In Windows, you have the option to configure the number of simultaneous remote connections permitted for a connection. By default, Windows restricts RDP sessions to a Windows Server to only 2 concurrent connections. If you attempt to access more than two users simultaneously, you will encounter an error message indicating that there are too many users signed in to Server 2019.
To require access for more than 2 users simultaneously, you'll need to install the RDS roles and allocate user CAL licenses accordingly to accommodate the needed number of sessions.
How to allow multiple Remote Desktop Connections in Server 2019 and 2022
The process of allowing multiple Remote Desktop Connections on Server 2019 and 2022 is broken down into five parts. Follow the comprehensive steps outlined in each part to begin.
Part 1. Enable multiple RDP sessions on Windows Server
To enable multiple Remote Desktop connections on Windows Server 2019 and 2022, you must initially activate multiple RDP sessions on Windows Server.
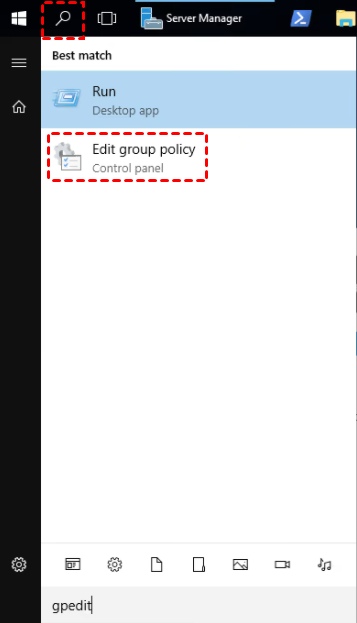
Step 1. Type in“Edit group policy” or “gpedit.msc” in the search box and open it.
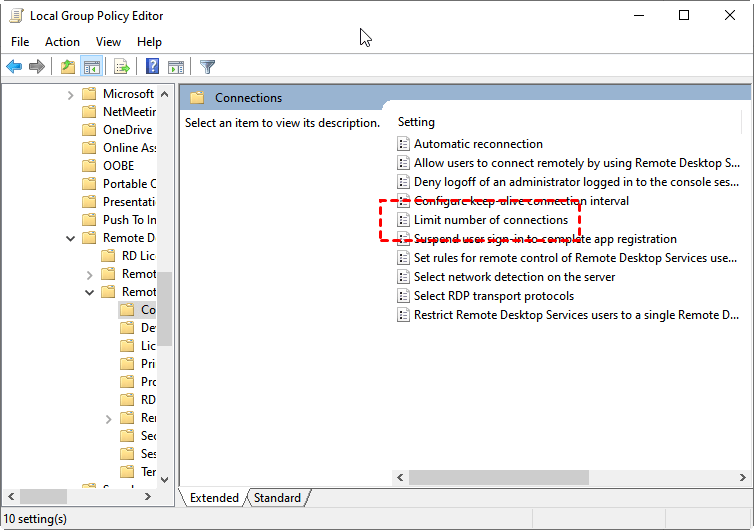
Step 2. Navigate to: Computer Configuration > Administrative Templates > Windows Components > Remote Desktop Services > Remote Desktop Session Host > Connections.
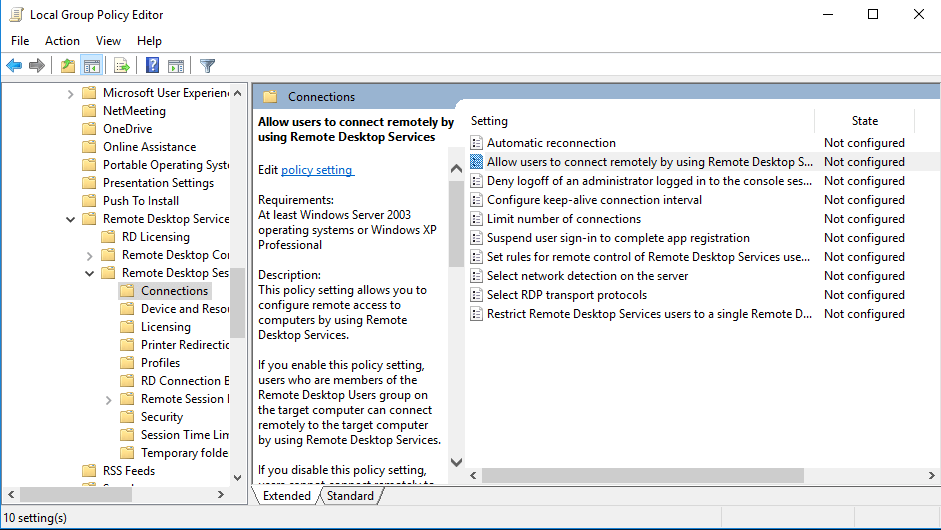
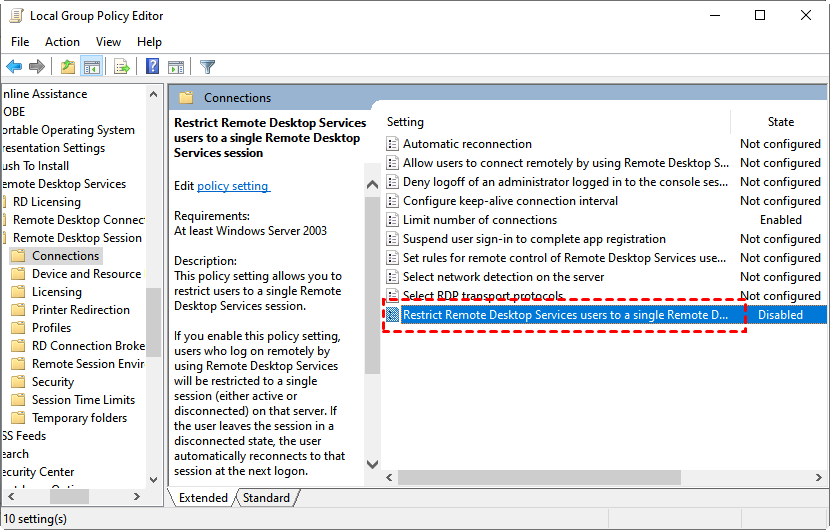
Step 3. Double-click Restrict Remote Desktop Services users to a single Remote Desktop Services session on the right pane.
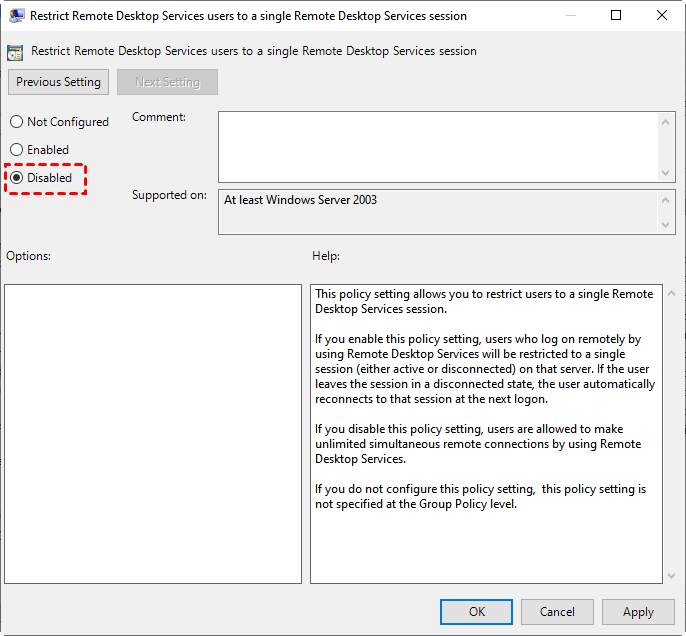
Step 4. Tick Disabled to allow simultaneous remote connections.
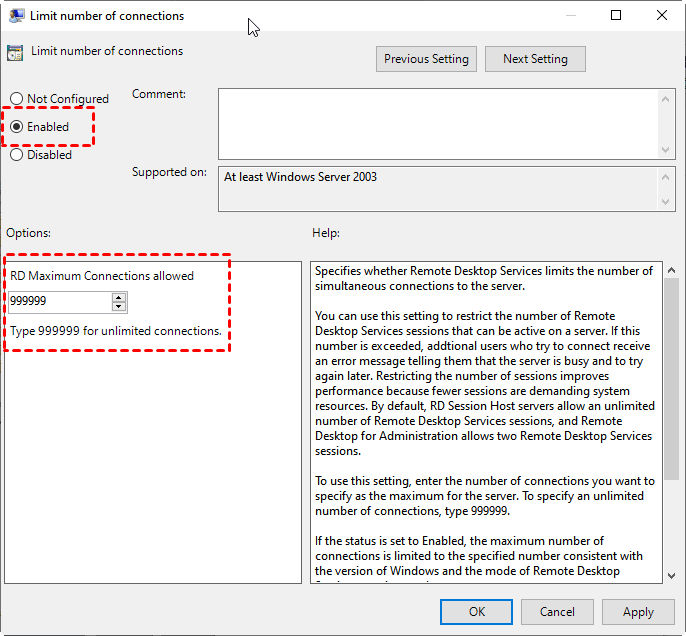
Step 5. Back to the Connections interface and double-click Limit number of connections to set the limit number of connections.
Step 6. Tick Enabled and enter the number of maximum connections based on your need.
Step 7. Restart the computer to apply the settings and then you can allow multiple Remote Desktop connections Server 2019/2022.
Part 2. Install the Remote Desktop Licensing Role
The Remote Desktop Licensing feature can be installed on any Windows Server host, without the necessity of installing it on one of the servers within the RDS farm.
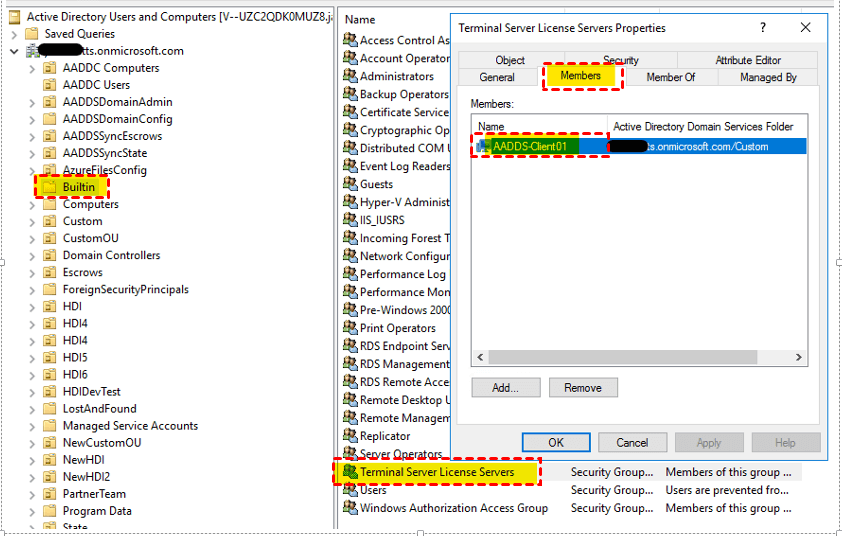
Step 1. If deploying an RD Licensing host within an AD domain, ensure to add the server to the built-in Terminal Server License Servers group. Failure to do so will result in the host being unable to issue RDS Per User CALs to domain users.
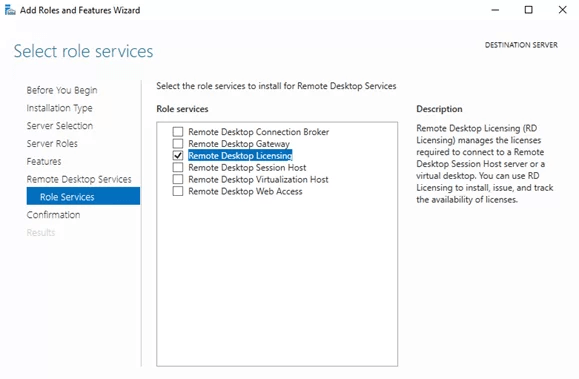
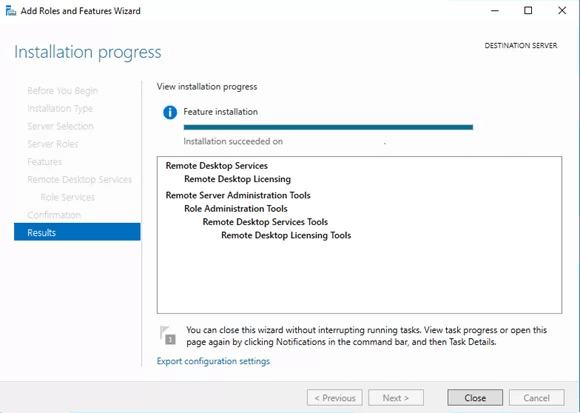
Step 2. Install the Remote Desktop Licensing service using the Server Manager console. Navigate through Add Roles and Features > Remote Desktop Services > Remote Desktop Licensing.
Step 3. Allow time for the role to be fully installed.
Part 3. Activate the Remote Desktop Services License Server
To activate your RDS License Server for issuing licenses to RDP clients, follow these steps:
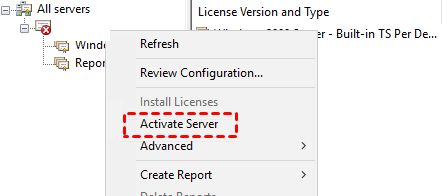
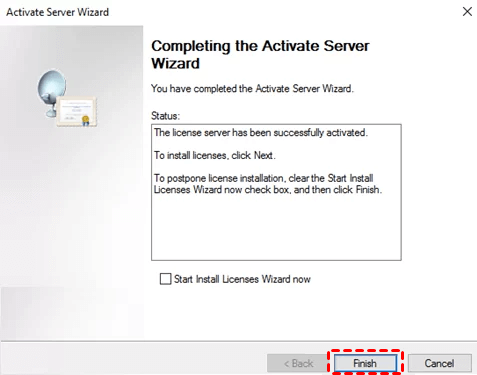
Step 1. Open the Remote Desktop Licensing Manager (licmgr.exe), then right-click on the server name and choose Activate Server.
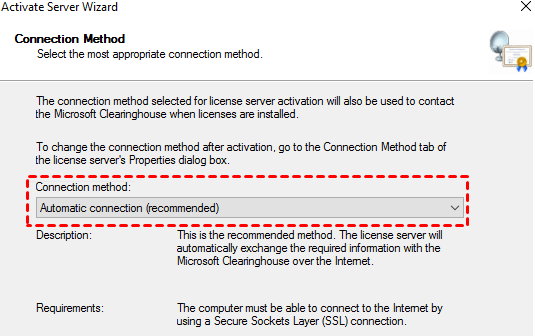
Step 2. In the RDS licensing server activation wizard, select your preferred method for activation: over the Internet, using a browser, or by phone.
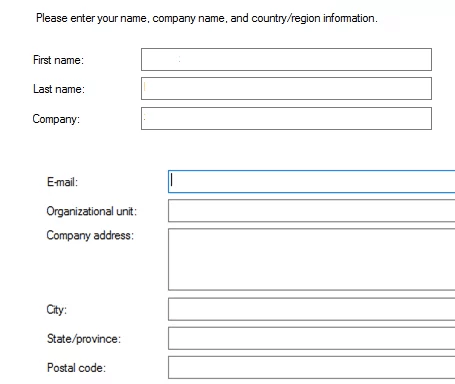
Step 3. Provide necessary company information in the required fields.
Step 4. Click the Finish button to complete the activation process.
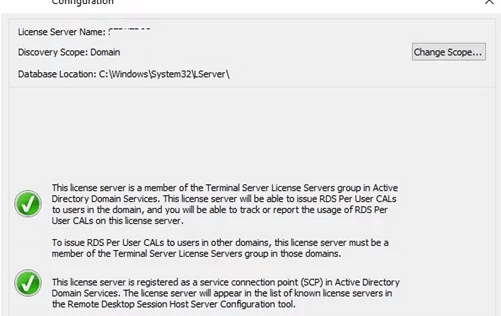
Step 5. Click on the server name in the console and select Review Configuration. Ensure that the RD license server is enabled and capable of issuing licenses to clients in the AD domain.
Part 4. Install RDS Client Access Licenses (CALs)
Now, you'll need to install the terminal client access license (RDS CAL) pack that you've purchased on the license server. There are two types of RDS CALs:
-
Per-Device CAL: This is a permanent license assigned to a computer (device) that connects to the RDS server more than once. Initially, a temporary licensee is issued when a device connects for the first time. These licenses are not concurrent, meaning if you have 10 Per-Device licenses, only 10 computers can connect to your RDS host.
-
Per-User CAL: This license allows a user to connect to the RDS from any number of computers/devices. It's linked to a user account in Active Directory and is issued for a period of 52 to 89 days (random number).
Ensure that the RDS CALs you're using are compatible with the version of Windows Server that the users or devices are connecting to.
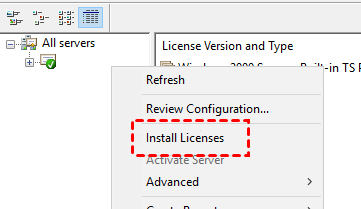
Step 1. Right-click your host in the Remote Desktop Licensing Manager console and select Install Licenses.
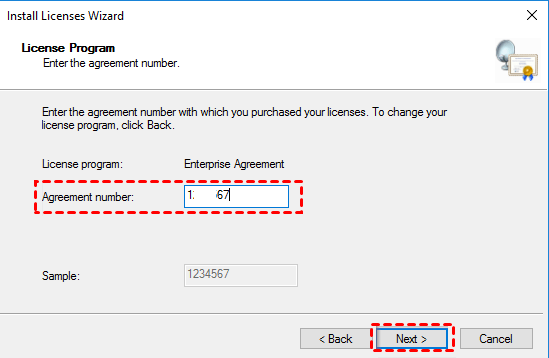
Step 2. Choose the activation method (automatic, online, or by phone) and the license program (e.g., Enterprise Agreement).
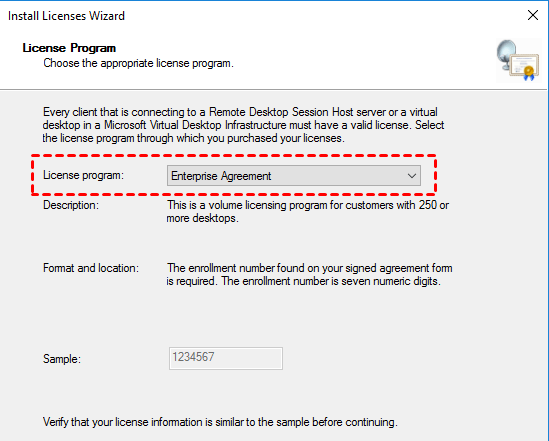
Step 3. Depending on the license program chosen, provide the necessary information. For example, if using an Enterprise Agreement, enter its number. If selecting License Pack (Retail Purchase), input the 25-character product key received from Microsoft or a partner.
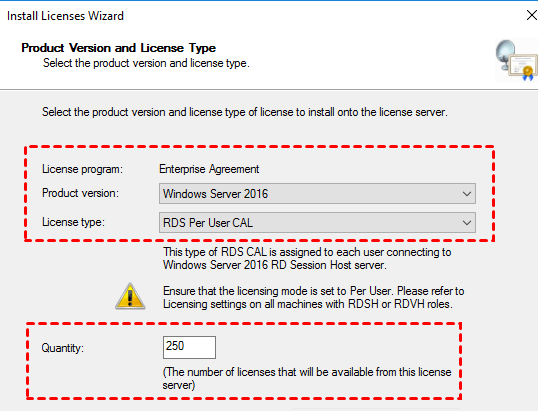
Step 4. Specify the product version (e.g., Windows Server 2022, 2019, or 2016), the RDS CAL type, and the number of terminal licenses to be installed on the server.
Step 5. Utilize the Convert Licenses option in the RD Licensing Manager console to convert RDS User CALs to Device CALs (and vice versa) if needed.

Part 5. Configure Licensing Settings on RD Session Hosts
Users can use the RDSH role for a grace period of 120 days after it is installed on Windows Server, after which they won’t be able to connect to RDS. For your RDSH host to receive CALs and issue them to devices/users, you must specify the address of the RD licenses server in the RD Session Host settings.
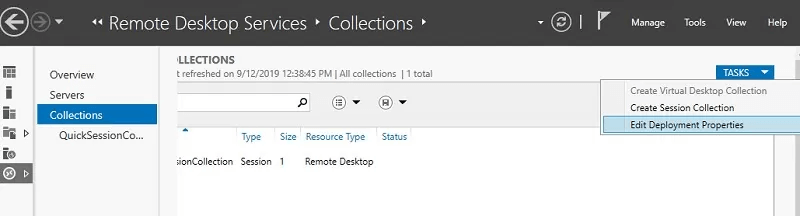
Step 1. Open Server Manager, navigate to Remote Desktop Services, and select Collections. In the "Tasks" menu at the upper right, choose "Edit Deployment Properties".
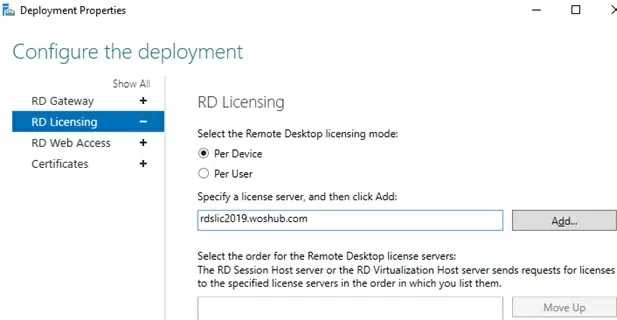
Step 2. Head to the RD Licensing tab, select the licensing type (Per user or Per device), and input the license server address. Click Add > OK.
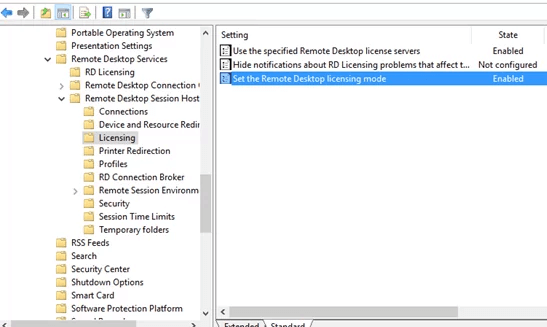
Step 3. Navigate to Computer Configuration > Policies > Admin Templates > Windows Components > Remote Desktop Services > Remote Desktop Session Host > Licensing. Configure the following options:
- Use the specified Remote Desktop license servers: Specify the name or IP address of the server where the RDS license is installed.
- Set the Remote Desktop licensing mode: Choose the license type for RDS CALs.
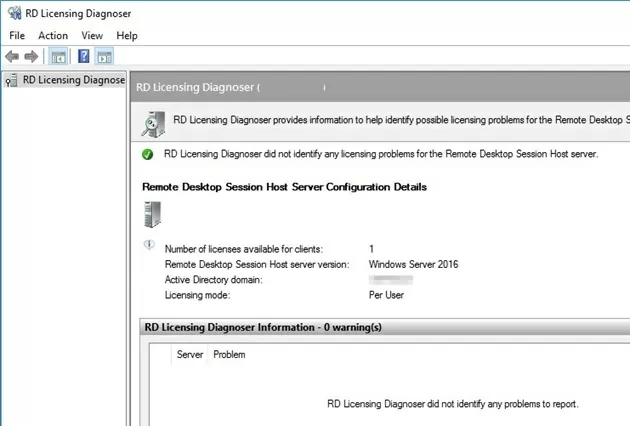
Step 4. Run the Remote Desktop Licensing Diagnoser (lsdiag.msc) on the RDSH to ensure it detects the licensing server and the available RDS CALs. If there are no warnings, and the message indicates successful detection, the RDSH server can receive RDS CALs for remote users/devices.
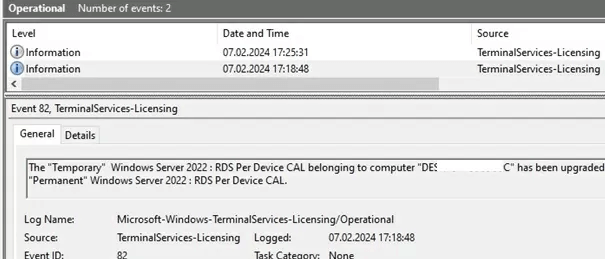
Step 5. Connect to the RDSH server from the client and verify that the licensing server has issued an RDS CAL. Open the Event Viewer console and navigate to Applications and Services Logs > Microsoft > Windows > TerminalServices-Licensing > Operational. Event ID 82 should contain the description for a successfully issued RDS CAL.
AnyViewer: The easiest way to achieve multiple remote connections
Enabling multiple RDP sessions on Windows Server can be a challenging task. For a simpler alternative, consider using AnyViewer. AnyViewer is professional remote desktop software designed for Windows, including both Windows OS and Windows Server OS. Its professional and enterprise plans offer support for unlimited simultaneous sessions. Moreover, AnyViewer is easy to set up and use, with minimal configuration complexity, providing users with exceptional convenience.
After download and installation on all the devices, follow the next steps to establish multiple remote connections via AnyViewer.
Step 1. On the local computer, go to Log in interface and click Sign up to create a new AnyViewer account (you can log in directly if you have already signed up.)
Step 2. When you successfully logged in to AnyViewer, you can see a list of devices are automatically assigned to the account you’ve logged in to.

Step 3. Log in to the same host account on the remote computers.
Step 4. On the local computer,click the Device interface to view the devices that have been assigned to the account. Choose the computer you want to control, click One-click control to gain unattended remote access.

Step 5. You can connce to multiple devices following the same steps. You can conveniently switch between the sessions by clicking the tab.
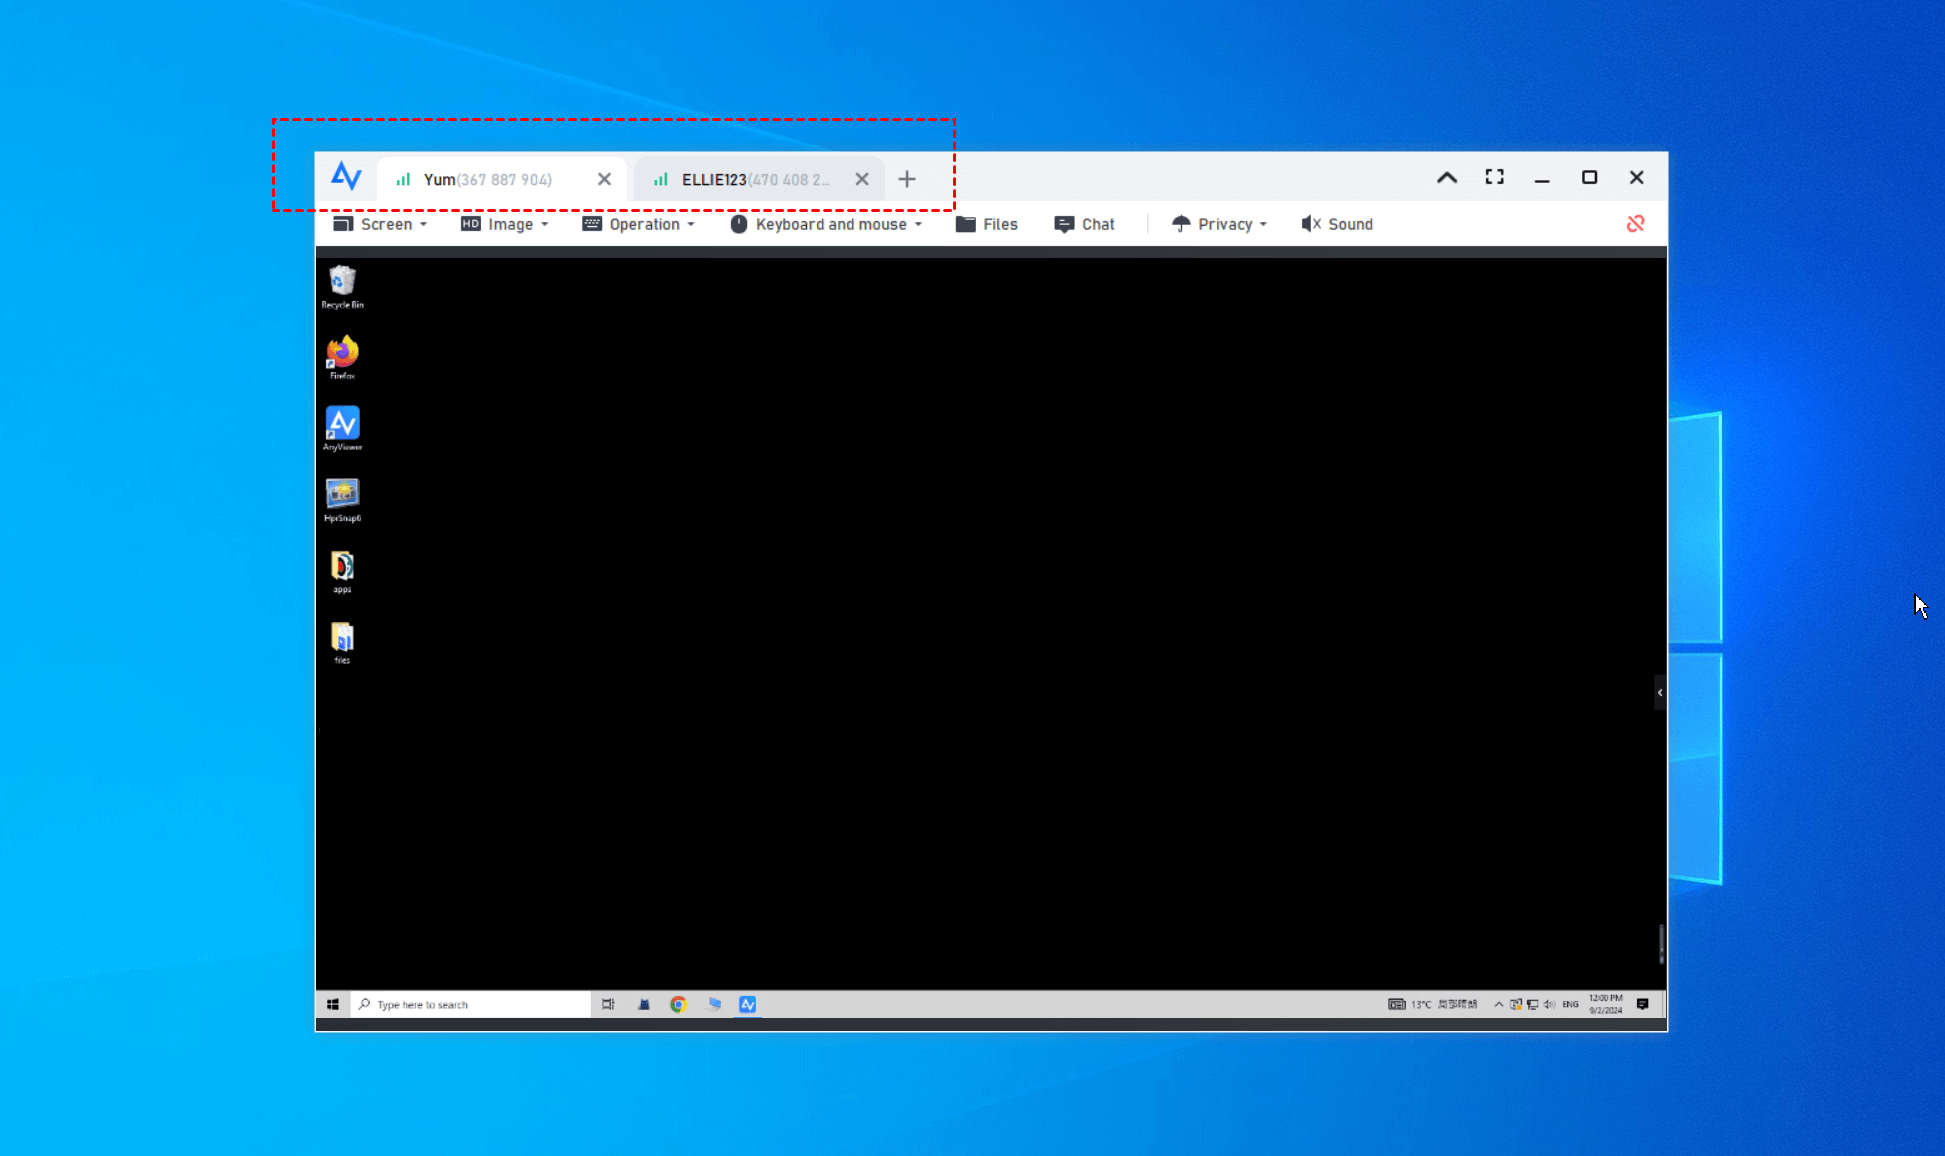
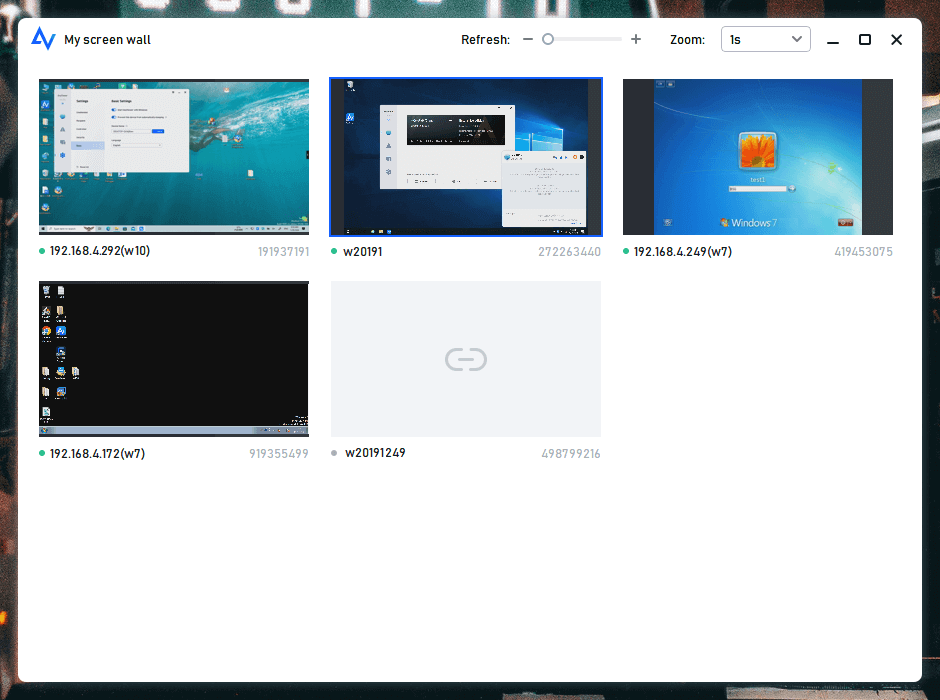
Additionally, you can utilize the screen wall feature, which enables you to monitor the activities of all selected devices within a single window and control them. This functionality offers flexibility in managing devices according to your preferences.
- ✍Notes:
- Here are some other benefits that a Professional or Enterprise plan can bring you:
- More logged in devices to one account.
- Faster file transfer speed.
- Connect in privacy mode.
- Mass Deployment (MSI).
- Create groups for better device management.
Conclusion
In conclusion, Windows Server 2019 defaults to allowing only two concurrent remote desktop connections, but you can allow multiple remote desktop connections on Server 2019 by configuring the Remote Desktop Services (RDS) roles and installing Remote Desktop Client Access Licenses (CALs). This involves enabling multiple RDP sessions, installing and activating the Remote Desktop Licensing role, installing CALs, and configuring licensing settings on RD Session Hosts.
Alternatively, you can simplify the process by using AnyViewer, a professional remote desktop software offering support for unlimited simultaneous sessions with minimal configuration complexity. Choose the method that best suits your needs for efficient remote teamwork.
