
2026 Top 10 Mirroring360 Alternative [Pros & Cons]
For those in search of a Mirroring360 alternative, your quest ends here. This article is tailored to meet your needs as it introduces 10 alternatives to Mirroring360. Continue reading to delve into the options and select the one that aligns perfectly with your specific requirements.
By AnyViewer / Updated on December 26, 2025
Is Mirroring360 free?
Unfortunately, Mirroring360 only offers a 7-day free trial. After 7 days, you may want to make a purchase if you still want to continue using it.Mirroring360 is a software that can mirror your iPhone to your computer or mirror your Android devices to your computer.
In the realm of screen mirroring and content sharing, Mirroring360 has long been a popular choice for users seeking a seamless experience across devices. However, the tech landscape is vast, and users often explore alternatives to find the perfect fit for their specific needs.
![]()
Specific feature requirements, pricing considerations, ease of use and interface, etc. are all reasons why users want to look for Mirroring360 free alternative.
This article delves into the world of Mirroring360 alternative, exploring the features, benefits, and unique offerings of other screen mirroring solutions.
Top Mirroring360 alternative [10 options]
If you decide to explore Mirroring360 alternative free, a plethora of options awaits. This compilation introduces the top 10 Mirroring360 alternatives in 2024. These programs not only match Mirroring360's features but also cater to various mirroring requirements. Explore the list to identify the Mirroring360 free alternative that aligns seamlessly with your preferences.
|
|
Free version |
advertise |
iOS/Android |
Easy-to-use |
|
Yes |
No |
Both |
Yes |
|
|
Free trial |
Yes |
Only iOS |
Yes |
|
|
Free trial |
|
Both |
Yes |
|
|
Yes |
Yes |
Both |
Yes |
|
|
Free trial |
No |
Only iOS |
No |
|
|
Free trial |
No |
Both |
No |
|
|
Yes |
No |
Both |
Yes |
|
|
Yes |
No |
Both |
No |
|
|
Yes |
Yes |
Both |
No |
|
|
Yes |
Yes |
Both |
No |
Option 1. AnyViewer
For a Mirroring360 alternative that comes free of charge, AnyViewer takes the top spot as the prime recommendation. Serving as a secure and all-encompassing remote desktop software, AnyViewer enhances the interaction between mobile phones and computers, as well as among various computers. This versatile tool guarantees a smooth and swift experience, allowing for effortless mirroring between mobile devices and computers, regardless of your geographical location.
Pros:
- Free Plans: AnyViewer distinguishes itself by providing both personal and commercial users with a free version that encompasses extensive features, exceeding the capabilities of many competitors in the market. This complimentary version delivers robust functionality to cater to a variety of user requirements.
- Unlimited Screen Sharing: With AnyViewer, you can indulge in the freedom of unlimited screen sharing, unburdened by constraints of time or space. This feature ensures a seamless and expansive experience, allowing you to share your screen without any restrictions, providing unparalleled flexibility for your remote desktop needs.
- Cross-Platform Compatibility: AnyViewer showcases exceptional versatility by accommodating a diverse range of device systems, spanning Windows, iOS, and Android. This comprehensive compatibility underscores the software's adaptability, ensuring users enjoy flexibility and convenience when establishing remote desktop connections.
- Feature-Rich: In addition to facilitating screen sharing, AnyViewer presents a myriad of impressive features. Users can relish real-time synchronization of remote sounds, conduct unattended file transfers, utilize one-click control, engage in text chat, benefit from multi-monitor support, explore multiple sessions, and more.
- User-Friendly Interface: AnyViewer takes pride in its user-friendly and straightforward interface, eliminating unnecessary complexity. Users can effortlessly navigate the software, establishing remote desktop connections without encountering a steep learning curve.
Cons:
- Operating System Limitations: AnyViewer currently lacks support for Mac and Linux operating systems.
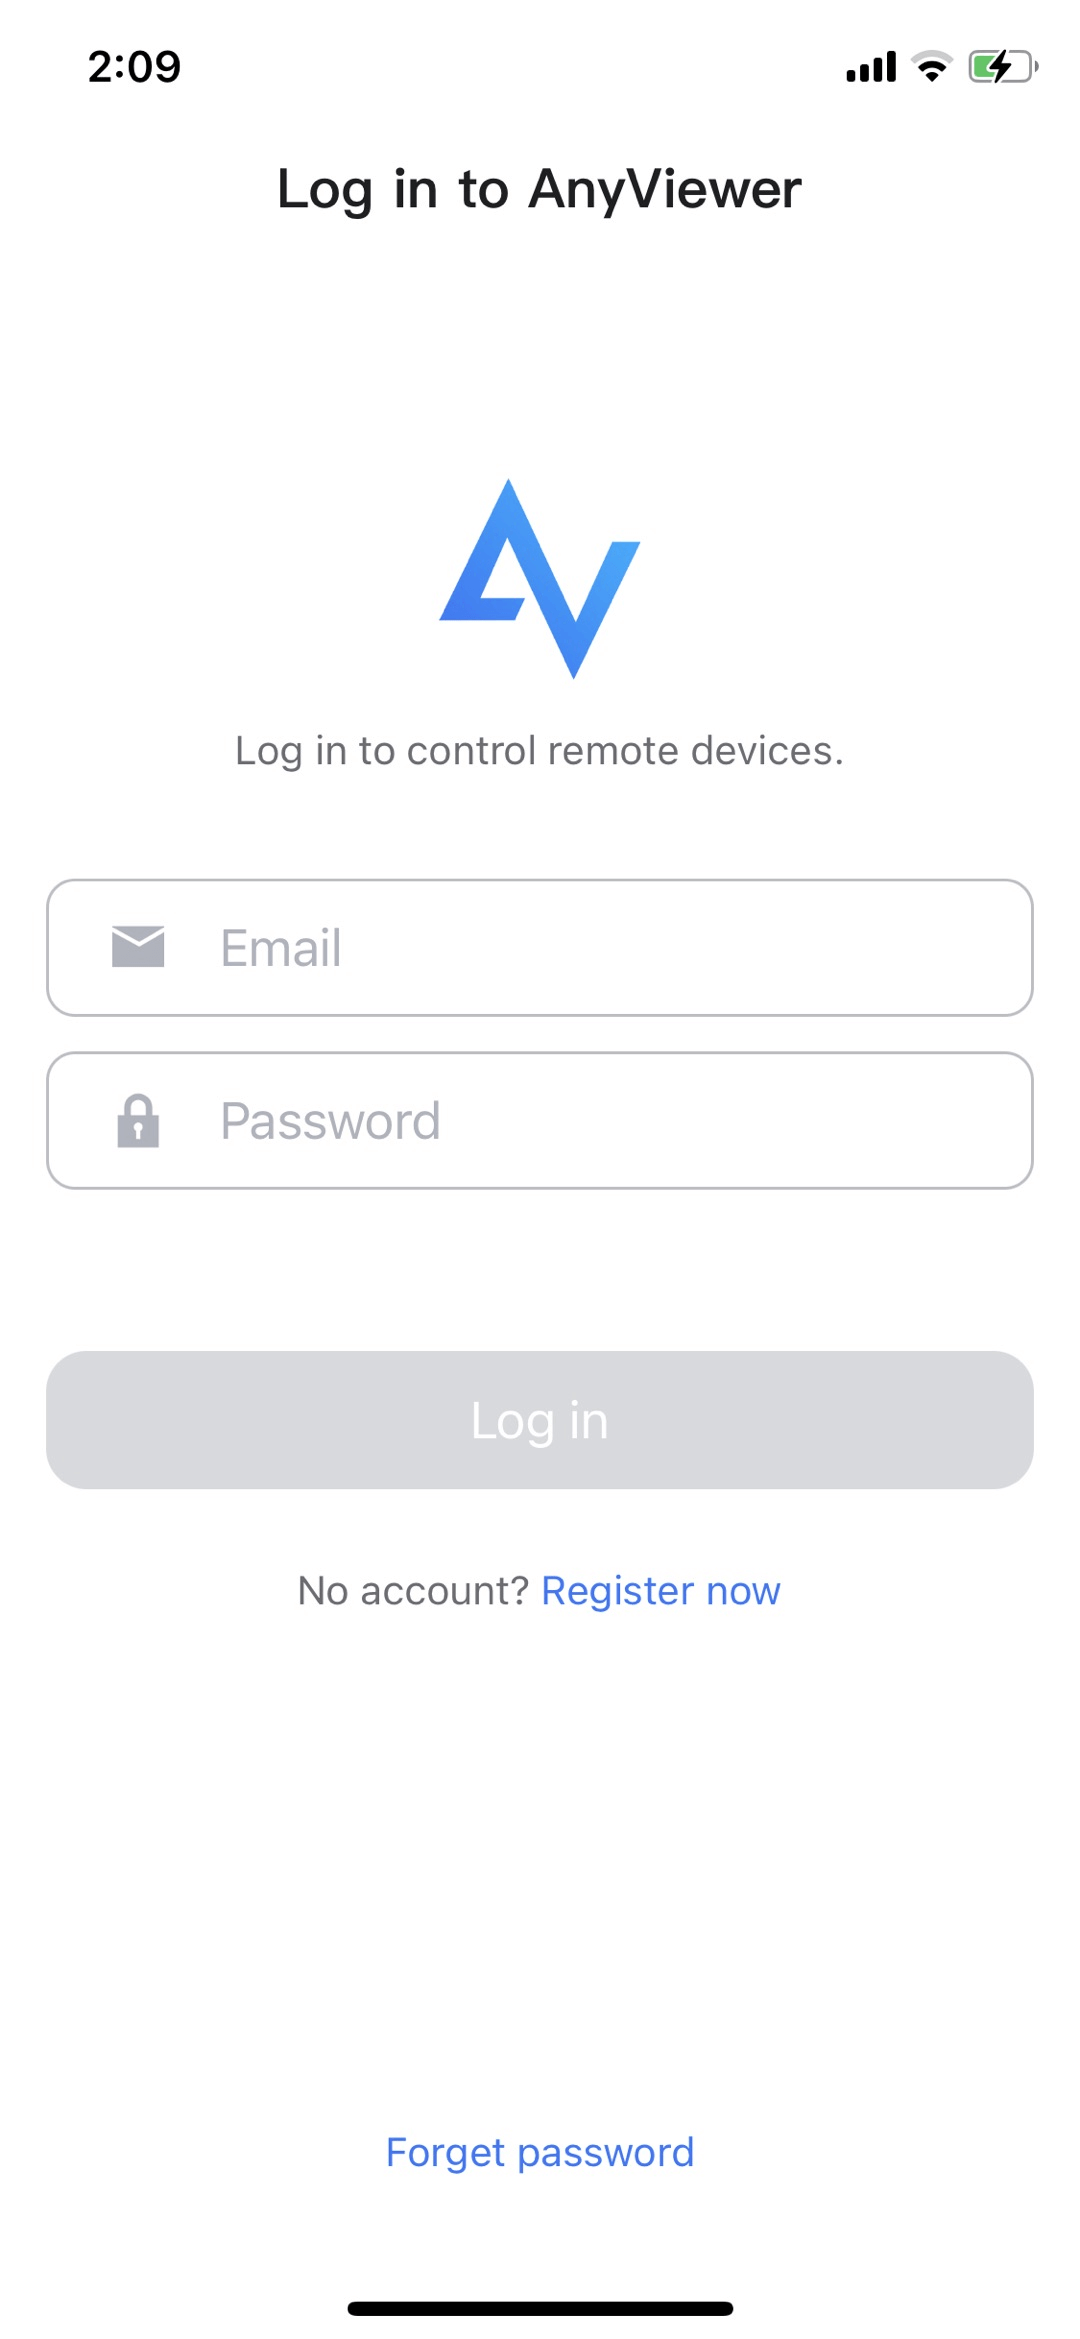
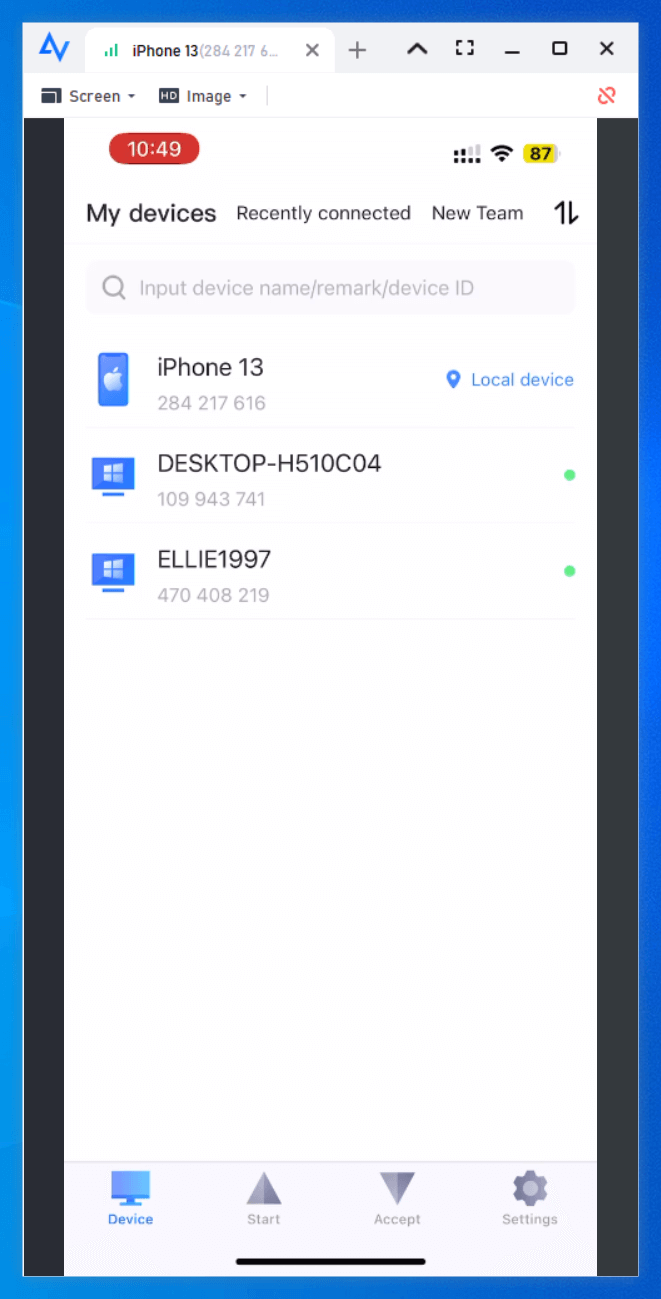
Step 1. After successfully installing AnyViewer on both your iPhone and computer, head to the "Log in" section and choose "Sign up" to create your personal AnyViewer account.

Step 2. Log in on your iPhone using the same account credentials established on your computer.
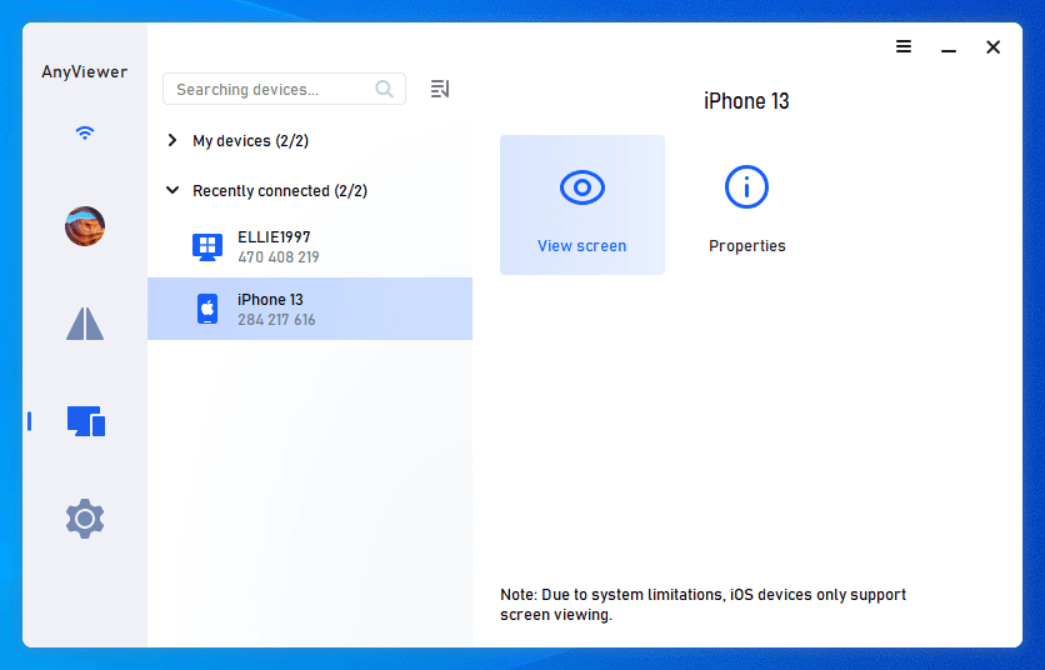
Step 3. Pick your iPhone on the computer and click the "View screen" option.
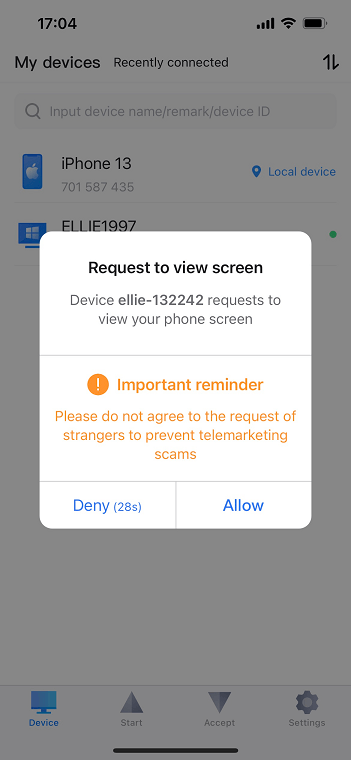
Step 4. On your iPhone, tap "Allow" to grant permission for the screen view request.
Step 5. Initiate the screen sharing process by clicking "Start Broadcast."
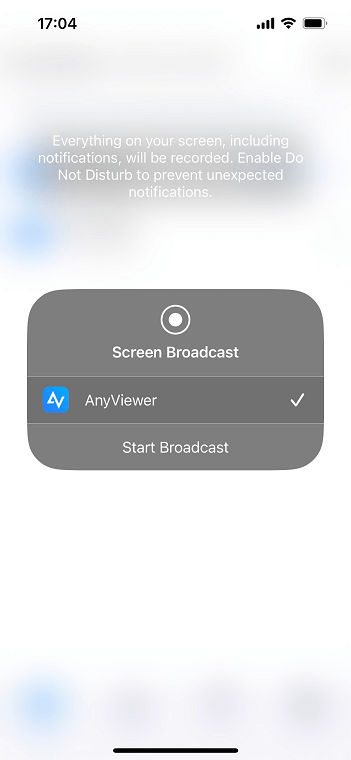
Step 6. Your iPhone screen is now visible on your PC, providing flexibility to adjust image quality through the toolbar for an optimized viewing experience.
- ★Tips: Enhance your remote screen viewing capabilities and access a wider range of iPhone devices by considering an account upgrade to a Professional or Enterprise plan. This step opens up additional features and ensures a more comprehensive experience with AnyViewer.
Option 2. LonelyScreen
In the world of screen mirroring solutions, LonelyScreen stands out as a reliable and free trial AirPlay receiver designed for both Windows and macOS platforms. Offering a straightforward and lightweight experience, LonelyScreen allows users to effortlessly mirror their iOS devices to their computers, turning the screen-sharing process into a seamless and enjoyable experience.
Pros:
- AirPlay Compatibility: Dedicated to providing a seamless AirPlay mirroring experience, LonelyScreen supports the mirroring of iOS devices, including iPhones and iPads, onto Windows or macOS computers.
- Cross-Platform Availability: Available for both Windows and macOS, LonelyScreen caters to a wide range of users. It ensures compatibility with different operating systems, allowing users to mirror their iOS devices regardless of their computer platform.
- User-Friendly Interface: LonelyScreen features a user-friendly interface, simplifying the mirroring process. The straightforward setup and initiation make it accessible for users of varying technical backgrounds.
- Versatility in Use Cases: LonelyScreen proves useful for various scenarios, including presentations, gaming, entertainment, and collaborative work. Its versatility makes it suitable for a range of use cases.
Cons:
- Limited to AirPlay: LonelyScreen is specifically designed for AirPlay mirroring. While this makes it a reliable choice for iOS users, it may not cater to individuals with devices using other mirroring protocols.
- Basic Feature Set: Compared to some premium screen mirroring solutions, LonelyScreen may have a more basic feature set. Users seeking advanced functionalities or additional tools may find alternatives better suited to their needs.
- No Android Compatibility: LonelyScreen is primarily designed for mirroring iOS devices and does not support screen mirroring from Android devices. Users with Android smartphones or tablets will need to explore alternative solutions.
- Advertisements in Free Version: The free-to-use model of LonelyScreen may come with advertisements in the application. While this is a common approach for free software, some users may find it less appealing.
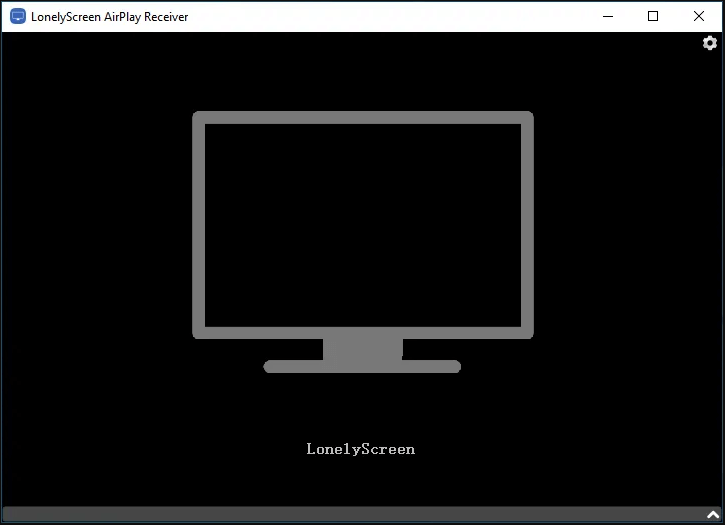
Step 1. Download the LonelyScreen software from the official website.
Step 2. Install the software and, after completion, double-click the application's icon to launch LonelyScreen.
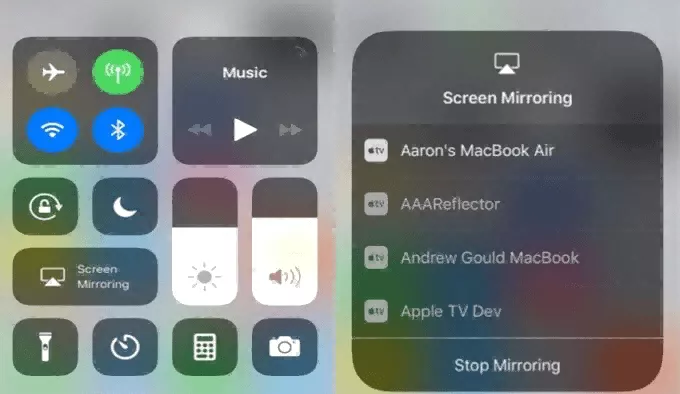
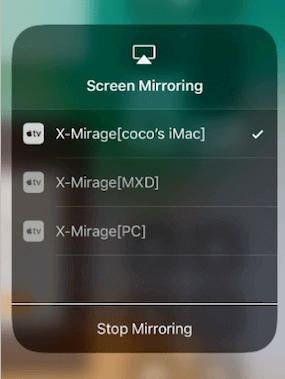
Step 3. Open the Control Center on your iPhone, select "Screen Mirroring," and make sure both your iPhone and Windows PC are connected to the same Wi-Fi network.
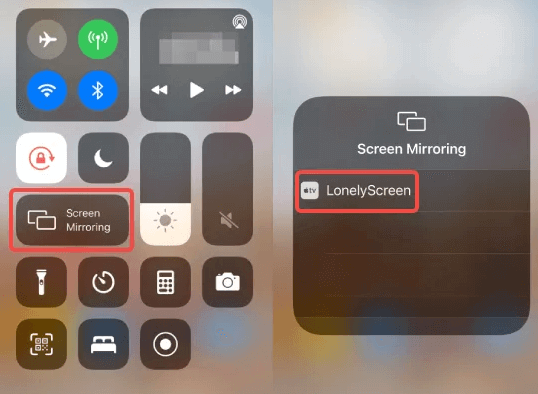
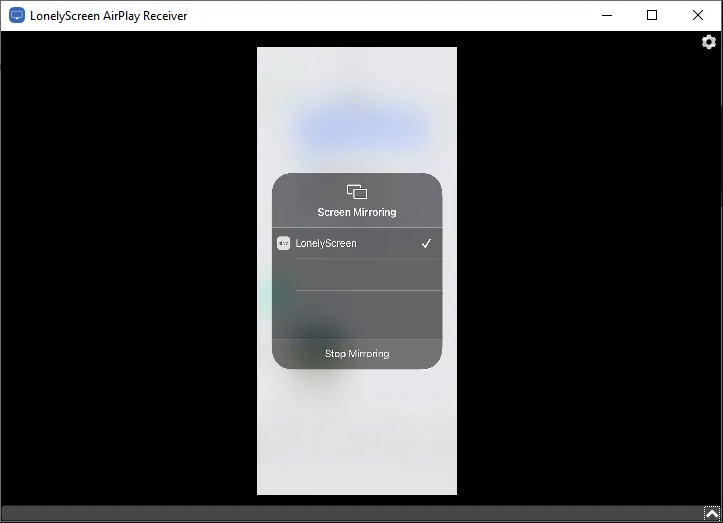
Step 4. Choose "LonelyScreen," and your iPhone screen will quickly mirror on your Windows PC.
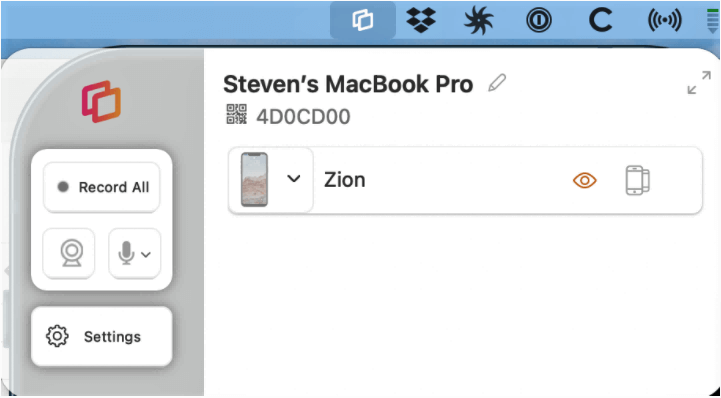
Option 3. Reflector
Reflector is a versatile and feature-rich screen mirroring solution that empowers users to seamlessly share content from their smartphones, tablets, or computers onto larger displays. Whether you're delivering presentations, gaming, or simply enjoying multimedia content, Reflector transforms the way you interact with your devices.
Pros:
- Cross-Platform Compatibility: Reflector supports screen mirroring from various platforms, including iOS, Android, Windows, and macOS. Its cross-platform compatibility makes it a versatile solution for users with diverse devices.
- AirPlay and Google Cast Support: With built-in support for both AirPlay and Google Cast, Reflector caters to users with Apple and Android devices. This inclusive approach enhances its usability and convenience.
- Multiple Device Mirroring: Users can mirror the screens of multiple devices simultaneously. This feature is particularly useful for collaborative work, presentations, or educational scenarios where multiple screens need to be displayed.
- Audio and Video Streaming: In addition to screen mirroring, Reflector supports audio and video streaming. Users can share multimedia content with enhanced audiovisual quality.
Cons:
- Paid Software: Reflector is not a free-to-use software. While it offers a free trial, users seeking access to its full range of features will need to purchase a license, which may be a limitation for budget-conscious individuals.
- Potential Lag or Delay: Depending on the quality of the Wi-Fi connection and the performance of the devices involved, users may experience lag or delays during the mirroring process.
- Device-Specific Limitations: Certain features or functionalities may vary depending on the specific device or operating system, leading to potential limitations in the user experience for some users.
- No Android Audio Support on Some Devices: While Reflector supports audio streaming for iOS devices, audio support may be limited for some Android devices, potentially impacting the overall audio mirroring experience.
- Occasional Connectivity Issues: Some users may encounter occasional connectivity issues, such as devices not being detected or difficulties establishing a connection, which may require troubleshooting.
On Mac:
Step 1. Download, install, and launch Reflector on both your iPhone and Mac.
Step 2. Make sure the two gadgets are linked to the same wireless network.
Step 3. Open Reflector on your Mac.
Step 4. Access the Control Panel on your iPhone and select “Screen Mirroring”.
Step 5. Choose your computer's name from the list, and your iPhone screen will be seamlessly displayed on your Mac.
On Windows:
Step 1. Begin by completing the earlier preparations.
Step 2. Start Reflector on your Windows computer.
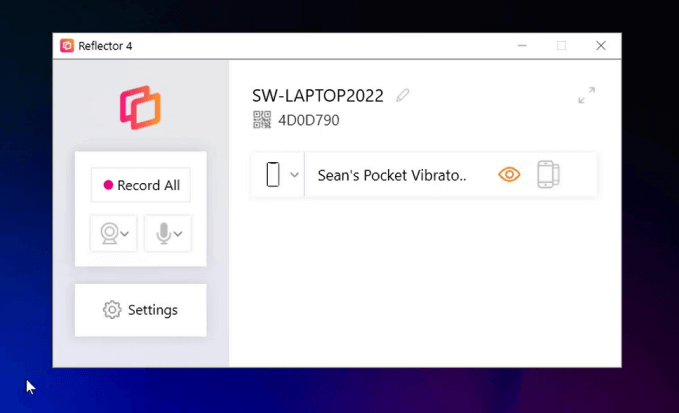
Step 3. On your iPhone, access the Control Panel, click on "Screen Mirroring," and choose the name of your computer.

Step 4. Windows will now showcase your iPhone's screen seamlessly.
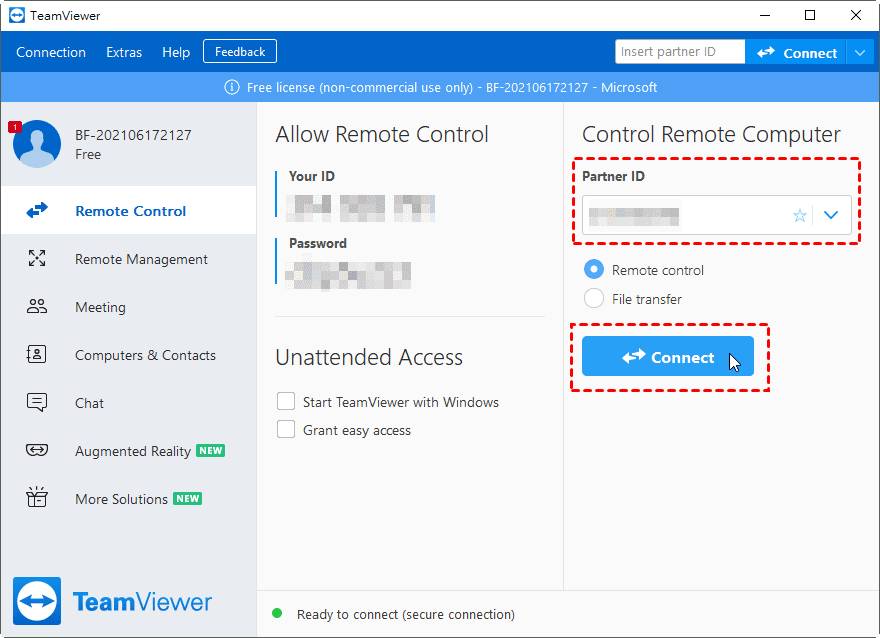
Option 4. TeamViewer QuickSupport
TeamViewer is a renowned remote desktop software, featuring the TeamViewer QuickSupport app designed specifically for iOS users. This application enables individuals to install it on their iPhones, enabling seamless screen sharing with computers and other devices. It's crucial to note that the primary functionality of this app is real-time viewing of the iPhone screen, rather than remote control of iOS devices.
Pros:
- Cross-Platform Compatibility: TeamViewer QuickSupport is compatible with a wide range of operating systems, including Windows, macOS, Linux, Android, and iOS. This cross-platform support ensures flexibility and accessibility for users on various devices.
- No Installation Required for Users: Users seeking support do not need to install TeamViewer QuickSupport on their devices. The application can be run on-demand without the need for administrative privileges, simplifying the support process.
- File Transfer Capabilities: Support providers can transfer files between their devices and the user's device, facilitating the sharing of patches, updates, or diagnostic tools during support sessions.
- Customizable Branding (Business Version): For business users, the business version of TeamViewer QuickSupport offers customizable branding options, allowing organizations to maintain a professional appearance during remote support sessions.
Cons:
- Paid Business Features: While TeamViewer QuickSupport is free for personal and non-commercial use, businesses may need to opt for a paid TeamViewer plan to access advanced features and customization options.
- Learning Curve for New Users: For users unfamiliar with remote support tools, there may be a learning curve in understanding how to use TeamViewer QuickSupport effectively. However, the user interface is generally intuitive.
- Potential for Resistance to Remote Control: Some users may be hesitant to grant remote control access to their devices due to privacy concerns. Effective communication and reassurance are important to address such concerns.
- Occasional Connectivity Issues: As with any remote support tool, users may encounter occasional connectivity issues, such as difficulties in establishing a connection or potential delays during the session.
- Device-Specific Limitations: Certain features or functionalities may vary depending on the specific device or operating system being used. Users may encounter limitations in the user experience based on the devices they have.
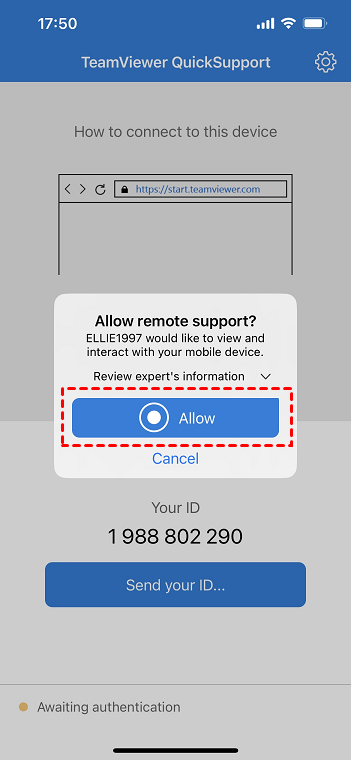
Step 1. Install TeamViewer QuickSupport on your iPhone and another device after downloading it. Once launched, take note of the unique ID displayed.
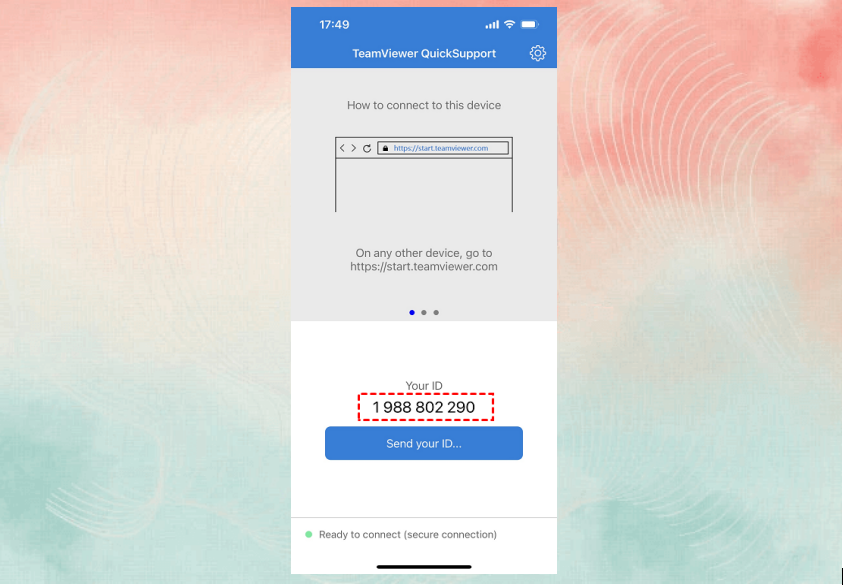
Step 2. On the controlling device, open TeamViewer, enter your iPhone's ID, and click "Connect."
Step 3. Your iPhone will receive a connection request; tap "Allow" to grant access. Now, you can see your iPhone screen from a distance.
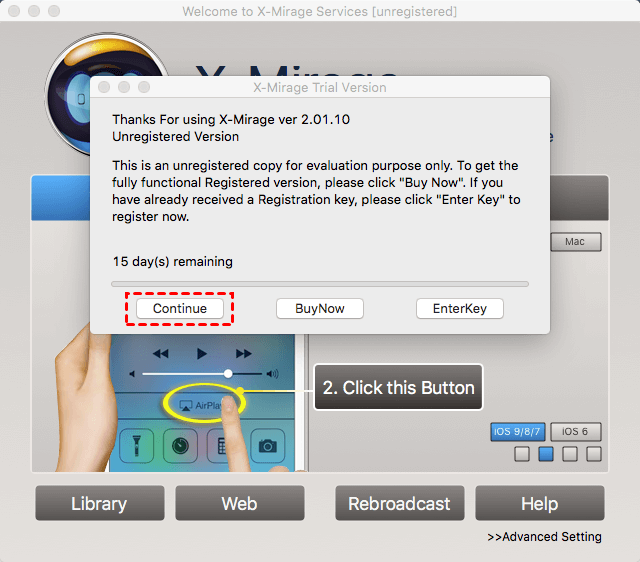
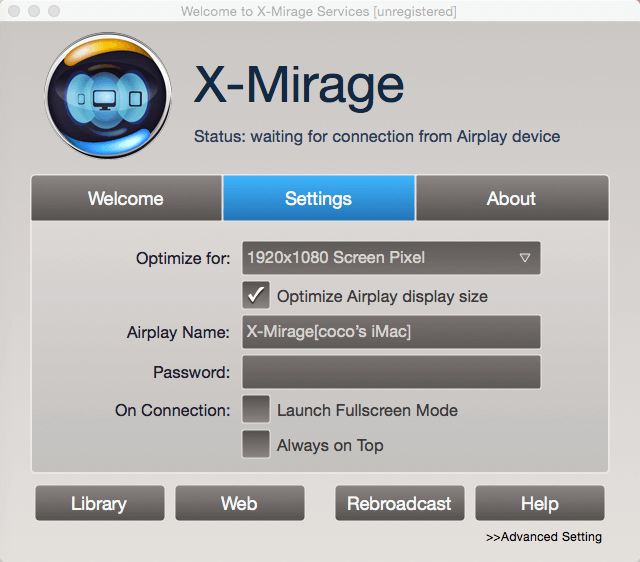
Option 5. X-Mirage
X-Mirage is a feature-rich and user-friendly AirPlay server that transforms your Mac or Windows PC into an AirPlay receiver, allowing seamless mirroring and streaming from iOS devices. Developed by X-Mirage Inc., this versatile application opens up a world of possibilities for educators, presenters, gamers, and entertainment enthusiasts looking to share their iOS device screens on a larger scale.
Pros:
- AirPlay Mirroring: X-Mirage supports AirPlay mirroring, allowing users to wirelessly mirror the screens of their iOS devices (iPhone, iPad, iPod Touch) to their Mac or Windows computer.
- Cross-Platform Compatibility: X-Mirage is compatible with both Mac and Windows operating systems, providing flexibility for users on different platforms to enjoy AirPlay mirroring.
- Recording and Streaming: X-Mirage goes beyond basic mirroring with the ability to record and stream mirrored content. Users can capture their screen mirroring sessions for later playback or share live content with an audience.
- Annotation and Interaction (Education Edition): In the Education Edition of X-Mirage, users benefit from additional features like screen annotation and interaction, enhancing the tool's utility for educational purposes.
Cons:
- Paid Software: X-Mirage is not offered as a free-to-use solution. While it may offer a free trial, users seeking access to its full features and capabilities will need to purchase a license, which may be a consideration for budget-conscious individuals.
- Device-Specific Limitations: Certain features or functionalities may vary depending on the specific iOS device being used. Users may encounter limitations in the user experience based on the devices they have.
- Learning Curve for New Users: Users unfamiliar with AirPlay mirroring tools may experience a learning curve in understanding how to use X-Mirage effectively. However, the user interface is generally intuitive.
- No Android Compatibility: X-Mirage is designed specifically for iOS devices and does not support mirroring from Android devices. Users with Android smartphones or tablets will need to explore alternative solutions.
Step 1. On your computer, download, install, and launch X-Mirage. If you're using the trial version, click "Continue."
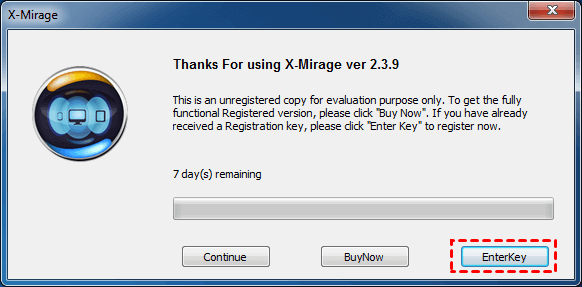
Step 2. Register by clicking "Enter Key."
Step 3. In the Settings tab, configure AirPlay settings such as display size, AirPlay name, and password.
Step 4. Make sure both your Mac/PC and iOS devices are connected to the same Wi-Fi network.
Step 5. On your iPhone, open the Control Panel, tap "Screen Mirroring," and select the name of your computer for connection.
Option 6. ApowerMirror
ApowerMirror is a versatile screen mirroring application that empowers users to mirror and control their Android or iOS devices on a larger screen, including computers and smart TVs. Developed by Apowersoft, this feature-rich tool serves a multitude of purposes, from presentations and gaming to content sharing and remote control.
Pros:
- Cross-Platform Compatibility: ApowerMirror supports both Android and iOS devices, providing users with a versatile solution for screen mirroring across different platforms.
- Multiple Connection Options: Users can connect their mobile devices to ApowerMirror through various methods, including USB, Wi-Fi, and QR code scanning. This flexibility accommodates different user preferences and scenarios.
- Screen Recording and Capture: ApowerMirror allows users to record screen mirroring sessions or capture screenshots directly from the application. This feature is valuable for creating tutorials, documenting presentations, or sharing memorable moments.
- Annotation and Drawing: ApowerMirror provides annotation and drawing tools, enabling users to mark up their mirrored screens in real time. This feature is beneficial for collaborative work, presentations, or educational settings.
Cons:
- Paid Software: While ApowerMirror offers a free version, users seeking access to advanced features, such as full-screen recording and additional functionalities, may need to purchase a license.
- Limited Functionality of Free Version: The free version of ApowerMirror has certain limitations, and users may need to upgrade to the paid version to unlock the full range of features.
- No Cross-Platform Control: While users can control Android devices from a PC, the feature for controlling iOS devices from a computer is not available.
- Learning Curve for New Users: Users unfamiliar with screen mirroring tools may experience a learning curve in understanding how to use ApowerMirror effectively. However, the user interface is generally intuitive.
Step 1. Install ApowerMirror on your computer and iPhone after downloading it.
Step 2. Ensure that both the PC and iPhone are connected to the same wireless network.
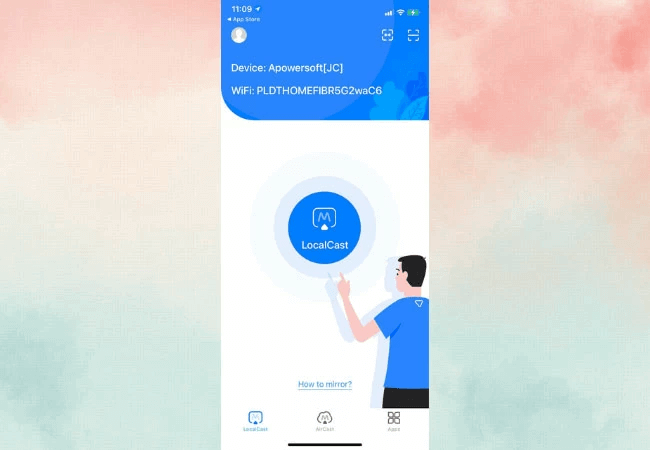
Step 3. Launch the ApowerMirror app on your iPhone. Choose "LocalCast," locate your computer's name, select it, and click "Mirror Phone to PC."
Step 4. On your iPhone, access the Control Center, tap "AirPlay Mirroring" or "Screen Mirroring," and choose your computer's name.
Step 5. Enjoy a smooth mirroring experience as your iPhone screen is displayed seamlessly on your PC.
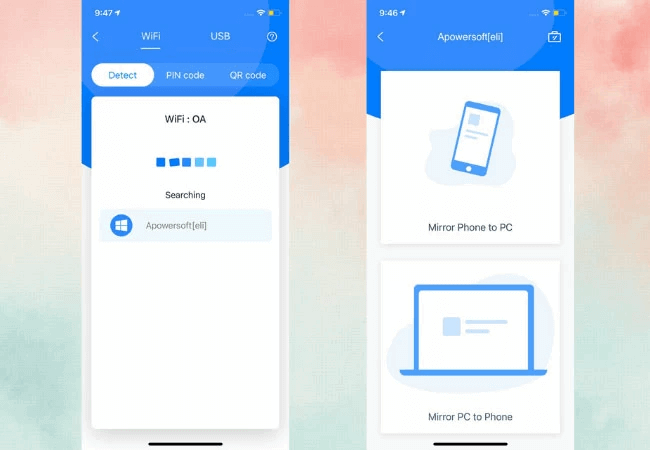
Option 7. AnyMirror
AnyMirror stands out as an exceptional tool, capable of replicating not only your iPhone screen but also your phone's camera, microphone, and files onto your computer. With just a few simple clicks, you can effortlessly mirror your iPhone screen to a Windows PC, making it an excellent choice for those seeking a user-friendly solution without the need for technical expertise.
Pros:
- Recording Capability: AnyMirror supports screen recording, making it ideal for creating tutorials, capturing gameplay, and preserving important information.
- Multiple Device Support: Enables simultaneous connections of multiple devices to a single PC, providing versatility.
- Cross-Platform Compatibility: AnyMirror is compatible across various platforms, ensuring flexibility.
Cons:
- Free Version Limitations: The free version offers access to basic features, and upgrading to a VIP account comes with a relatively high cost.
- Free Version Time Limit: In the free version of AnyMirror, you get a 20-minute daily usage limit, and it supports mirroring from a single source.
- Free Version Image Quality Limitations: The free version includes a watermark on the mirrored screen and is limited to SD quality.
- Unstable Connection: Occasionally, AnyMirror may face challenges in detecting smartphones, requiring multiple attempts.
Step 1. Download and install AnyMirror on both your iPhone and computer.
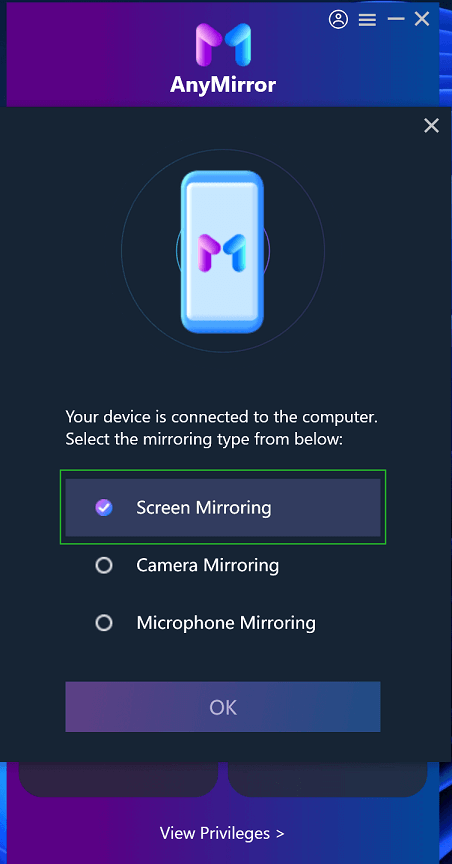
Step 2. Establish a connection between your iPhone and computer using a USB cord. On your computer, initiate the “Screen Mirroring” feature and validate by clicking the "OK" button.
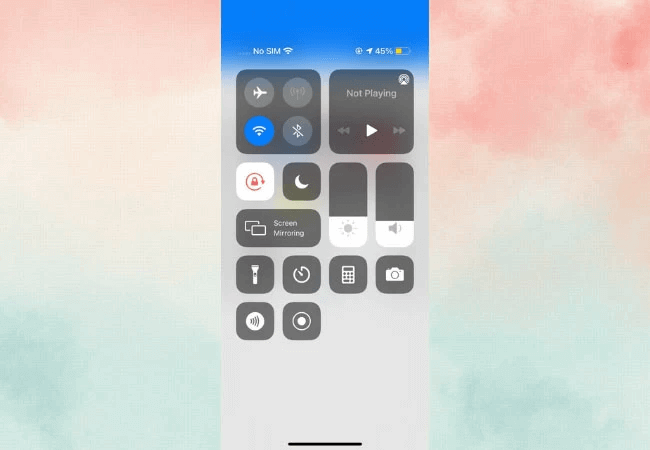
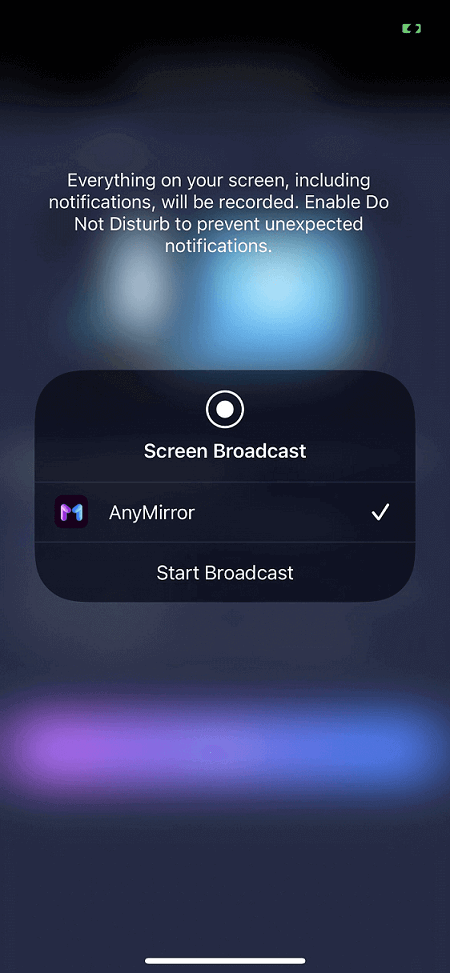
Step 3. Shift your focus to the iPhone, where you'll activate Screen Mirroring, opt for USB as the connection method, and commence the process by clicking the Start button, followed by tapping "Start Broadcast."
Step 4. Witness the successful mirroring of your iPhone screen onto your PC via USB, providing a seamless platform for sharing your device's display effortlessly.
Option 8. LetsView
LetsView is a versatile screen mirroring application designed to facilitate the wireless casting of displays across various devices. Whether you're sharing presentations, conducting virtual meetings, or enjoying multimedia content, LetsView aims to provide a user-friendly and efficient solution for screen mirroring. Developed by LetsView Team, this application is compatible with different platforms, including Windows, macOS, Android, and iOS.
Pros:
- Cross-Platform Compatibility: LetsView supports screen mirroring across various operating systems, including Windows, macOS, Android, and iOS, providing users with flexibility and compatibility across different devices.
- Wireless Connection: Users can mirror their screens wirelessly, eliminating the need for cables and offering a convenient and clutter-free experience.
- Annotation and Drawing: LetsView provides annotation and drawing tools, enabling users to mark up their mirrored screens in real time. This feature is useful for collaborative work, presentations, or educational settings.
- Screen Recording: Users have the capability to record their screen mirroring sessions directly through LetsView, allowing for the creation of tutorials, documentation of presentations, or capturing important moments.
Cons:
- Limited Features in Free Version: While LetsView offers a free version, users may encounter limitations in terms of features and functionalities. To access advanced features, you might need to upgrade to a premium version.
- Ads in Free Version: The free version of LetsView may include advertisements, which could be a consideration for users looking for an ad-free experience.
- Learning Curve for New Users: Users unfamiliar with screen mirroring tools may experience a learning curve in understanding how to use LetsView effectively. However, the user interface is generally intuitive.
- Device-Specific Limitations: Certain features or functionalities may vary depending on the specific device or operating system being used. Users may encounter limitations based on the devices they have.
Step 1. Begin by downloading and installing LetsView on both your iPhone and computer, ensuring a comprehensive setup.
Step 2. Confirm that both your iPhone/iPad and computer are seamlessly connected to the same Wi-Fi network, fostering a smooth connection.
Step 3. Launch LetsView on both your iOS device and computer, initializing the screen sharing process.
Step 4. On your phone, navigate to "Screen Mirroring" and opt for your computer with LetsView, establishing a direct link.
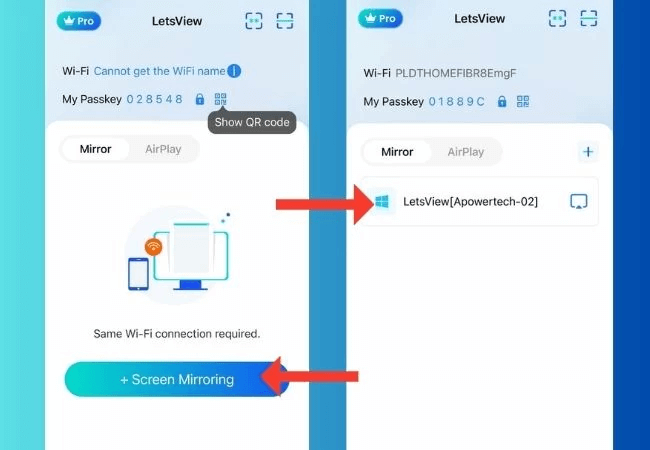
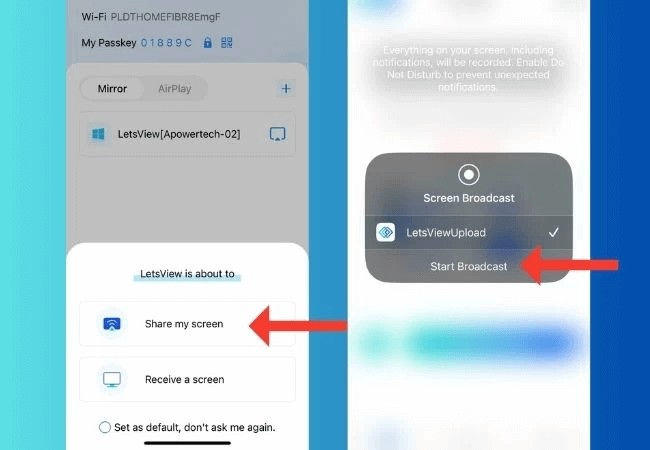
Step 5. Choose "Share my screen" and kickstart the sharing experience by clicking "Start Broadcast."
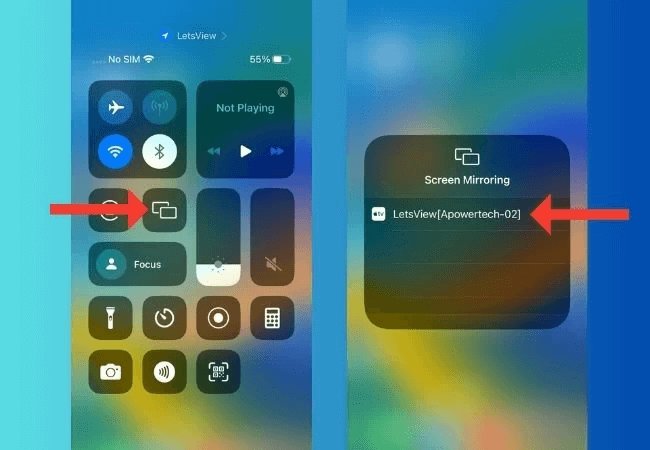
Step 6. Access the Control Center on your iPhone, tap "Screen Mirroring," handpick your PC from the list, and observe your iPhone screen effortlessly mirrored on your computer. This seamless integration allows for a fluid and intuitive screen sharing experience.
Option 9. AirDroid
AirDroid Cast introduces a cable-free solution for effortlessly mirroring your iPhone screen onto a PC. It provides diverse options for screen mirroring, including WLAN, AirPlay, and USB methods. Notably, AirDroid extends its capabilities beyond iOS, enabling you to mirror and control Android devices from your computer. In this article, we'll exemplify the process of achieving screen mirroring over WLAN as an illustrative example.
Pros:
- Remote Device Management: AirDroid allows users to manage their Android devices remotely, offering features like remote access, file transfer, and more, providing flexibility and convenience.
- Cross-Platform Support: AirDroid supports various platforms, including Windows, Mac, web browsers, and other mobile devices, ensuring compatibility and accessibility across different devices.
- File Transfer: Effortlessly transfer files between Android devices and computers, streamlining the process of managing documents, photos, videos, and other content.
- Device Mirroring and Screen Recording: AirDroid allows users to mirror their Android device's screen on a computer and record the screen, useful for creating tutorials, showcasing apps, or providing remote assistance.
Cons:
- Paid Subscription for Full Features: While AirDroid offers a free version, some advanced features and functionalities may require a paid subscription, which could be a consideration for users looking for a fully-featured experience.
- Occasional Connectivity Issues: As with any wireless connection, users may encounter occasional connectivity issues, such as difficulties in establishing a stable connection between devices.
- Learning Curve for New Users: Users who are new to AirDroid may experience a learning curve in understanding how to use the various features and functionalities offered by the platform.
- Limited Support for iOS Devices: While AirDroid is primarily designed for Android devices, its support for iOS devices is limited compared to its features for Android.
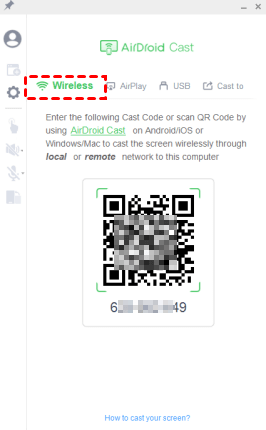
Step 1. Opt for the WLAN method on your PC to initiate the connection process.
Step 2. Utilize your iPhone to scan the QR code or input the cast code visibly presented on your PC.
Step 3. Consent to the casting request on your PC, triggering the commencement of the mirroring process.
Step 4. Activate the casting permission on your iPhone, facilitating the smooth progression of the mirroring operation.
Step 5. Confirm the successful completion of the casting process, achieving a cable-free and efficient iPhone screen mirroring experience.
Option 10. AirMore
AirMore is a versatile mobile device management platform that enables users to seamlessly manage and transfer files between their smartphones and computers. Developed by Apowersoft, AirMore offers a user-friendly interface and supports various platforms, including Windows, Mac, Android, and iOS. With a focus on simplicity and efficiency, AirMore simplifies the process of file transfer, media management, and other tasks across devices.
Pros:
- Wireless File Transfer: AirMore allows users to transfer files between their mobile devices and computers wirelessly, providing a convenient and cable-free solution for managing content.
- Web-Based Interface: The web-based interface of AirMore allows users to access and manage their devices without the need for additional software installations. This enhances accessibility and usability, making it easy to use from any computer.
- Document Editing: Users can edit documents directly from the AirMore platform. This feature provides a versatile tool for making quick edits or annotations to files stored on their mobile devices.
- Backup and Restore: AirMore offers backup and restore functionalities, allowing users to safeguard their important data by creating backups that can be easily restored when needed. This ensures data security and recovery.
Cons:
- Limited Features for iOS: Certain features offered by AirMore may be more comprehensive on Android compared to iOS devices. Users with iOS devices may encounter some limitations in functionality.
- Learning Curve for New Users: New users may experience a learning curve in understanding how to use the various features and functionalities provided by AirMore, especially if they are not familiar with similar tools.
- File Format Compatibility: While AirMore supports a wide range of file types, users should check for compatibility, especially when dealing with less common or proprietary file formats.
- Possible Sync Delays: Depending on the internet connection and other factors, users may experience sync delays when transferring files or managing content, affecting the real-time responsiveness of the application.
- Advertisements: The free version of AirMore may include advertisements, which could be a consideration for users looking for an ad-free experience.
Step 1. Initialize AirMore on your iPhone by installing and launching the app.
Step 2. Head to the AirMore website on your computer.
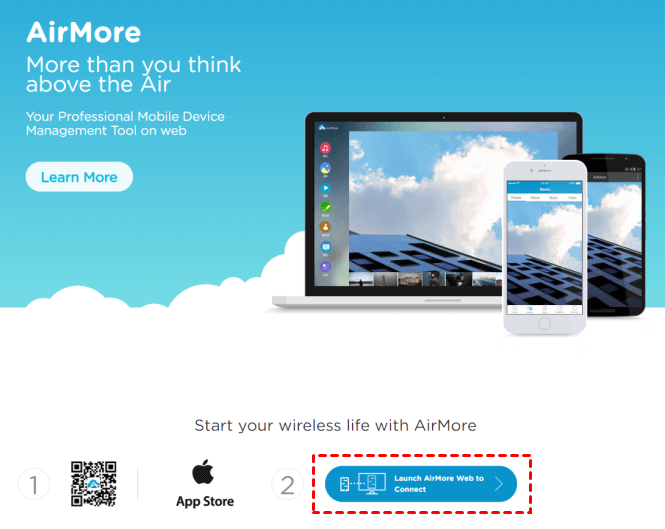
Step 3. Within the AirMore app on your mobile device, click the "Scan to connect" button. Utilize your phone's camera to scan the QR code visibly presented on the AirMore website.
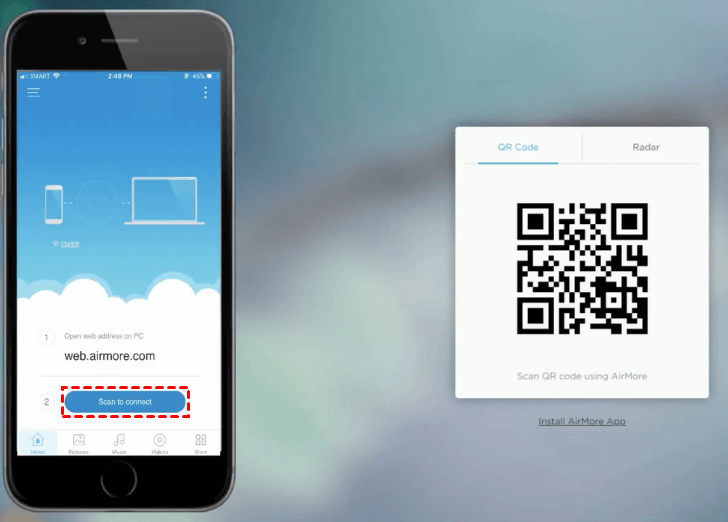
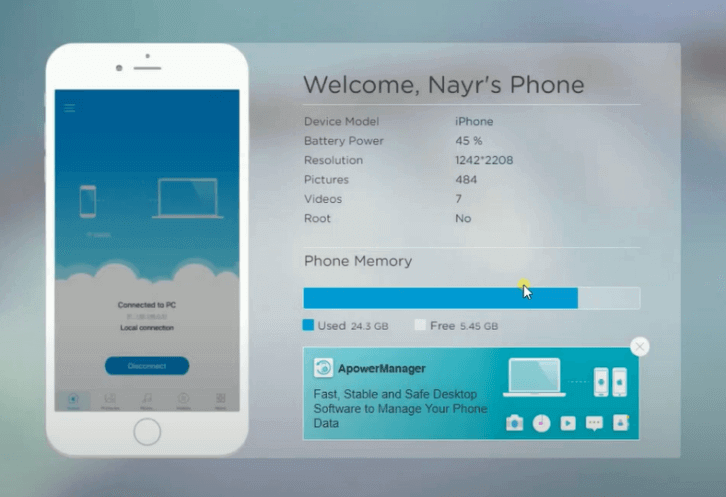
Step 4. Once the QR code is successfully scanned, your phone establishes a connection with your computer. This connection grants you access to a spectrum of features, including file transfers, message viewing, app management, and the convenient option to mirror your phone's screen on your computer.
Conclusion
In the ever-expanding landscape of screen mirroring solutions, exploring Mirroring360 alternatives opens up a world of possibilities. Each alternative comes with its unique set of features and advantages, catering to the diverse needs of users. Whether it's for presentations, entertainment, or collaborative work, finding the perfect mirroring solution involves considering compatibility, features, ease of use, and overall performance. As technology continues to advance, users are empowered with a plethora of choices to enhance their screen mirroring experience.
When you take a closer look, you'll see that the only all-encompassing and free option is AnyViewer. Going for AnyViewer not only makes it easy to connect your mobile to your computer but also ensures it's quick and smooth to use. In simple terms, if you're after a free alternative to Mirroring360, AnyViewer is the best pick.
