
2026 Top 8 Reflector Free Alternative
If you're seeking a free alternative to Reflector, you're in the right place. This article addresses your needs by presenting 8 free alternatives to Reflector. Keep reading to explore and choose the option that best fits your requirements.
By AnyViewer / Updated on December 26, 2025
What can you use instead of a Reflector?
Is there a free substitute for Reflector available? I'm searching for something akin to a remote desktop application that showcases your iPad screen on a desktop PC. My intention is to facilitate teachers in projecting their iPad displays onto a projector.
- Question from Spiceworks
![]()
Reflector is labeled as an AirPlay receiver, enabling a wireless mirror your iPhone on PC or on various devices. It works seamlessly with Mac, PC, and the majority of Android devices. Mirror your device on a larger screen effortlessly, without the need for wires or complex setups.
However, it's crucial to note that Reflector provides only a 7-day free trial, and continued usage necessitates a purchase. Some users have reported experiencing delays or lag while using the application. Due to these reasons, many users are looking for Reflector free alternative, here are the relevant free alternative to Reflector we found for you, read on to choose the one that suits you best.
Top Reflector free alternative [8 options]
If you decide to move on from Reflector, there are several alternatives worth considering. In this compilation, we've gathered the top 8 free alternative to Reflector in 2024. These programs offer comparable features to Reflector and can meet your mirroring requirements. Explore the list to find the Reflectoralternative free that suits your preferences.
Option 1. AnyViewer
Consider AnyViewer as the top pick for a free alternative to Reflector. It's a secure and free remote desktop software that simplifies the interaction between mobile phones and computers, providing a seamless and swift experience. This versatile tool enables you to easily mirror iPhone to PC and vice versa, regardless of your location. AnyViewer stands out as an all-encompassing software, delivering exceptional features and top-notch performance.
Pros:
- Free Plans: AnyViewer caters to both personal and commercial users with free plans.
- Unlimited Screen Sharing: Enjoy unrestricted screen sharing without time or space constraints.
- Cross-Platform Compatibility: AnyViewer supports iOS, Android, and Windows devices, offering versatile usage.
- Feature-Rich: As an all-in-one solution, AnyViewer goes beyond screen sharing, providing one-click control, text chat, multi-monitor support, and more.
- User-Friendly Interface: AnyViewer boasts a simple and intuitive interface for easy navigation.
Cons:
- Operating system limitations: AnyViewer does not currently support Mac and Linux operating systems.
AnyViewer is the best free alternative to Reflector.
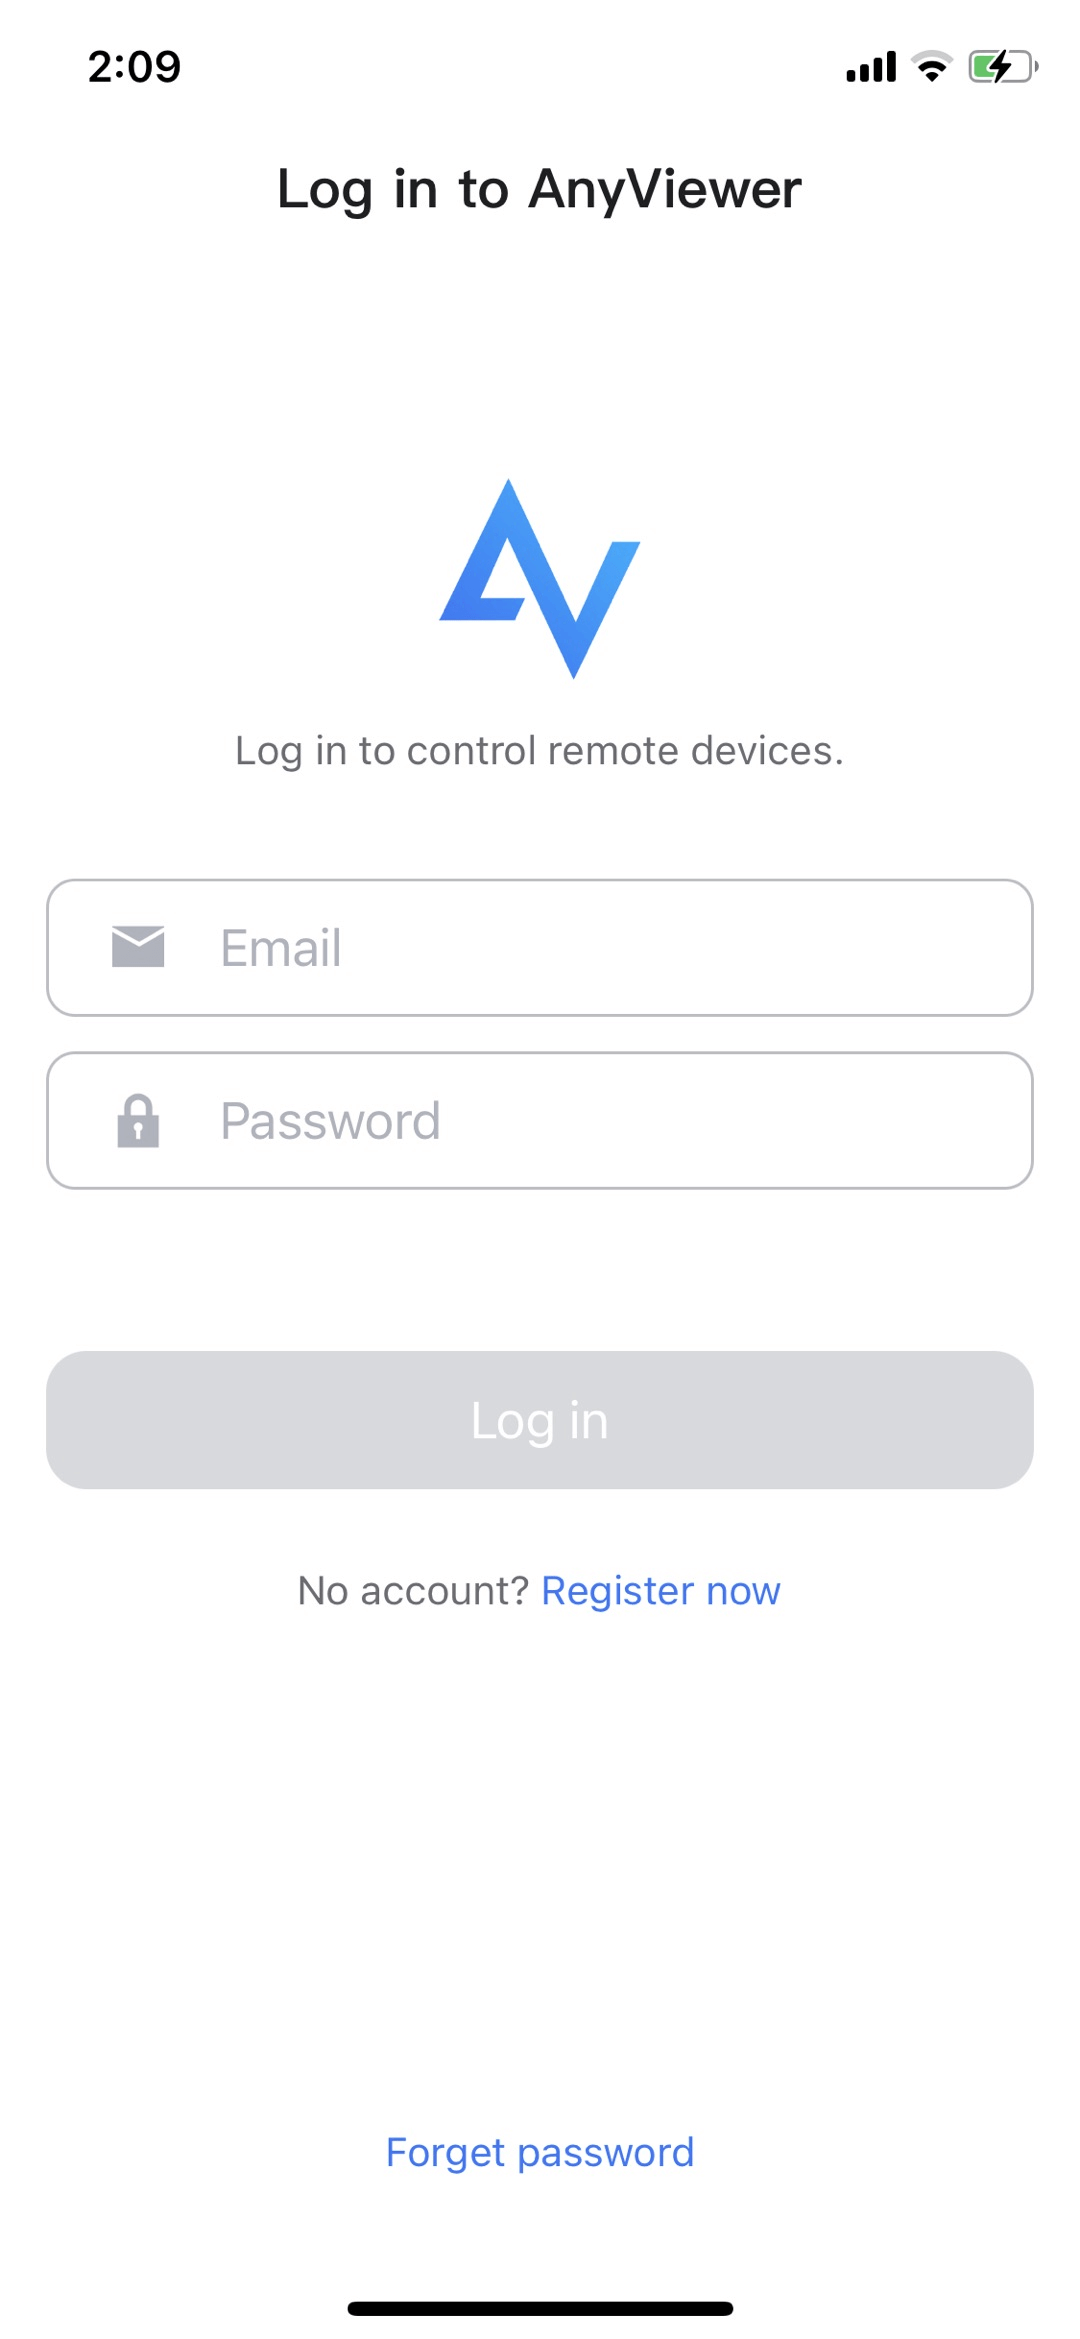
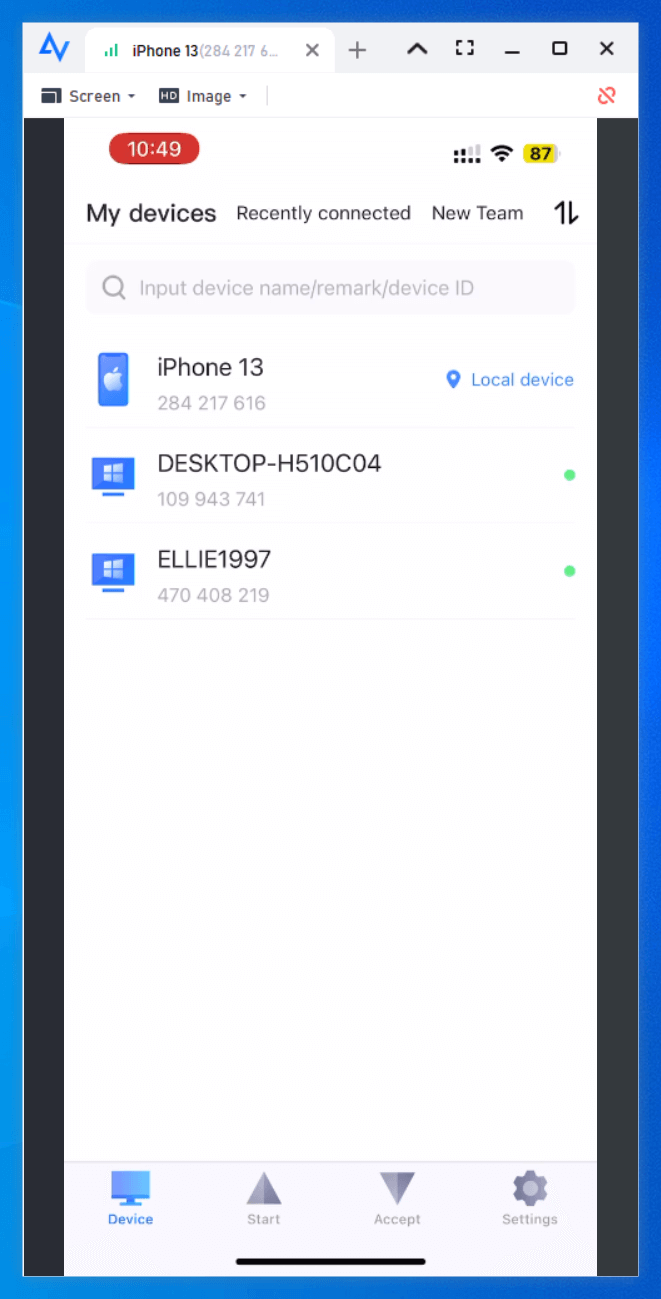
Step 1. Once you've successfully installed and initiated AnyViewer on both your iPhone and computer, navigate to the "Log in" section and opt for "Sign up" to establish your personal AnyViewer account.

Step 2. On your iPhone, log in using the identical account credentials you established on your computer.
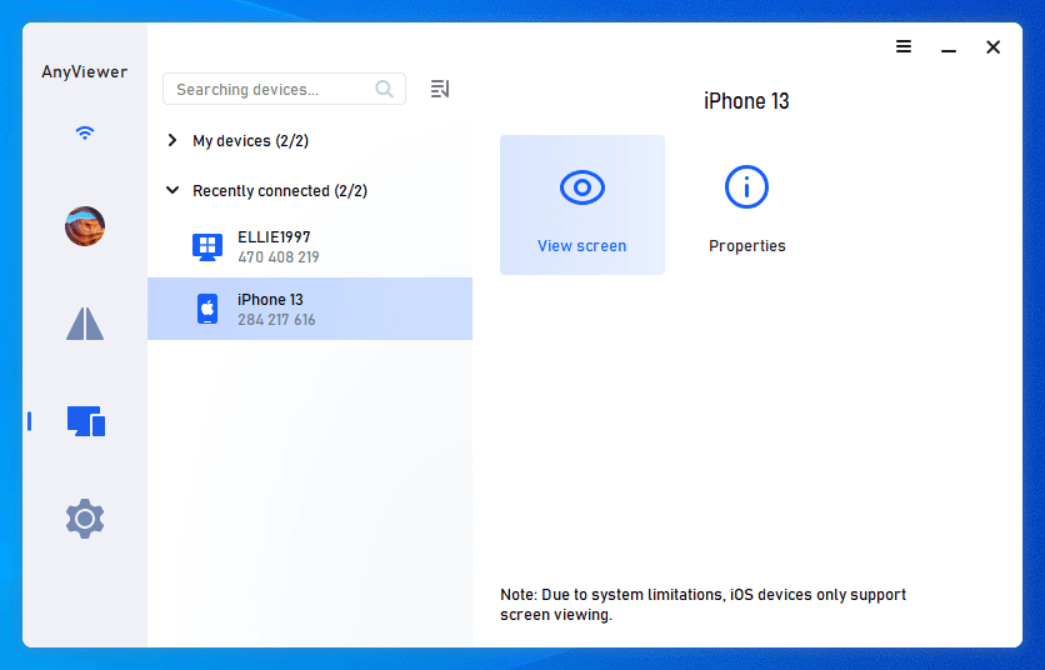
Step 3. Select your iPhone on the computer and click the "View screen" option.
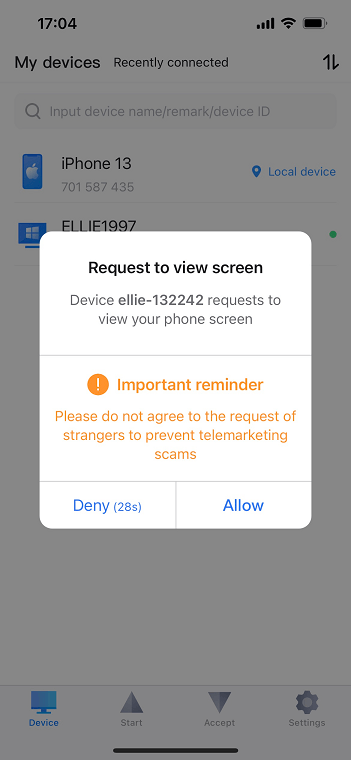
Step 4. On your iPhone, tap "Allow" to grant the screen view request permission.
Step 5. Commence the screen sharing process by clicking "Start Broadcast."
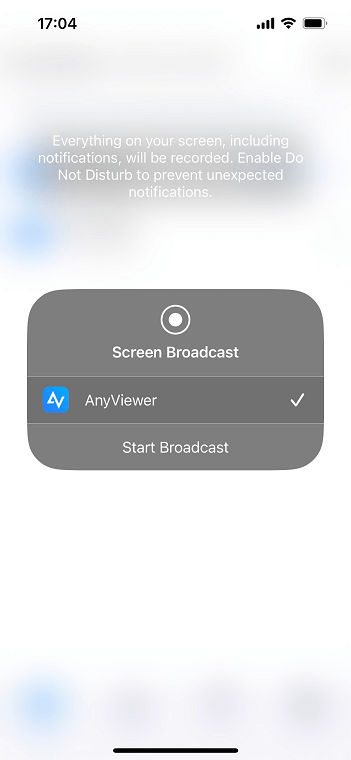
Step 6. Now, your iPhone screen is visible on your PC, offering the flexibility to adjust image quality through the toolbar for an optimized viewing experience.
- ★Tips: To expand your remote screen viewing capabilities and gain access to a broader range of iPhone devices, upgrading your account to a Professional or Enterprise plan is recommended.
Option 2. LetsViewer
LetsView is an innovative and free application that effortlessly works with both iOS and Android devices. Download the app on both your PC and iPhone, ensure they are on the same Wi-Fi network, and effortlessly start mirroring your phone's content on your PC.
Pros:
- Free: A cost-free Android and iOS screen mirroring application.
- User-Friendly Interface: With a user-friendly interface.
- High quality images: Enables high-quality content display without loss.
- Wireless Screen Mirroring: Supports wireless mirroring for convenience.
Cons:
- Unstable connection: Potential disconnection issues after some time.
- Connection method restrictions: Lacks USB connectivity support.
- Functional limitations: No device control option for Android or iOS.
- Ad Presence: Users will encounter ads.
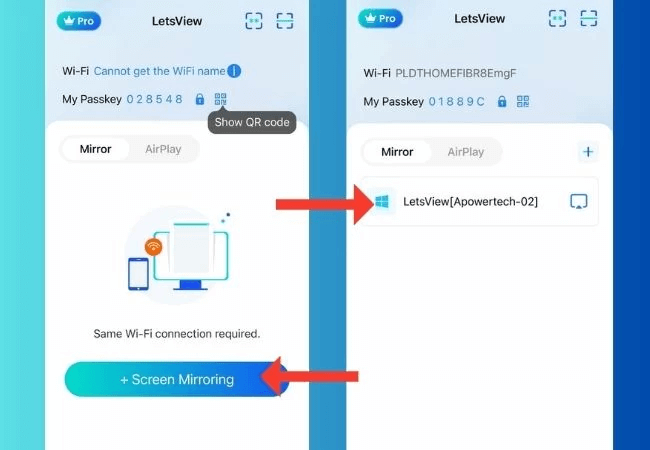
Step 1. Download and install LetsView on your iPhone and computer.
Step 2. Ensure both your iPhone/iPad and PC are connected to the same Wi-Fi network.
Step 3. Launch LetsView on both your iOS device and PC.
Step 4. On your phone, go to "Screen Mirroring" and choose your PC with LetsView.
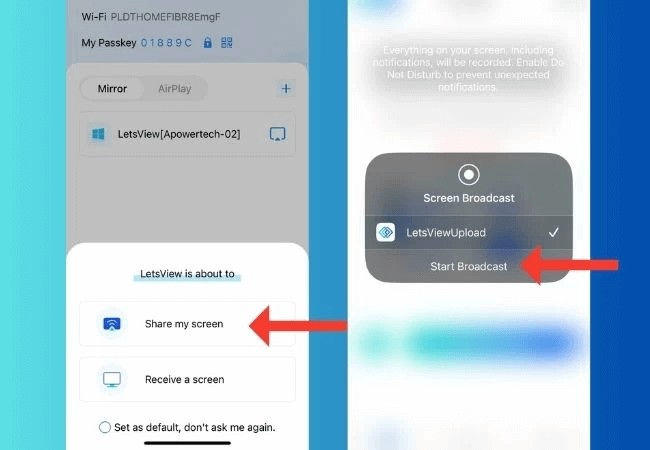
Step 5. Choose "Share my screen" and click "Start Broadcast" to begin sharing your screen.
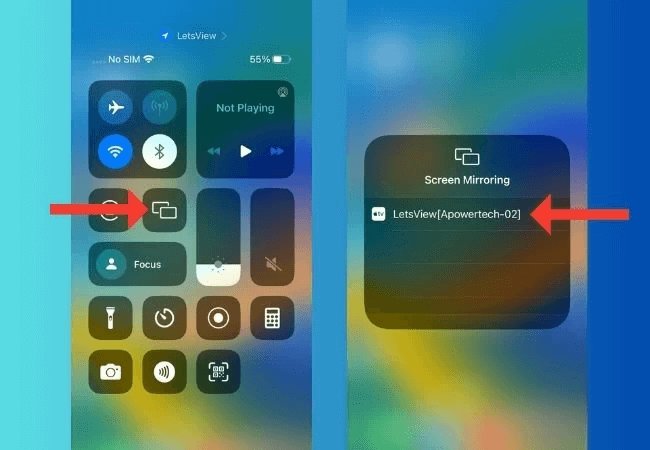
Step 6. Access the Control Center on your iPhone, tap "Screen Mirroring," select your PC from the list, and your iPhone screen will be mirrored on your PC.
Option 3. LonelyScreen
LonelyScreen is a screen mirroring application that enables users to display and record the screen of their iOS devices, such as iPhones and iPads, on a Windows or Mac computer. It uses Apple's AirPlay technology to create a wireless connection between the iOS device and the computer.
Pros:
- Wireless Connection: The application uses AirPlay technology for wireless screen mirroring, eliminating the need for physical cables.
- Recording Capability: Users can record the mirrored content, making it suitable for creating tutorials, capturing gameplay, or sharing demonstrations.
- Multiple Device Support: LonelyScreen supports the simultaneous mirroring of multiple iOS devices to the same computer.
- Customization Options: Users can customize the mirrored screen by adjusting settings, providing flexibility in how the content is displayed.
Cons:
- Performance Issues: Some users have reported issues with inconsistent performance, occasional lag, or disruptions during screen mirroring sessions.
- Limited Mirroring Content: Certain types of content, such as protected videos, may not be mirrored due to restrictions imposed by iOS.
- Dependency on Stable Network: The quality of the mirroring experience is dependent on a stable Wi-Fi network, and issues may arise with slower or unstable connections.
- Free Version Limitations: While LonelyScreen offers a free version, some advanced features may be restricted, and users might need to upgrade to a paid version for additional functionalities.
- Limited to iOS Devices: LonelyScreen is designed specifically for mirroring iOS devices and may not support other platforms.
- Ad Presence: The free version of LonelyScreen may include advertisements, impacting the user experience.
Step 1. Obtain the LonelyScreen software by downloading it from the official website.
Step 2. Execute the installation process, and after completion, double-click the software's icon to initiate the LonelyScreen application.
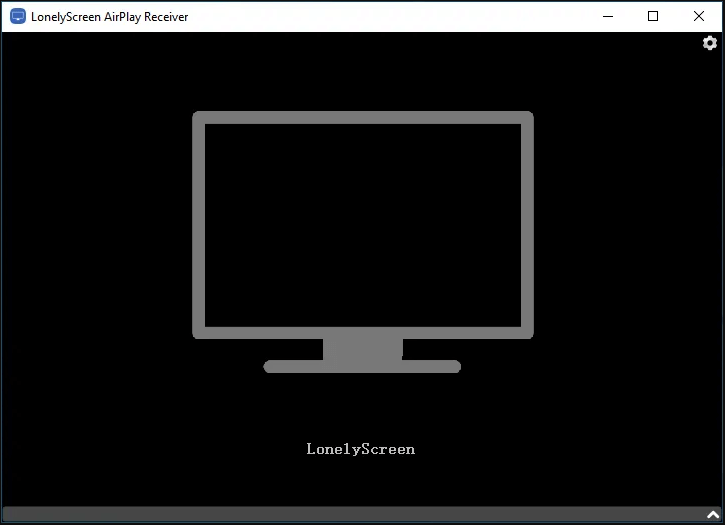
Step 3. Open the Control Center on your iPhone, select "Screen Mirroring," and ensure that your iPhone and Windows PC are connected to the same Wi-Fi network.
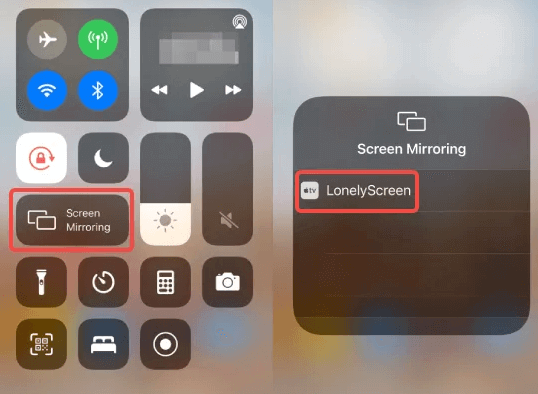
Step 4. Choose "LonelyScreen," and your iPhone screen will be mirrored on your Windows PC in no time.

Option 4. TeamViewer QuickSupport
TeamViewer stands as a widely acknowledged remote desktop software, offering the TeamViewer QuickSupport app tailored for iOS users. This app allows individuals to install it on their iPhones, facilitating screen sharing capabilities with computers and various devices. It's imperative to emphasize that the primary function of this app is real-time viewing of the iPhone screen, rather than remote control of iOS devices.
Pros:
- No Installation Required for Users: QuickSupport does not require installation on the user's device; it can be run as a standalone application, making it convenient for one-time support sessions.
- File Transfer: Users can transfer files between the connected devices during a remote support session.
- Chat and Communication: TeamViewer QuickSupport includes a chat feature, allowing communication between the support technician and the user during the remote session.
- Customizable Branding: For businesses, the application allows for customizable branding, providing a more professional appearance during support sessions.
Cons:
- Free Version Limitations: While TeamViewer offers a free version for personal use, commercial users are required to purchase a license. Certain advanced features may have limitations in the free version.
- Security Concerns (if Misused): As with any remote access tool, there are potential security risks if the tool is misused. Users should only share access details with trusted support personnel or organizations.
- Complexity for Non-Technical Users: Users who are not familiar with remote support tools may find the process of downloading and running QuickSupport somewhat complex.
- Dependency on TeamViewer Servers: TeamViewer sessions rely on TeamViewer servers to establish and facilitate connections. Issues with the servers may impact the ability to initiate or maintain remote support sessions.
- Pricing for Commercial Use: Businesses or organizations using TeamViewer for commercial purposes need to purchase a license, and the pricing structure may be a consideration.
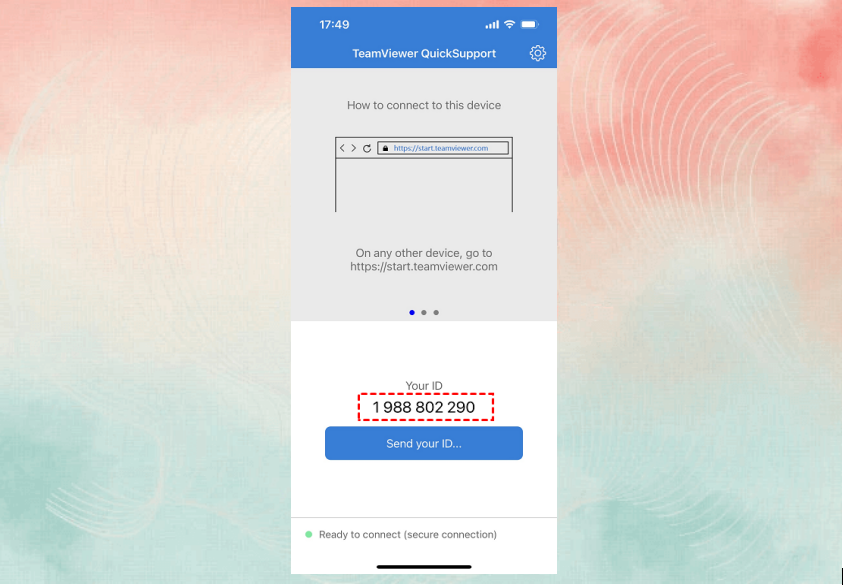
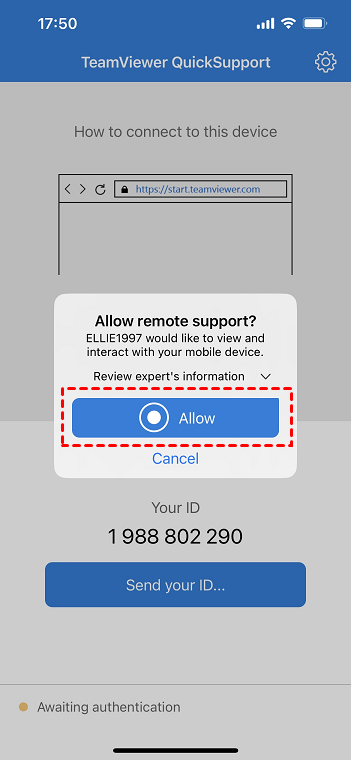
Step 1. Download and install TeamViewer QuickSupport on both your iPhone and another device. Upon launching the app, you'll find your unique ID displayed.
Step 2. On the controlling device, open TeamViewer, input your iPhone's ID, and click "Connect."
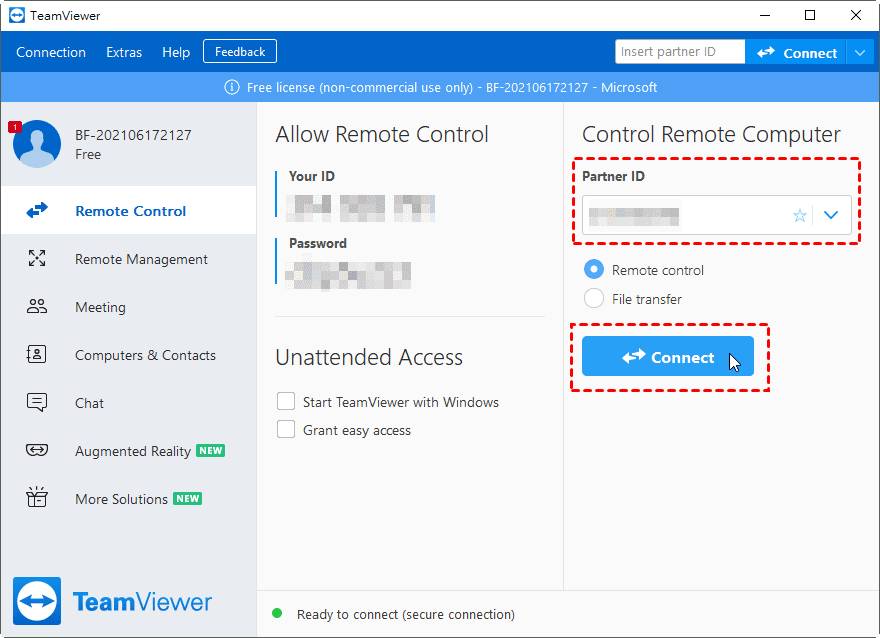
Step 3. Your iPhone will show a connection request; tap "Allow" to grant access. You can now see what's on your iPhone from a distance.
Option 5. AnyMirror
AnyMirror can replicate not only your phone's screen but also its camera, microphone, and files to your computer. Mirroring your iPhone screen to a Windows PC is effortless, requiring just a few simple clicks and no technical expertise. AnyMirror is a standout solution for reproducing the iPhone screen seamlessly.
Pros:
- Recording Capability: Provides screen recording functionality, ideal for tutorial creation, gameplay capture, and preserving important information.
- Multiple Device Support: Allows simultaneous connections of multiple devices to a single PC.
- Cross-Platform Compatibility: Offers compatibility across various platforms.
Cons:
- Free Version Limitations: The free version offers access to fundamental features, and acquiring a VIP account comes with a relatively high cost.
- Free version time limit: The free version of AnyMirror allows only 20 minutes of daily usage and supports a single mirror source.
- Free version image quality limitations: The free version of AnyMirror includes a watermark on the mirrored screen and is limited to SD quality.
- Unstable connection: At times, it may face challenges in detecting smartphones, requiring multiple attempts.
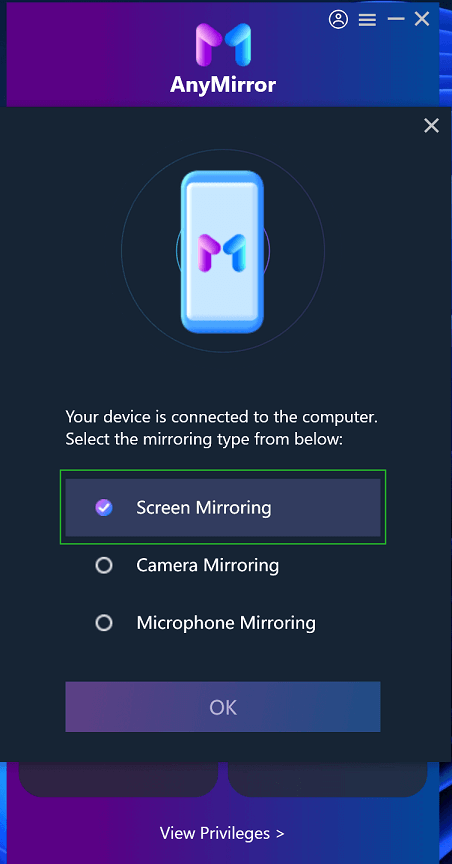
Step 1. Install AnyMirror on both your iPhone and computer.
Step 2. To connect your iPhone to your PC, use a USB cord. On your computer, select Screen Mirroring and confirm by clicking "OK."
Step 3. On your iPhone, activate Screen Mirroring, choose USB as the connection method, click the Start button, and then tap “Start Broadcast”.
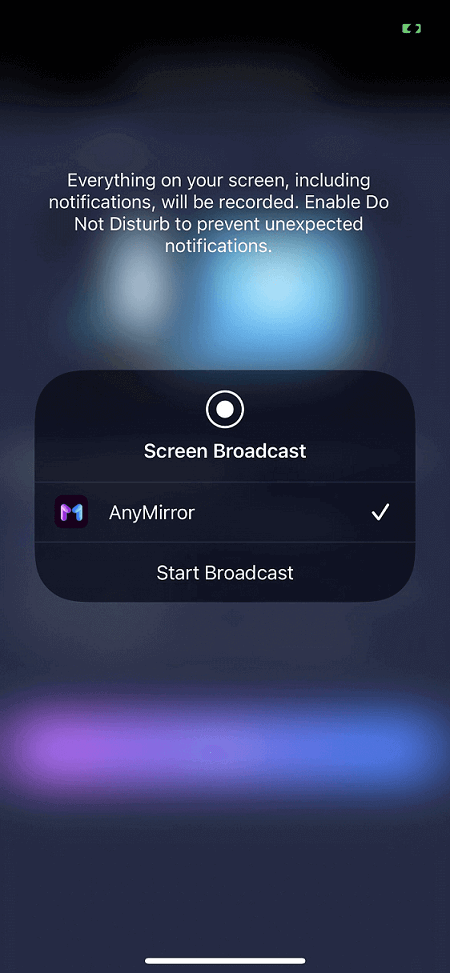
Step 4. Your iPhone screen is now mirrored to your PC via USB, allowing you to seamlessly share your device's display.
Option 6. Zoom
Zoom is a widely used video conferencing and communication platform that facilitates online meetings, webinars, and virtual collaboration. It gained significant popularity, particularly in the context of remote work and virtual communication. It provides an array of features, encompassing top-notch audio and video calls, screen sharing, and chat functions. Hosts in meetings can assign screen-sharing privileges to themselves or other participants.
Pros:
- User-Friendly Interface: Zoom is recognized for its intuitive and user-friendly design.
- Cross-Platform Compatibility: Supports multiple platforms, including Windows, macOS, iOS, Android, and web browsers.
- Free Version: Offers a free version with basic features for smaller meetings.
Cons:
- Security Concerns: Zoom faced security and privacy concerns in the past, although the company has implemented measures to address them.
- Meeting Time Limits (Free Version): The free version has a 40-minute time limit on group meetings.
- Resource Intensive: Video conferencing may require significant bandwidth and system resources.
Step 1. To start, open the Zoom app on your iPhone. After logging into your Zoom account, go to the main menu and choose "New Meeting".
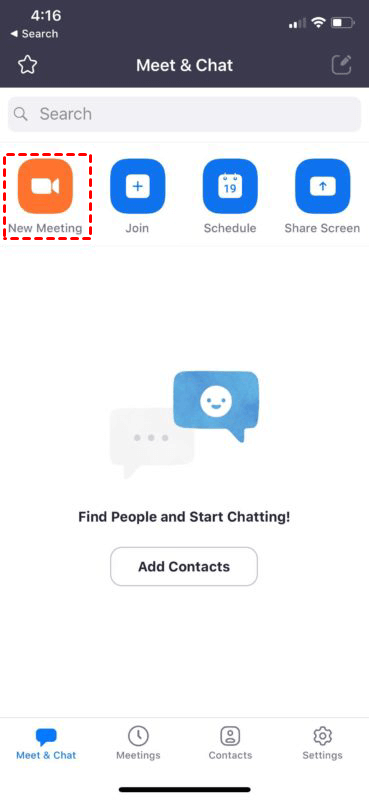
Step 2. Ensure that the "Use Personal Meeting ID" toggle is enabled in the "New Meeting" settings, and then tap "Start a Meeting" to initiate the meeting.

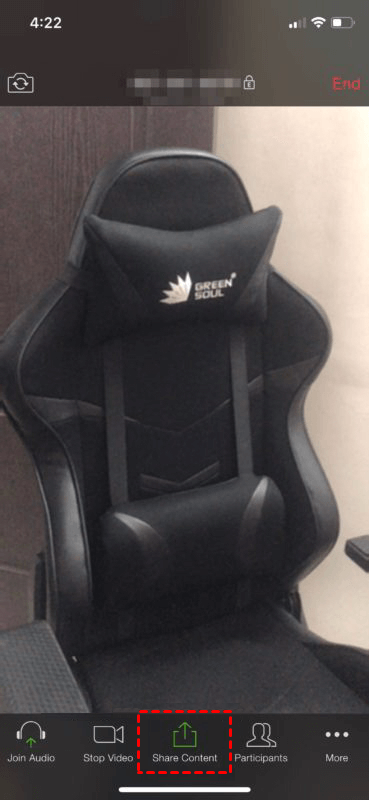
Step 3. By initiating this action, you'll commence the Zoom conference and activate the camera on your iPhone or iPad. To start screen sharing, just tap "Share Content," conveniently located at the bottom of your screen.
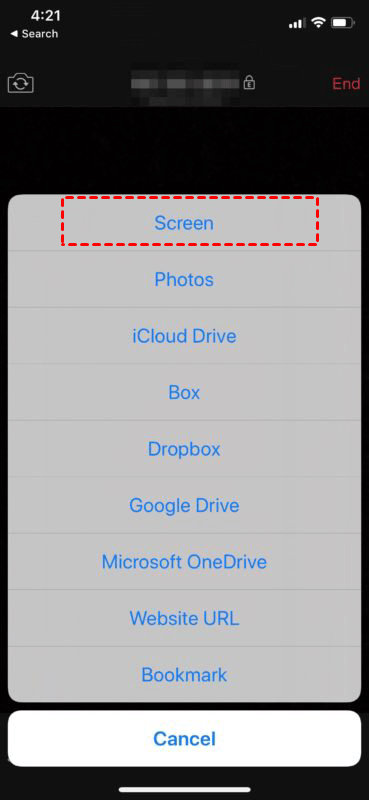
Step 4. Shift your attention to the primary selection, "Screen," as illustrated in the accompanying screenshot, and proceed by tapping on it.
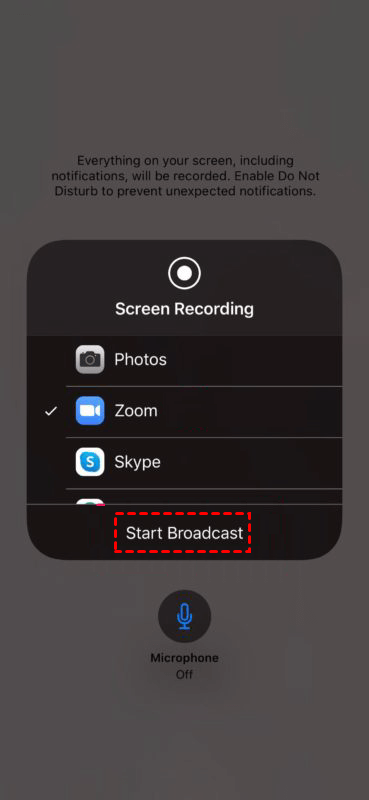
Step 5. Ensure that "Zoom" is selected, and then initiate screen sharing by tapping "Start Broadcast." If needed, you can effortlessly control your microphone's status with the nearby toggle.
Option 7. ApowerMirror
ApowerMirror offers an effective solution for effortlessly mirroring your iPhone screen on your PC. With advanced mirroring technology, it ensures a superior mirroring experience. What sets ApowerMirror apart is its ability to support both wired and wireless connections, providing users with diverse options for screen casting and enhancing overall versatility in the mirroring process.
Pros:
- Cross-Platform Compatibility: ApowerMirror supports both Android and iOS devices, providing a wide range of compatibility for users.
- Wireless Screen Mirroring: Users can mirror their device screens to a computer or TV wirelessly, eliminating the need for physical cables.
- Screen Recording: ApowerMirror allows users to record the mirrored screen, enabling the creation of tutorials, gameplay recordings, and presentations.
Cons:
- Free Version Limitations: The free version of ApowerMirror may have limitations, and users might need to upgrade to a paid version to access advanced features or remove watermarks from recordings.
- Internet Dependency: For wireless screen mirroring, a stable internet connection is required. Issues may arise with slower or unstable connections.
- Audio Quality: Some users have reported issues with audio quality during screen mirroring sessions.
- Connection Issues: Users may experience occasional connectivity issues or difficulties establishing and maintaining a connection between devices.
- Popup Ads in Free Version: The free version may include popup ads, which can affect the user experience.
Step 1. Download and install ApowerMirror on both your iPhone and computer.
Step 2. Make sure the PC and iPhone are linked to the same wireless network.
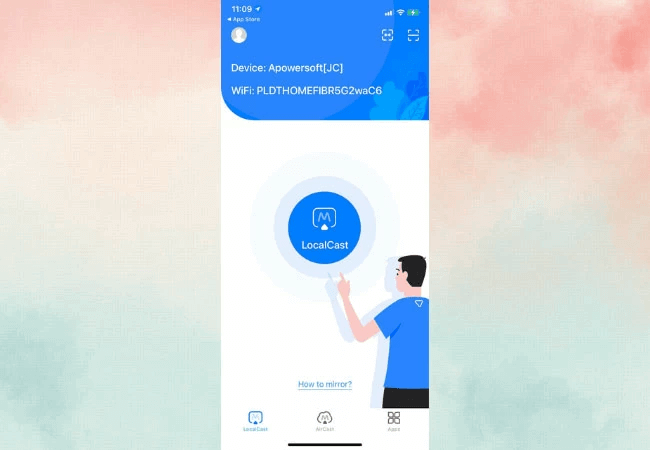
Step 3. Launch the ApowerMirror app on your iPhone. Select "LocalCast," find your computer's name, choose it, and click "Mirror Phone to PC."
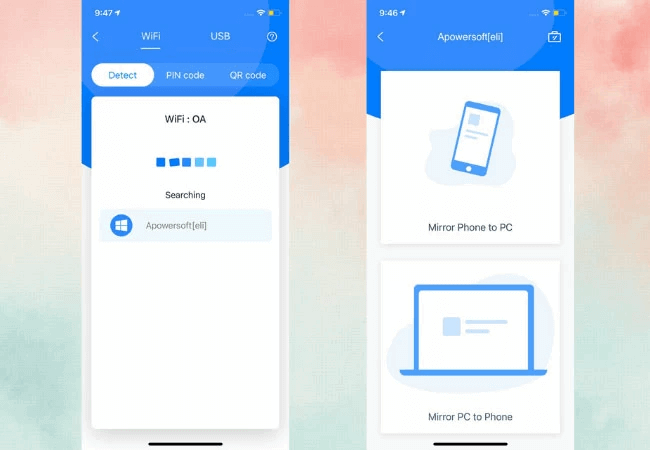
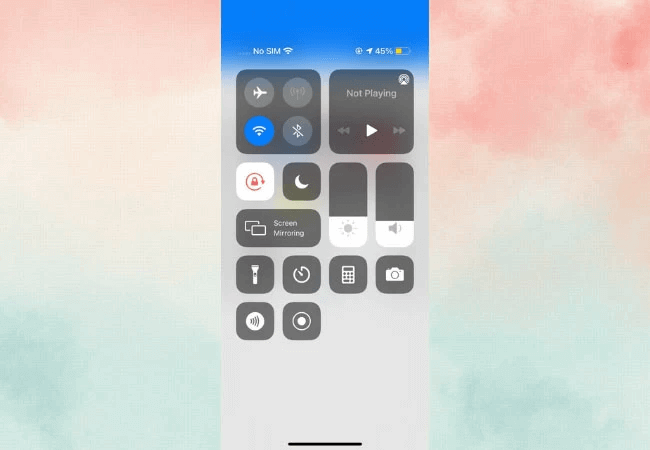
Step 4. On your iPhone, open the Control Center, tap "AirPlay Mirroring" or "Screen Mirroring," and select your computer's name.
Step 5. Your iPhone screen will now be smoothly mirrored on your PC.
Option 8. X-Mirage
X-Mirage is a leading AirPlay server compatible with both Windows and Mac PCs, offering seamless mirroring of iOS devices onto a larger screen. Beyond simple display, it empowers users to effortlessly record onscreen activities with just a single click.
Pros:
- Wireless Screen Mirroring: X-Mirage allows users to mirror the screens of iOS devices (iPhone, iPad) to a computer wirelessly.
- Recording and Streaming: Users can record the mirrored screen or stream content from iOS devices to the computer.
- Multiple Device Support: Users can connect and mirror multiple iOS devices simultaneously, making it suitable for presentations or collaborative work.
Cons:
- iOS Restrictions: Due to Apple's restrictions, certain features may be limited when mirroring an iOS device to a computer.
- Limited Compatibility: X-Mirage is primarily designed for mirroring iOS devices, and compatibility with other platforms may be limited.
- Audio Quality: Some users have reported issues with audio quality during screen mirroring sessions.
- Free Version Limitations: The free version of X-Mirage may have limitations, and users might need to upgrade to a paid version to access advanced features or remove watermarks from recordings.
- Popup Ads in Free Version: The free version may include popup ads, impacting the user experience.
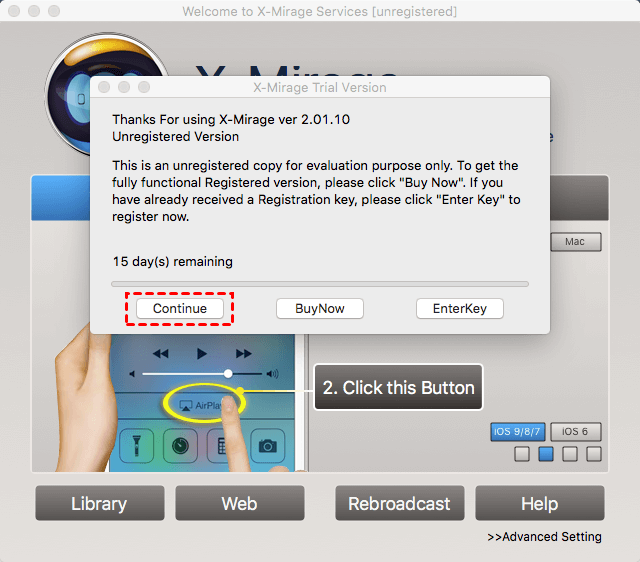
Step 1. On your computer, download, install, and start X-Mirage. If you're opting for the trial version, click "Continue."
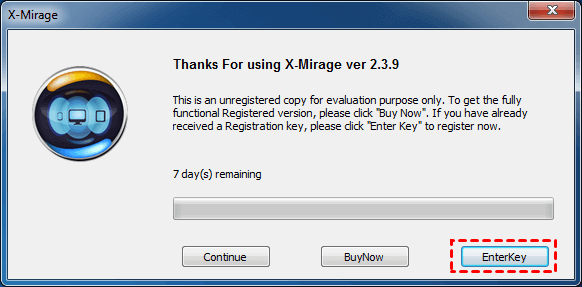
Step 2. Register by clicking "EnterKey."
Step 3. In the Settings tab, configure various AirPlay settings like display size, AirPlay name, and password.
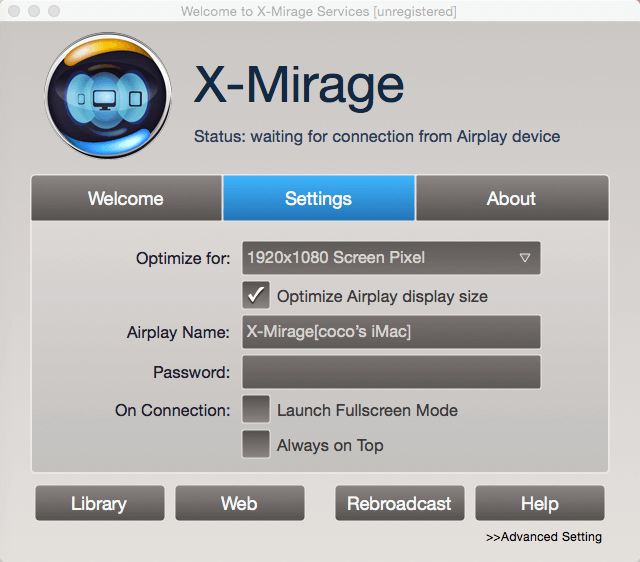
Step 4. Ensure both your Mac/PC and iOS devices are on the same Wi-Fi network.
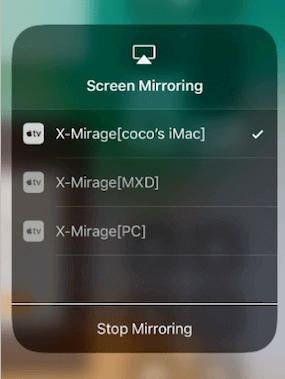
Step 5. On your iPhone, open the Control Panel, click "Screen Mirroring," and select the computer's name for connection.
Conclusion
Exploring Reflector free alternative? This article introduces 8 options, including LetsViewer, AnyMirror, and more. Upon careful comparison, AnyViewer emerges as the sole software offering comprehensive functions with free access. Opting for AnyViewer simplifies connecting your iPhone to your computer, ensuring a fast and smooth user experience.
AnyViewer provides free plans for personal and commercial use, featuring a wide range of adaptable features and permissions. Compatible with iOS, Android, and Windows, AnyViewer stands out as the preferred choice for the best free iPhone screen mirroring application.
